Hey! This site is reader-supported and we earn commissions if you purchase products from retailers after clicking on a link from our site.
As with any component in an RV, over time they eventually become worn, cracked, faded, stained or simply outdated and your RV’s bathroom is no exception to that rule. In fact, in most cases it’s one of the most trafficked areas of your rig and subject to a lot of wear and tear.
When I bought my 5th wheel, it was 18 years old. It had less than five miles of travel time on the road because the people I bought it from lived in it full-time less than two miles away from the dealership they purchased from. They took care very good care of it by replacing the furnace when it needed that, skirting it in nicely to protect the undercarriage and the tires, as well as replacing the carpet in the living area and slide-outs, which caused some issues for me that were humorous but easily fixable when I had to deal with them.
In this DIY guide, I’ll share some of my thoughts about tackling projects in your RV bathroom and whether you should do a complete renovation at one time, or whether you should replace your restrooms components individually. We’ll also examine the pros and cons of both of those options and which decision will work for you when upgrading or repairing your RV’s bathroom.
Inspecting and Evaluating your RV’s Bathroom
If you bought your RV new several years ago, or you purchased a used model RV to begin a camping adventure, there’s a good chance that your rig’s bathroom has become outdated and worn out. Unless you’re buying a very high dollar RV and ordering it new from the manufacturer, there’s a good chance that you’re going to be dealing with low-end components that were installed on your RV to save the manufacturer money and maximize their profitability.
With that said, you really need to evaluate your bathroom before you begin to replace its components. When it comes to making repairs on my RV, I tend to be a perfectionist. In other words, I’m not going to replace my toilet or sink in my bathroom with out inspecting my shower and the bathroom cabinetry nor am I going to replace my shower without evaluating my toilet or sink. Frankly, there’s a good chance that if your toilet, sink, or shower and tub basin need to be replaced because of age and wear, they probably all need to be replaced at the same time.
To be honest with you, this is exactly what I recommend. Yes, you can replace the shower pan this summer, but do you really want to reposition piping or flooring next year when the toilet or sink needs upgrading or replaced? I’m hoping your answer was no because it’s probably in your best interest to remodel your bathroom at one time as opposed to spreading it out into multiple tasks.
Remove the toilet first
Whenever you’re taking on a large remodeling project such as replacing your shower basin and its walls within your RV’s bathroom, I recommend removing the toilet first. Why? Because it opens more area to freely remove those components as well as when replacing them.
If you’re planning on remodeling your RV’s bathroom, I would absolutely upgrade the inexpensive plastic model toilet that the manufacturer likely installed, to a ceramic toilet made for an aftermarket installation. I don’t care how much some of these manufacturers of plastic molded toilets claim that their model is superior to their competitors, they will never be superior to a toilet made of ceramic material.
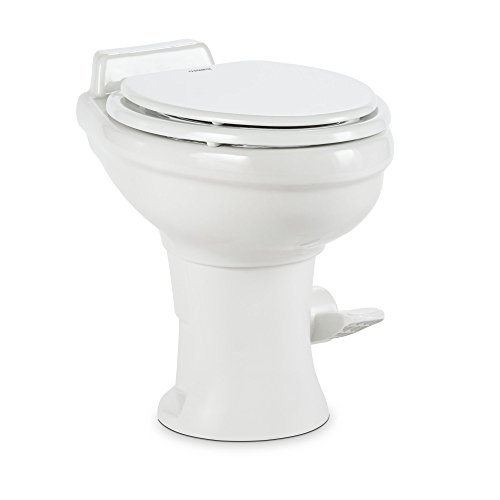
- High-gloss ceramic construction
- Stain and scratch proof for long-lasting durability
- Elongated bowl
Last update on 2024-07-12 / Affiliate links / Images from Amazon Product Advertising API
While a plastic toilet may weigh less than a ceramic bowl, they age far differently. As a rule, plastic toilet bowls deteriorate quickly when exposed to corrosive cleaning agents, excrement, and even ultraviolet light. Their color fades, and in some cases the texture of the plastic design deteriorates making the plastic toilet bowl unsightly and unusable. With that said, I highly recommend upgrading your RV’s toilet to a ceramic model.
Disconnect your water supply
Before you begin any work in your bathroom, always remember to shut off your water supply and the water pump. Now that you have done that, replacing the toilet is remarkably simple.
First, disconnect your water supply. As with any toilet, you’ll need to loosen and remove the hold down nuts that secures it to the floor. Once you have done this, it should easily pull up from the floor. Next remove the brass bolts (these should easily slide out of the floor flange) and replace them with the new hardware that should be included with the new toilet.
Inspect your floor flange
Now inspect your floor flange, in most cases it’s unlikely it will need to be replaced, but if it does, be sure to install the new flange with a minimum of four screws.
To do this task, I like to use wood glue and wooden kitchen matches. Simply remove the match tip, spread the glue on the matchstick, then use a small hammer to tap it into the hole. Repeat as necessary until the filler wood is good and tight in the screw holes. In fact, sometimes I even use toothpicks around the matchsticks just to get more wood into the holes.
Since it’s unlikely that your filler wood will need to be inserted as deep their length, tap them in as far as they will go, then cut them off with a utility or wire nips so they are flush with the flooring. Also, it’s not necessary to wait for the glue to dry. In fact, I recommend installing the floor flange as soon as you have filled the holes when the glue is still wet as this will add more strength to the fixture. However, remember to never over tighten your screws as this will damage the flange.
Placing the new toilet
If you’ve replaced your floor flange or have determined that the one currently installed doesn’t need replacing, the next step is to place the rubber toilet seal into the base of the new toilet. This part is also included with the new toilet and it fits snuggly into place. Next, place your toilet over the two T-bolts that holds it securely into the floor flange and tighten the nuts on the bolts. Remember to do this alternatively between both bolts to avoid over torqueing one side of your toilet and unseating the toilet seal or worse, cracking the housing of your new toilet.
Now that you secured your new toilet into the floor flange and are confident that it’s seated correctly, reconnect the water supply. Next, turn on the water supply and look for any leaks. If you find no leaks in the water connection line, the next step is to fill and flush the toilets several times. If there are no leaks at the base of your toilet during this step…you’ve successfully installed your new toilet.
Have a plan in mind before you begin to replace your shower
Having a plan in mind before you begin any RV renovation project is always a good idea. However, don’t be surprised if those plans change as you progress toward the end goal. For example, I once helped a friend replace his RV shower and he was determined that all he was going to do was replace the basin because it was cracked.
When I told him how difficult I thought that would be, he was a bit argumentative and convinced that removing and saving the shower walls would be more advantageous in terms of cost. He quickly found out that this was more trouble than what any cost savings made it worth.
Why? Because the walls of your RV shower can be extremely difficult to remove without removing other parts of your RV’s bathroom. As I have said in other articles, when RV manufacturers build your rig, they typically work from the outside into the interior. In other words, they install the prefabricated fiberglass shower before they frame the inner walls that secure it in place as well as the outer wall framing.
With that said, it’s likely that you’re going to have trouble removing some components of your RV’s original shower without first removing parts of the outer and inner walls. Frankly, I recommend planning a complete redesign of your RV’s shower and plan it accordingly.
Forget about conserving old faucets or other plumbing fixtures. Take a pass on trying to repurpose old fiberglass shower walls and work on your own design. You’ll be happy you did.
Installing your new shower walls and shower pan
While some RVs have a bathtub installed by the manufacturer, it’s unlikely that you’ll find one of those when purchasing a used RV. As a rule, most RVs are equipped with a shower area with lining walls and a drain pan. Replacing or upgrading these components can be complicated but having a good understanding of how your RV’s plumbing fixtures match up to your new design is essential when replacing your shower.
As with any repair or remodel project that involves plumbing, the first thing you need to do is shut off your water supply and the water pump. Next, locate your access panel for the plumbing fixtures. Remove the panel and disconnect the water supply lines. Some lines you might be able to loosen by hand, but it’s best to have a pair of channel locks on hand if they don’t easily turn.
Start from the top and work your way down
Aside from accessing your RV’s shower/bath panel first to disconnect the water supply, I highly recommend that you dismantle your shower from the top down. In other words, remove the shower curtain rod and any hardware associated with it or any hardware associated with a shower door if your unit has that. Remove the faucet and knobs and any moldings that may be holding your shower unit in place.
Be sure to examine how your shower/bath assembly is constructed. Is it a one-piece solid unit or does it have a basin with added walls? How is it attached to the framework of your RV? Is it attached to the framework with screws, clips or adhesive? These are just a few questions you should ask before you plan a bathroom remodel that includes replacing your shower.
With that said, I highly recommend replacing all the components of your shower at one time. While I love to recycle, repurpose or conserve aspects of any project, it’s highly likely that you will damage the walls of the shower enclosure when you remove them, especially if it’s a fiberglass molded unit designed to be installed in one piece while the supporting walls are built around it which makes it almost impossible to remove through the doorway.
My design when replacing a shower/bath pan, walls and hardware
Frankly, forget about saving the shower walls. You’re not going to be able to remove them without cracking or breaking them into pieces, especially if they were installed from the outside in. Instead, remove any screws or pins holding them in place and pull the unit out. If the walls tear apart, so be it.
Next, choose some modern plumbing fixtures. This is extremely important if you’re doing a restoration. While I like a restoration to look authentic, I also prefer to upgrade an RV. The same can be said for electronics and wiring. Any time I have a wall or undercarriage open, I work upgrades into the plan, and you should too. When you’re doing a restoration, there’s nothing wrong with wanting to keep it cosmetically authentic, but you should always consider upgrading aspects like plumbing and especially electrical components that wear out over time and travel.
Once you have removed the shower walls, the pan should lift out with little resistance. However, you may encounter a few fasteners that keep the pan in place so be sure to check any of those as well.
Finding the right shower pan
RV shower pans come in various styles, so it’s important that you try to get your old pan out of your shower enclosure intact. This makes it much easier to purchase a new pan because you can match the dimensions and the locations of the plumbing fixtures.
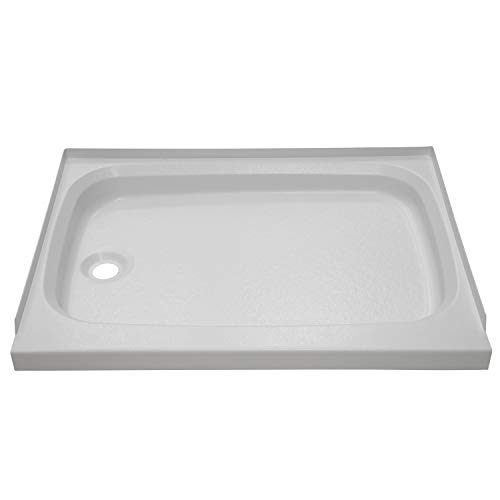
- Greater toughness than coated fiberglass
- ABS presents a viable and paint replacement alternative
- Thermoformed ABS sheet weighs 20-25percent less than fiberglass molded parts, reducing overall...
Last update on 2024-07-12 / Affiliate links / Images from Amazon Product Advertising API
It’s not unusual to find that your old shower pan’s dimensions vary from newer models or that your model shower pan is no longer being manufactured. In some cases, you may find that your old pan varies by its depth. If this is the case, you may have to add or remove some of the framework beneath the pan. In most cases when you are replacing a shower pan, it’s more likely that you’ll have to raise your pan and this is easily fixed by adding some underlayment such as a piece of ¾” plywood cut to fit under your pan. However, the main thing to keep in mind when replacing your shower pan, is to match the drain into your current plumbing configuration if you can. This can cause some serious issues if you can’t find a pan that will match your RV’s plumbing/piping design and could also result in having to redesign some of that plumbing design.
The shower walls
While you can purchase entire RV shower enclosures as replacements, these can be hard to fit into your restoration if you haven’t planned on how to bring the replacement pre-fab enclosure through doorway openings that usually are smaller than the door to your bathroom or the entrance to your RV.
Therefore, I recommend using vinyl flooring for your walls during a restoration of your shower. Most RV showers have one wall that’s secured to an outside wall of your RV, and in most cases the manufacturer attached the original shower enclosure to that wall without installing insulation or an underlayment behind the shower casing. If this is the case in your restoration, fill the void between the outer skin with foam panel insulation and seal it off with 1/5” plywood underlayment paneling that the vinyl shower panel can be easily affixed using the correct adhesive.
Home Depot is a great source for vinyl RV shower walls because you can purchase it from a roll. In fact, they will custom cut your sheet of vinyl based upon your requirements. For example, most rolls of vinyl flooring are 12 feet wide, so if your shower is three feet by three feet, that means you’ll need a piece of vinyl that is at least 9 feet in length to cover three walls in your shower enclosure. Of course, you’ll need to do some trimming because you’re not going to need a piece of vinyl that’s 12 feet in height, in fact, you’ll probably need half of that, but it really depends on the distance from the top of your pan to your ceiling.
Remember to go all the way up to the ceiling
I have seen manufacturers and people that remodel or restore an RV not install shower panels completely to the ceiling of their bathroom. In my opinion this is not a good idea and here’s why – water is almost certain to get behind those walls and over time it will surely cause damage to your walls, flooring and even electrical outlets.
With that said, once you have chosen the vinyl you want to install, measure from the top of your shower pan to the ceiling. As you can see from the photo of the shower pan, there is a small lip on three sides of the pan, this is used to secure the unit in place with screws, so don’t measure the distance to the ceiling from the top of the lip as you will be covering this part of the pan with your vinyl.
Applying your new shower walls
Once you have established the height of the vinyl, lay it out flat with the pattern side up and using a utility knife trim off the excess vinyl. Be sure to leave an extra inch that you will be trimming off after the vinyl is secured to the shower walls. Next, measure each wall of your shower and add these numbers together. This will give you the length of the sheet of vinyl. Cut the vinyl just as you did for the ceiling making sure to leave a little extra on each end. Now you’re ready to install the vinyl.
Using a large putty knife, apply a thin layer of the adhesive to your walls and the lip of your shower pan. Now lift the vinyl in place and spread it out over your walls. Now you’ll need to get any air bubbles out that may be between the vinyl and the walls. For this step, you’ll need rolling pin. Simply roll the pin over the vinyl until you have a smooth surface over most of the vinyl.
At this point, carefully trim the excess vinyl from along the top and the end of the sheet. Since the pin won’t completely push out the air near the ceiling, use your fingertips in this area. You’ll also notice that the pin won’t completely push sparely into the corners of your shower walls. This is normal and you don’t want to force your vinyl into the corners as it will crack. However, you can leave this small radius and it will give your shower walls a nice rounded appearance in each corner.
Once you have done this, and you’re sure the adhesive is secure, carefully trim the vinyl from around your water supply lines openings and make sure that you have a good seal there too. At this time, I would give the vinyl plenty of time to adhere to the walls or underlayment to adhere to those surfaces.
Next, you’re ready for the hardware. Attach the hardware accordingly and seal the shower pan and the walls with a nice bead of caulk. If you need a new shower head, read Mike’s guide on the best RV shower heads. He also has a guide on outdoor RV showers if you’re working with a much smaller space.
Final thoughts
Thanks for following along folks. In a future article, I’ll focus on some amazing upgrades for your RV’s kitchen as well as your bathroom sink and their faucets. As always, my friends, I hope to see you out on the road sometime. Stay safe, stay healthy and as always, I wish you nothing but safe travels and happiness.