Hey! This site is reader-supported and we earn commissions if you purchase products from retailers after clicking on a link from our site.
Have you ever taken your RV out for a short stay at a favorite campsite and noticed that your water tasted or smelled differently? If so, there’s a good chance that your water system needs to be sanitized and flushed out. This is quite common for those folks that only use their RV occasionally throughout the summer months and typically store them most of the time. However, even the full-time RV should still sanitize their water system from time-to-time to flush out any mineral deposits or unwanted bacteria. In this tutorial, I’ll share some of my experiences sanitizing my RV and some tips I use to make it easier.
Drain your water system
First, you will need to drain your system of any water. If you are at a site where you have a constant supply to water and sewer, you can simply disconnect your water supply and drain your system by turning on your RV water pump and opening all of the faucets in your system. This should purge most of your water out of your freshwater system and it will help to clean your gray and black water tanks as well. For this step, you should keep the discharge valves open for those systems until you have fully drained your RV of all of its liquid waste.
However, if you’re in an area where you can’t discharge your gray and black tanks, I highly recommend that you empty those tanks prior to pumping out your fresh water. In fact, it would be a good idea to manually drain your fresh water tank to avoid any over flow to your sewage tanks. You should also drain your water heater by removing the anode rod. For this task, you will need a 1 and 1/16 socket wrench and some Teflon tape.
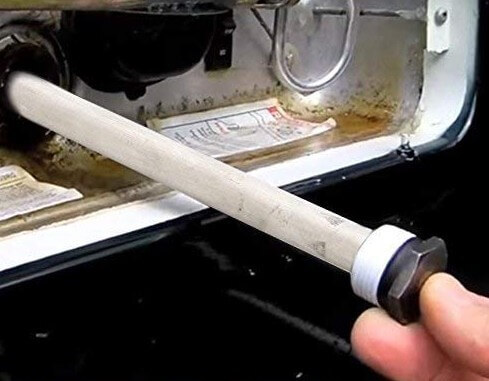
In a previous column, I explained what an anode rod is and why you should remove it from your water heater when draining your water system. The same principles apply to this task as well. After you drain the water heater, you should inspect the rod; if it has too much corrosion then you should replace it. You will need to tape the threaded end with the Teflon tape before installing a new rod or the one you are reinstalling.
Now we’re ready to sanitize your water system
For this step you will need to refill your freshwater system with chlorinated water so you will need a gallon of non-gel unscented bleach on hand. It’s also important to note that sanitizing your water system is not a quick process and you will need to let the sanitizer sit in the system for at least four hours though I recommend more time than that.
Once you have turned off all of your faucets and closed your freshwater drain valve, you will be ready to start filling your system with freshwater. You will need to fill your freshwater tank about half full and stop the flow of water for the next step which is adding the bleach. I also recommend removing any water filters before you begin the sanitation process or you will have to replace them before you refill your system with drinkable water.
Since you should never introduce pure bleach into your system due to its corrosive qualities, I use a different method of adding the bleach than using a hose and funnel and pouring the bleach directly into your RVs water intake line, which some folks recommend.
You may remember in a previous article about using five gallon buckets for storage and as tools, and this next step is a good example of using a bucket for both.
The rule of thumb when adding bleach to sanitize your system is to add two cups of bleach for every 100 gallons of water. Because my RV has a 40 gallon tank, a six gallon water heater and water lines which add a more water I use one cup of bleach to sanitize my system.
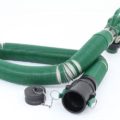
Next, I fill up my bucket with water while adding one cup of bleach. Once I have completed that, I like to use my small water pump to pump the water from the bucket into my RVs water intake just as would normally. Most pumps will come with a small hose for intake, but you will most likely have to purchase a short hose to run from your pump to your RV. I recommend a piece from 4-6 ft. in length for this task (example pictured below).

- Heavy-duty bronze plated pump housing for durability. The noise level is 74dBA at 3 feet distance
- Portable pump for household and utility applications ; 120 Volt Metal Transfer Pump
- Removes water down to 1/8-inch of surface when water suction attachment is connected
Last update on 2025-07-01 / Affiliate links / Images from Amazon Product Advertising API
After you have pumped in the sanitizer, resume filling your water supply as you would normally. Once your tank is full, turn off the supply line to the RV and go inside and turn on the faucets one at a time until you can smell the bleach. Don’t forget the shower, toilet, and outdoor shower if you have one of those.
Flushing your system
As I said before, this is a long process in terms of time, so you will need to wait at least four hours before you flush the system and refill it with water. Personally, I prefer to wait longer than the recommended minimum time frame and I will sometimes even do this step overnight.
That said, the next step is to drain your system the same way as you did when you started this process. However, you can skip removing the anode from the water heater this time around. Once you drain the sanitized solution out of your RV, you refill your freshwater again. You may have to do this a couple of times to completely remove the taste or smell of chlorine, but if the problem persists, you can dilute ¼ cup of baking soda with a quart of water and use a short hose and funnel to introduce this to your water supply and then flush again. After you’re satisfied with the taste, reinstall your water filters if you use them.
If you are moving from one campground to another and the drive is several hours away, you can do this task by sanitizing your system before you leave for the next location. This way, when you reach your destination, you have waited the required time and are now ready to flush your system and refill it with freshwater. Part-timers that only use their RV for short excursions can even do this before they head home so they can sanitize their system before they go someplace else.
So there you have it folks, safe travels and we hope to see out on the highways.
Related reading: