Hey! This site is reader-supported and we earn commissions if you purchase products from retailers after clicking on a link from our site.
One or two lofts? Bath or shower? Living room or dinning room? Working from home and need an office space? Full size kitchen or just the basics? Options. Options. Options. Designing a floor plan in a small space means countless ideas to shuffle around and decisions on what plans stay and what is thrown out the window. Undertaking the creative process and embracing the complete freedom to design your own home may be as exciting as it sounds, but with so many options and decisions it can become a bit overwhelming. So let’s break it down.
First, researching various tiny home layouts can give you a sense of various uses of space. My tiny home floor plan was based on inspiration from multiple tiny homes. First step: your floor plan and design should align with your lifestyle. What are your daily activities and how do you spend your time? Create a list of what is required in your life and in your current home to function. Prioritize what is most important in your space then match this to the space, items and storage you will need in your home. Some of these will be more specific than others. For example, I love cooking and baking, so a simple, small kitchen with only the basic amenities did not match my lifestyle. Instead, I opted for a larger kitchen space and multiple appliances to suit my daily life and passion for food and cooking. Evidently, if cooking is not your forte, then consider a much smaller kitchen and allocate the saved space to maximize your main living area or to create another room. Every square foot can be tailored to you.
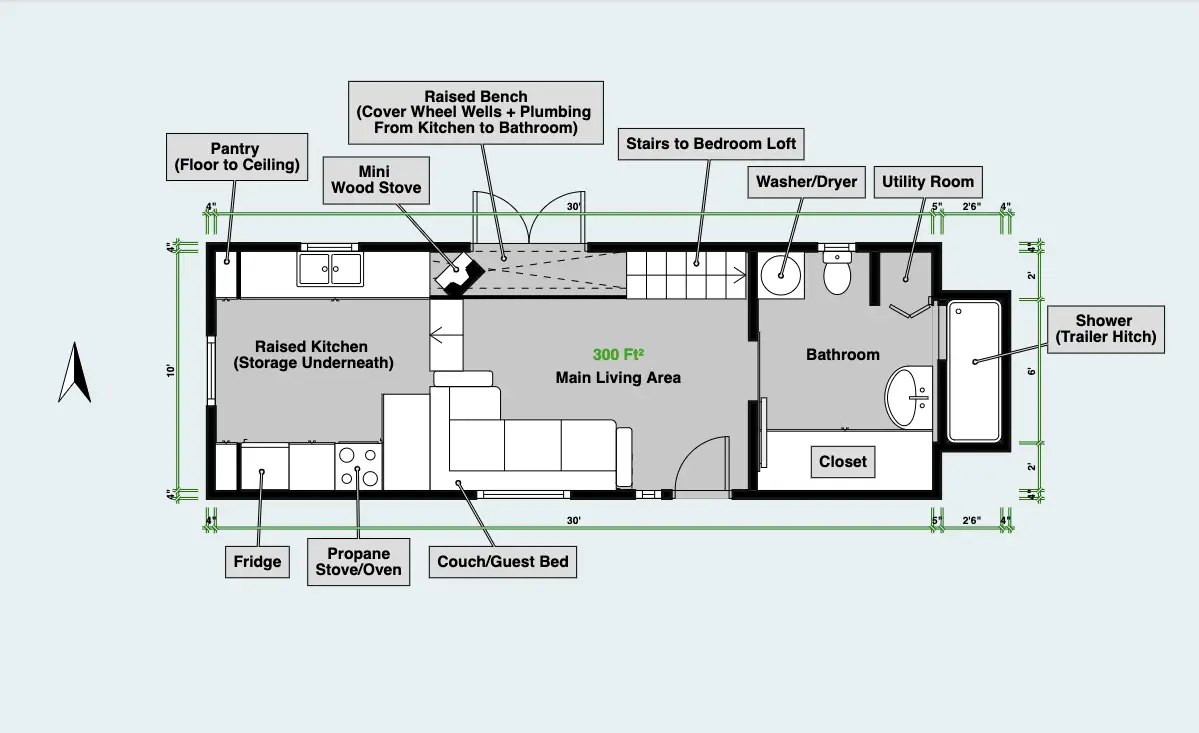
My floor plan:
For my layout, I wanted to focus on these 4 areas:
- Open Floor Plan + Definition of Space
- Windows: Light + Bright
- Functionality
- Simplicity + Character
Open Floor Plan + Definition of Space
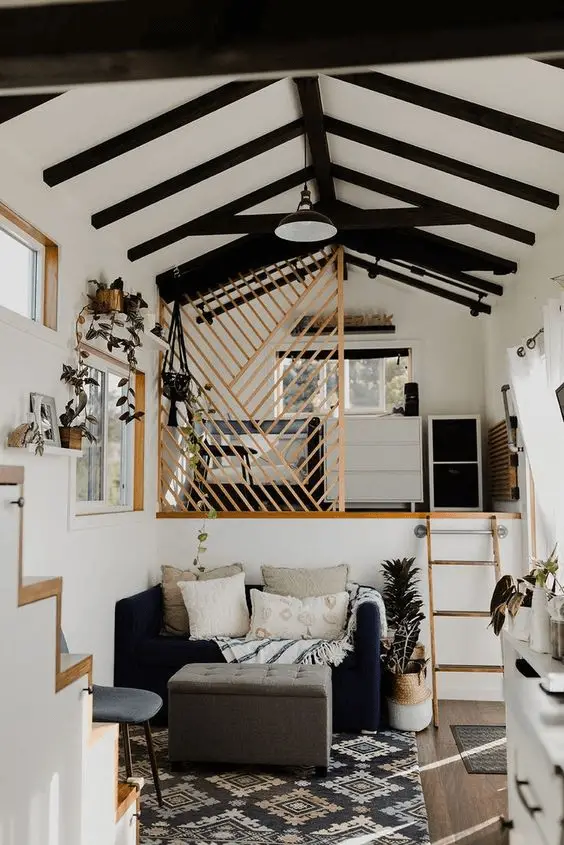
Creating an open floor plan in a small space can seem simple on the outside. No walls, one space – done! Unfortunately, not that simple. First, like any tiny home build, maximizing ceiling height becomes your first challenge. Designing a space with high ceilings can add to the illusion of a much larger open space and a definite sense of grandeur. Placing the main front door in the main living area where the ceilings are the highest, strategically gives you the sense of a much larger space than what you would anticipate when first entering a “tiny home”. In my design, I added exposed exposed beams that were both structural but also allured to a much grandeur space and contrast to the white walls. High ceilings = open concept. Check.
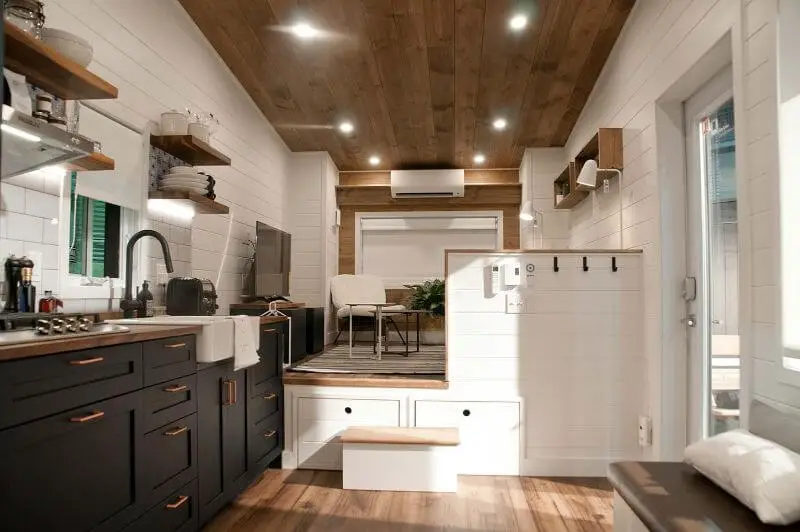
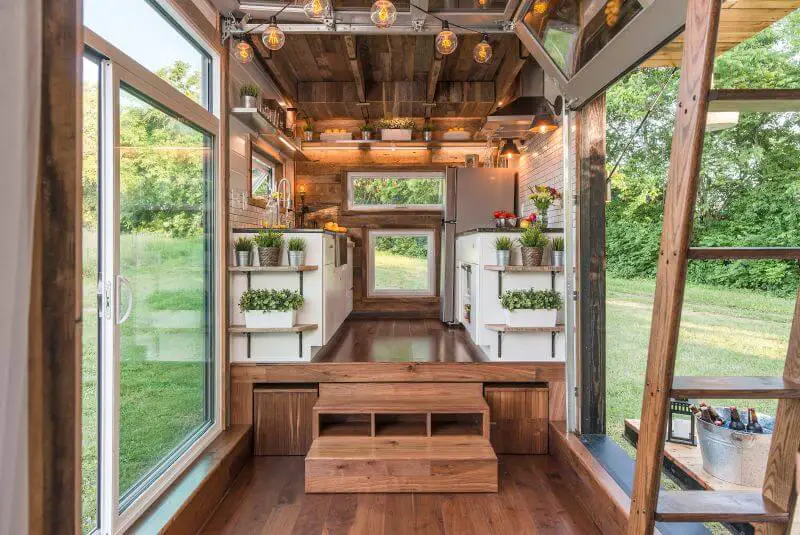
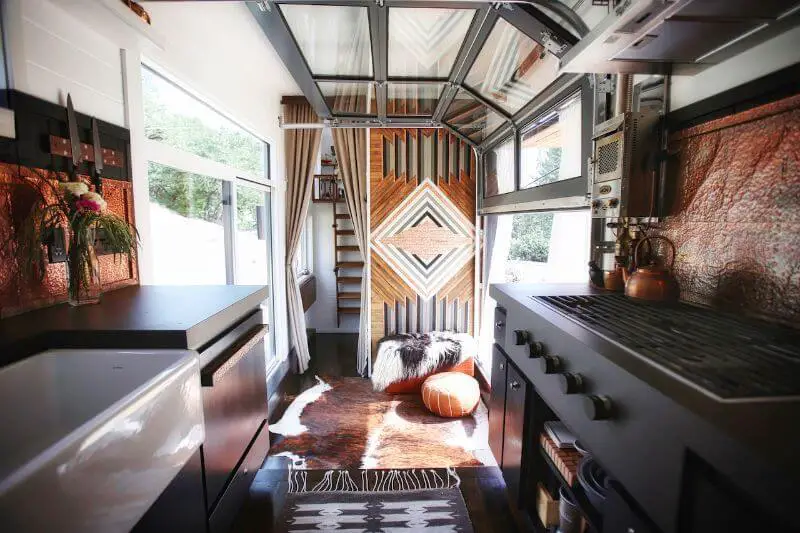
Once I began adding elements to each room, I noticed another issue with open concept: my tiny home started to feel like one big studio apartment with zero separation between rooms. I wanted more definition of each space in order to create separate living areas but still encompass an open floor plan. Closing in each space with walls would only make each space seem smaller instead of giving the illusion of a much larger space. Instead, I created a 16 inch raised kitchen stepping up from the main living area. Designing a galley style kitchen still allowed for an open space overlooking the main living area with a continuous walkthrough from the kitchen to the living area. Raising the kitchen created a definition of separate space while still allowing an open overflow from the kitchen to the living area (+ gaining…STORAGE!).
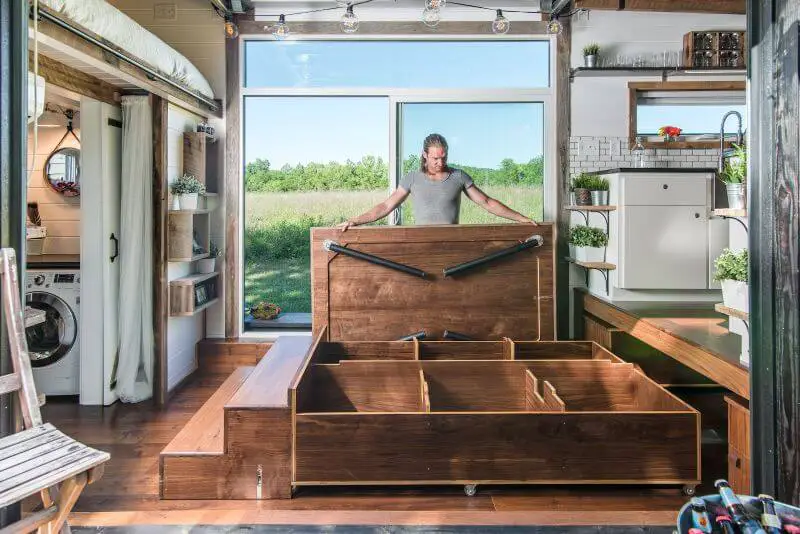
Most tiny home designs will incorporate two lofts on either end of the trailer with a large open space in the middle. Since my priority was an open floor plan, I knew adding an additional loft would give the sense of a more closed off space. Here are some tips on transforming your loft. By not adding an additional loft, it meant gaining an open concept, but also losing storage space above. Even though this created a high ceiling, I knew I could play around with the idea of a raised kitchen area in order to find some extra storage space below. The storage area below allowed for options to hide plumbing, water tanks, additional kitchen storage accessed through hatch doors, slide out benches, and a formal table storage. This suited my need for an open floor plan, high ceilings, plus additional storage. This is why it is important to know your needs and lifestyle beforehand so you can play around with the design of your floor plan.
Windows: Light & Bright
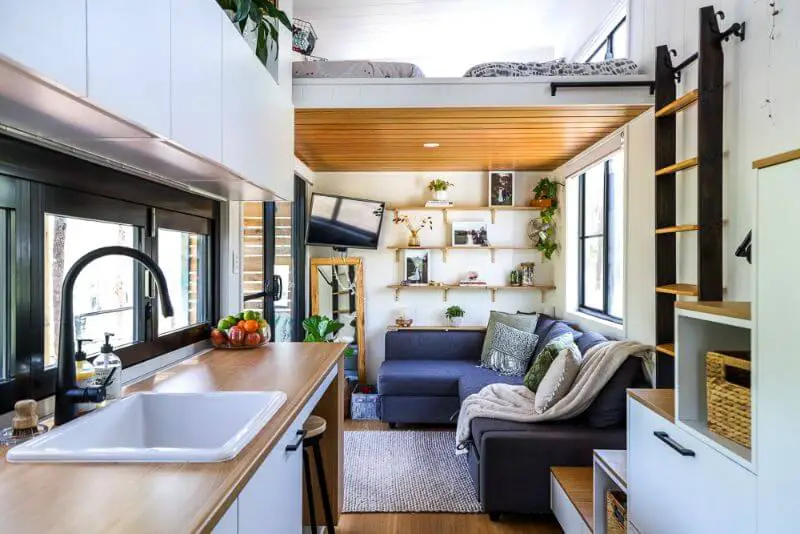
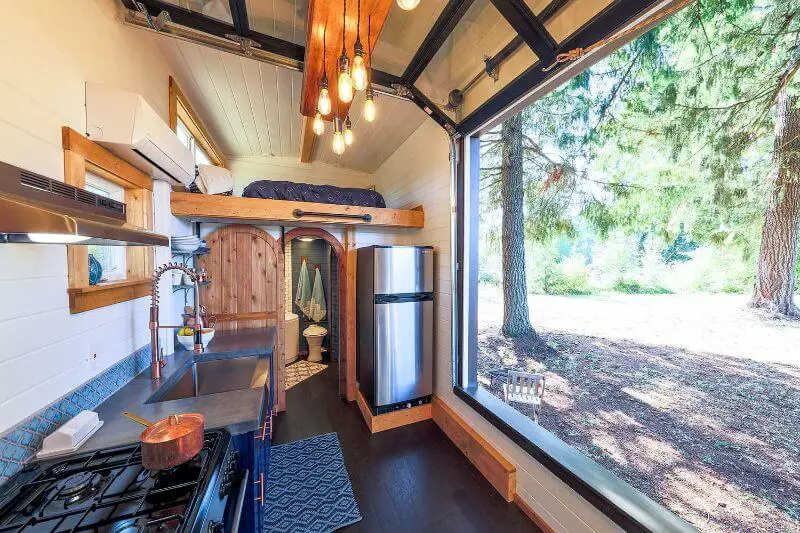
In order to create a space bigger and brighter, windows, windows, and more windows will do the trick. Large picture windows allow a space to feel like you’re bringing the outdoors inside. Although large windows and french doors may eliminate wall space for storage or art, think of the view you’re gaining as your newest piece to your art collection. It will serve as a dual function to make your space feel larger than the walls around you and give you the picture perfect view. I chose not to have any window panes, which would create a large glass viewing area with no obstructions. Adding skylights serve as a great way to bring more natural light in, but do your research before installing any skylight window. A leaky skylight will cost your wallet more than what you bargained for when you’re tearing off your roof to fix any repairs. When deciding placement of windows, try to place your main windows and door on the south side of your home. Once you decide which wall is south facing, start planning out from there. North windows do not provide much light and the north facing wall is the coldest wall in your home (especially if you plan to live in a cold climate like Canada!).
Budget Tip: Decide which windows you need to open and which could be fixed/non-operating windows. Opting for some fixed windows can reduce your budget to a fraction of the costs of buying all operating windows.
Functionality
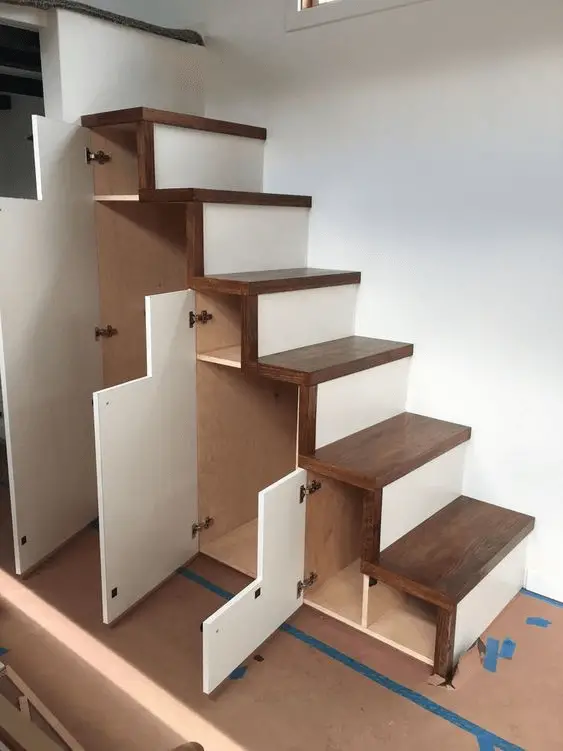
When designing each space, functionality was always top of mind. Not only did my space need to encompass my design style, but it always needed a functional aspect. Each space was designed with a practical and functional mindset – every piece of furniture needed to have a dual purpose. A raised kitchen allowed for storage, but also hiding plumbing and water tanks. Choosing stairs over a ladder took up more space, but allowed for more storage and unique seating/extended bench for the living area. Not only is my couch designed as a custom L-shape, but it includes storage and a pull-out guest bed option – triple purpose! Winner! The layout of the bathroom needed to reflect that its function was not simply a bathroom, but storage closet for clothing and linens, washing machine/dryer, utility room, and electrical panel. A lot of “behind the scenes” functionality in a bathroom! Remember that your space can both reflect your desired style, but also serve as a functional space where you will live, work, play, and ultimately reflect your daily lifestyle.
Plumbing serves as a main function to your tiny home (unless your plan is a simple counter top water jug system). Plumbing has to be considered when designing your floor plan as it can be a bit more tricky to hide plumbing in a tiny home. Typically, plumbing should be installed on interior walls and not run in any exterior walls due to the high chance of pipes freezing during winter. Additionally, keeping all plumbing systems in one area can make your life a lot easier in the long run. Of course, this may not always fall into your design plan.
My floor plan has the kitchen and bathroom on opposite ends of the trailer. That means I have to run all the plumbing from the kitchen to the bathroom where I decided to place the output for grey water. Deciding where your water output and input is located in your tiny home will help you when designing your floor plan and how to hide water pipes. I needed my kitchen sink and dishwasher to drain all the way to the bathroom, but needed to run the pipes on the interior of the wall. On the north wall there is a bench that would not only cover the wheel wells, but also serve as a seating bench leading into the stairs and could be used to run the water pipes from the kitchen to the bathroom. This way, the pipes run along the interior of the tiny home where it would be insulated. This eliminates the potential of freezing as it would have been an issue if the pipes were hidden and placed in the exterior north wall. Problem solved while serving multi-functional purposes.
Simplicity + Character
Keep it simple. One of my deciding factors to live in a tiny home was to embrace a simpler lifestyle and have this reflected in my layout and design. Keeping a simple and minimalist design flow does not mean compromising on character. My house encompasses the simple essentials to a home due to the fact that I only had a specific amount of square footage to work with, but also includes unique features, character, storage space, and multi-purpose furniture. Designing character and charm into your home can come from paint colors, art, storage design, color, or wood accents and even highlighting some of your unique possessions.
The choice to move into a tiny home also means understanding your relationship to possessions. In simple terms: get rid of your “stuff”. Reducing your possessions can be a walk in the park if you understand what possessions bring purpose and what brings clutter and ultimately a negative impact on your daily life. It can also be a challenging task as we live in materialist culture obsessed with consumerism and the need to buy more to have more, and to buy over and over again. Reducing your possessions can lead to a simpler design process as you will have less worry of where you will put all your “stuff”. Focus on some feature items to showcase in unique open storage or shelves or bookcases.
Base your design and floor plan on your lifestyle. Simple and neutral or bright and vibrant? Not everyone likes to cook so maybe a smaller kitchen would be sufficient. Are you an entertainer? Create an open, large main living area. Want a guest room? Create two lofts. Not everyone plans to host guests on a regular basis, so eliminate the secondary loft to create higher ceilings. Here is a list of questions I had to consider when designing my layout – and some you may not realize are important!
- Doors: swing inwards, outwards or sliding?
- Kitchen: trash and recycling bins – where will they be stored? Full-height pantry cupboards?
- Clothes stored in the loft or in the bathroom?
- Where will you eat? Kitchen table or couch?
- Office space needed? Fold-away desk?
- Utility space: designate an area for water utilities, water tanks, plumbing, and electrical?
- Television? No television = extra wall space or find hideaway television storage.
- Placement of windows – if your location for your home is set, design primary windows on the south facing wall.
- Will you need a washing machine? Place in the kitchen or bathroom?
- Does your bathroom need to be as big as your storage or bedroom loft above?
- Loft bedroom or main floor bedroom? If a sleeping loft isn’t your cup of tea, there are some great designs out there of tiny homes with main floor bedrooms!
- Do you plan for an expanding family? Does the space reflect where you are now in your life or is there possibilities for it to grow with you over time?
At the end of the day, designing your floor plan is one of the most exciting parts of planning out your future tiny home. You can be as creative, simple, or technical as you want when it comes to designing each area and aspect to your tiny home. Don’t know where to start? Remember your goal: your home should facilitate and align with your lifestyle. Just get out your pen and paper and start sketching out what you envision as your dream tiny home.
Tips and Tricks
- Research: There are plenty of free simple blueprints floating around on the internet to use as a starting point. This was my starting point and the first tiny house I found online and on YouTube, built by Gabriella and Andrew Morrison: tinyhouseplans.com
- Needs vs. Wants: Consider writing down a list of what you need in your space versus what you want. Designing a layout based solely on what you need will allow you to realize how to condense your layout then add in any extras.
- Designs are Messy: Don’t worry if your plans seem to be all over the place. This will take time, energy, and patience before finding the right fit for your own unique tiny home layout.
- No Need to Reinvent the Wheel: It’s okay to find a layout from a tiny home you’ve seen online or in a book or you can buy the plans online. If it works for you then that’s all that matters!
- Map It Out: Once you have a solid layout for your tiny home, map it out to scale with tape on the ground to get a sense of the space when you start to add furniture. Walk around and see where adjustments need to be made.
- Speak to Experts: Don’t be afraid to speak to an expert once you have a solid design layout. They can offer you suggestions you may not have considered in your planning process and point out areas you’ve forgotten!
- Plumbing: consider your plumbing in your layout. Talk to a plumber to ensure the placement of your kitchen and bathroom will function with your plumbing layout. Having a kitchen and bathroom on opposite ends of the trailer (my design) is more complicated to run plumbing than putting all your utilities and plumbing on one end of the trailer.
- Resale Value: Understand your tiny home plan – if this is a temporary living situation, retirement, or forever home? Sometimes keeping a more simple, multi-functional plan instead of being ultra-specific to your needs will add value if you plan to resale to future buyers who can put their own personal touch in the space.
Check out here what can prevent the value of your tiny house from going up.

