Hey! This site is reader-supported and we earn commissions if you purchase products from retailers after clicking on a link from our site.
It not unusual for many people to purchase an RV without a factory installed awning already on the rig. Some people don’t want the added expense and others don’t want to deal with putting it out and taking in while they travel between destinations and during periods of inclement weather. Also, some folks have seasonal campsites in shady areas and they simply don’t see a need for them.
Another thing many people consider when choosing to have an awning installed when they order their new RV, is how to keep the awning properly maintained. While these tasks do take some time, if you understand the best ways to clean and maintain your RV’s awning or outdoor window shades, you’ll find that the cost of maintaining the awning is minimal compared to the enjoyment you’re likely to benefit from if you do have an awning installed on your RV.
With that said, when I’m staying at conventional campgrounds and especially when I’m boondocking, I love to sit under my awning during a good rainstorm provided the winds are not too excessive. For me, it’s very comforting and it’s a part of being a full time RVer, just as it should be for a part time RVer or the weekend warriors. Enjoying where you’re at is what it’s all about and in this article, we’ll look at installing an awning on your recently purchased RV whether you bought it new or previously owned.
Understanding your RVs dimensions and where best to install your awning
There are factors to consider when installing a post market awning on your RV and the biggest one to consider is its location. As a rule, your awning should cover your main entrance door on one end and then flow left or right for several feet depending upon your RV design. For example, some RVs have an entrance into a forward area of your rig for living and kitchen spaces, while other models from other manufacturers have that configuration completely reversed. Understanding your RV, its dimensions and its design are always the first step when installing a custom awning.
While my current RV that I purchased previously owned came with a factory installed awning, I have installed awnings to other RVs I have owned, restored or worked on for others over the years and I believe my insight is beneficial to those folks looking to install a custom awning on their RV. That said, the next step you should understand is the various types of awnings that are available and which type will work for you.
Types of RV awnings
Fixed awnings
This type of awning is permanently attached to your RV and cannot be retracted or adjusted during your travels or at your stays. Generally, people that have these installed on their RV plan to keep the rig in place most of the time.
It’s also important to note that fixed awnings work best for windows and provide little shade needed when you’re trying to keep your RV cool during hot spells while camping. Additionally. They act as “sails” on your camper or motorhome because they collect air and create drag. When this happens as your driving down the road, it creates a lot of pressure on the hardware that secures into the RVs framework and quite often that hardware or framework will fail.
Frankly, I would never have this type of awning installed on my RV. In my opinion, this type of awning is not suitable for those that travel as much as I do and when you’re traveling on some plains in Wyoming, Nebraska, Kansas or Montana during high winds, it’s likely that a fixed awning would fail and then you’d be paying for that damage as well as looking for a solution to the problem at hand while being hundreds of miles away from someone that can fix the issue.
Slide or pull-out awnings
These are the most common awnings installed on factory manufactured RVs and frankly they are likely to be the most compatible for the average RVer. As a rule, most of them have a spring in the awning storage housing tube to make it easily retract and a gear locking pin that will keep it from retracting while they’re extended.
These types of manual awnings are ideal for most RVers and they would be the type I would install on any RV that I owned or was restoring with modern upgrades. They are easily installed around individual windows and even longer awnings that create a shaded patio area around your entrance.
This type of awning would be my choice for an after-market installation and it always has been. Mechanically, it’s a basic design proven by centuries of use that requires little to no regular maintenance. However, it’s likely that once the canvas or acrylic awning material has been stowed away into its protective housing, it will still hold moisture so it’s important that it’s cleaned regularly to avoid any mildew or moisture buildup.
Automatic awnings
Many people swear by this system because its electric and controlled by a handheld remote device. However, I wouldn’t install this type of awning on my RV even if I had the money to do so. While they work well for the weekend warrior camper and even some seasonal RVers, they just don’t work for a full time RVer. Frankly, they’re another point of maintenance that contradicts the theory of living off the grid and traveling down the road.
Patio awnings
This type of awning is typically attached to your RV using a pull-out awning or automatic awning design. Once extended, it has additional walls that deploy to create an enclosed area such as a patio that you might find at a traditional sticks-and-bricks home. While this type of design is certainly enjoyable, it does require some added work to properly deploy and stow it away while traveling between sites. Frankly, I’d gladly take a pass on this type of awning and you probably should too.
Selecting the proper awning for your RV
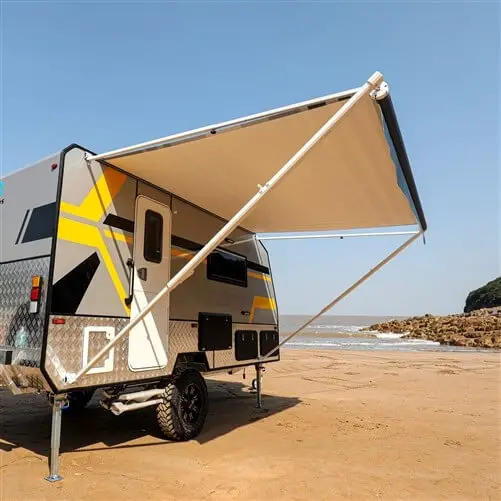
Once you have decided where to locate your awning, you’ll need to decide your preference when considering its structural design and where it can be securely attached to the framework of your RV. The most popular configuration for RV awnings is the top and bottom mounted two-strut design shown above and available from Aleko®, a family owned business that specializes in providing quality products such as tools and other accessories for your RV and even traditional homes since 2005.
The biggest advantage to installing this type of mechanical awning is that you’ll always have a sturdy and solid framework to anchor your awning arms onto your RV. Because the brackets for the awning supports will almost always align with the framework on your rigs top and bottom inner-wall framework, this is probably the mechanical design you should choose and it’s certainly the one I most often recommend for the do-it-yourselfer.
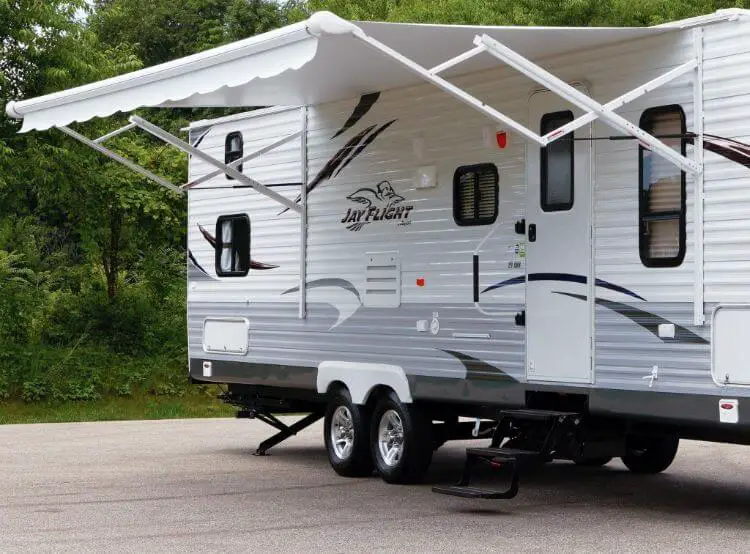
However, some people prefer to use this type of awning that when deployed, uses a scissor frame configuration attached to the struts. While both awnings would look great on any RV, keep in mind that this type of model may be harder to install that the first type.
Why is the scissor support type of awning more difficult to install?
Since the support struts do not attach to your RV’s flooring framework as most traditional styles do, you’re going to need to locate the studwork within your wall to properly secure it to your RV. To not do this, could cause damage to your RV and the awning when you have it deployed and when you’re driving down the highway.
For example, when your awning is fully extended while camping, one good gust of wind could easily pull your lower mount hardware away from your rig if those anchors are not properly attached to your rig. Even when driving, this type of awning can fail if not properly attached into your RV studwork because the lower strut hardware needs to be secured into the framework of your RV.
To do otherwise, would mean that the lower hardware on your awning struts will probably loosen over time and travels. While driving, its’s likely that any base hardware that’s not properly attached to the RV framework will fail and pull loose from any anchor point that’s also not fully secured into you RV’s wooden framework.
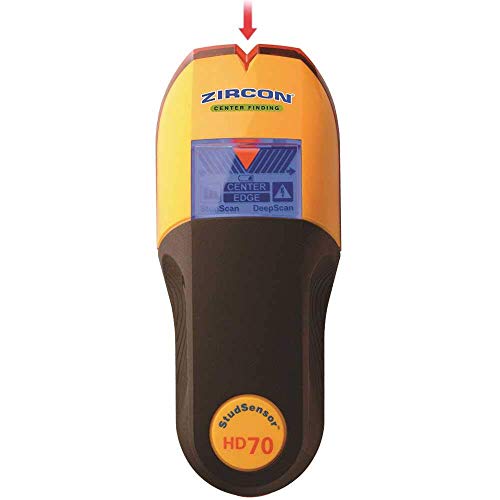
- This refurbished product is tested and certified to look and work like new. The refurbishing process...
Last update on 2025-06-22 / Affiliate links / Images from Amazon Product Advertising API
I highly recommend that you add a stud finder into your list of essential tools for the full-time RVer that I covered when I first started writing here. In fact, I should probably rewrite aspects of that article so that I can share other tools that I recommend such as this cordless saw and drill set made by Ryobi® and readily available at Home Depot.
Now that we have decided upon the tools needed to begin our awning installation. It’s time to attach it to our rig. By now, you should have decided on its location and where best to anchor it to your rig so as to avoid the support struts interfering with compartment doors freely opening as well as your windows and doors.
Installing your new after-market RV awning
First, you should understand that this is a difficult task to do by yourself, so you should try to recruit one or two helpers and have them on hand to help you lift the awning in place and hold it there while you secure it to the RV. With that said, once you have measured your RV and carefully decided where to locate your new awning so its support struts won’t interfere or obstruct the access doors for storage compartments, exhaust ports or crank out windows, you’re ready to install the awning rail.
For this step you’ll need a ladder. I recommend this folding ladder available from Amazon because it works well for these types of projects and it stows away nicely in your RV when it’s not needed. In fact, it’s my preferred choice of ladder when I do projects such as these and I use it often. With any luck, your helper will have a ladder that matches yours or at least one that will work nicely for this task.
When you purchase a new RV awning for a first-time installation and DIY project on your rig, it’s likely that it will be new and come with all the necessary hardware for its proper installation. With that in mind, I’m not going to get too detailed on some of the aspects such as the hardware needed for this installation as that has probably been supplied to you when you purchased the awning.
Just keep in mind, it’s especially important that you follow the manufacturers recommended directions when installing your awning and securing it to your RV. To do otherwise, could result in damages to your rig and your awning.
Step one: Install your RV awning rail
This task is one of the most important steps when installing an RV awning for the first time. Basically, the awning rail is a piece of metal hardware that is secured to your RV by bolts or screws and it has a groove or pocket in its design that allows for another piece of hardware on your awning to slide through and secure it to your RV and still allow the natural elements such as rainwater, small amounts of snowfall or even hail to drain properly in the small amount of space between your rig and the your awning housing container.
Now that you have installed the rail, you and your friends will need to carefully walk that anchor pin through the rail making sure that it is securely within the channel of the rail.
Step two: Attach the upper hardware and lower hardware of your awning to the RV
At this point, you should attach the hardware that’s needed to secure your awning to the RV and once you have done this, attach the adjustable struts to the awning base casing. Once you have done this, pull the awning completely out and examine this configuration to see if it will work for you. If it does, you’ll need to follow the directions supplied by the manufacturer to adjust the proper tension for your awning and its struts.
Some people like to have their base struts unattached to their rig, but I totally disagree with this design. A good stiff wind can pull your awnings struts away from their ground anchors and your awning will be in the wind, pulled away from your rig and permanently damaged. The better call would be to install the bottom strut and support hardware and keep it installed more tightly to your rig.
Another advantage to this installation is that it makes it much easier to properly drain the RV awning fabric when it’s extended. It also lowers the amount of stress on the awning’s strut supports as they are closer to the RV and less likely to fail with added weight.
Step three: Treat your helpers to dinner
Now that you’ve installed your new awning, pull your BBQ grill out, roast a good steak, pork chop, or chicken and share some cold beers or drinks with the friends that helped you install your new awning. That’s my best advice.
Final thoughts
In another article, we’ll walk through how to install an awning replacement.
If you’re working on your awning area, be sure to check out these recommendations for the best RV awnings, best RV awning lights, and best RV slide toppers as well.
As always, my friends, happy travels, and I can’t wait to have a BBQ with you on the road.