Hey! This site is reader-supported and we earn commissions if you purchase products from retailers after clicking on a link from our site.
Finally the build begins!
Time to bring out the tool belts, hammer, nails, drills, screws and every fancy tool in the shed!

The subfloor was the start of the build when the trailer was turned over to me. This is where you can decide on insulation. You will start to notice that like in most builds, most construction decisions are based on your climate. Remember my build is based in Ontario, Canada with summers reaching +30 degrees celsius and winters dropping to -30 degrees celsius! This means a high R-Value insulation is NO JOKE!
Let’s start with the basics: R-Value is the measure (or rating) of resistance to heat flow through a certain thickness of material. Higher R-Value = higher retention to heat therefore higher rate of keeping heat or cold in your home. Lower R-Value = lower retention to heat therefore lower rate of keeping heat or cold in your home.
My subfloor has a R-Value energy efficiency of R27.4. This means a toasty floor for my feet!
There were different options I considered when building my subfloor but narrowed them down to two different insulation options: spray foam or rigid foam.
Spray Foam: Spray foam is a highly effective, versatile, time-effective application and offers a high R-Value per inch. If you plan to insulate in-between every crossmember then spray foam insulation may be a viable option. I considered this option for its time conscious application and ability to provide better sealing and airtightness while providing a high R-Value. Spray foam may have a higher cost associated with the set-up and bringing in a professional applicator. I choose not to use spray foam as I planned to build an additional frame on the trailer and it would be difficult and costly to build up 5.5inches of spray foam.
Rigid Foam: Rigid foam provides greater compressive resistance which is especially beneficial when used as a subfloor application that will carry heavy loads. Rigid foam is a closed-cell structure which is resistant towards moisture and water vapors. This option can be more budget friendly and offer diverse R-Value efficiency options depending on your needs. I chose to use rigid foam for its structural durability, cost-effective option for a 5.5inch subfloor and the ability to do it myself instead of hiring a spray foam company. I was able to source high R-Value rated rigid foam materials in order to gain a higher R-Value than using spray foam.
Once you decide on the type of insulation for your subfloor you can begin the first step in actually building your tiny home!
Subfloor Build Materials
Here are the steps I took to build my subfloor. These steps may vary depending on how your trailer is built (i.e. metal crossmembers and underside sheathing), type of materials used and how much insulation you decide is needed for your subfloor build.
Rigid Foam Materials List
| Material | Size | Quantity | Price (CAD) |
| Plasti-Span 40 R-Value: R4.3/inch |
4 x 8 x 2″ | 16 | $42.49 |
| ISO/IKO Enerfoil R-Value: R6.8/inch |
4 x 8 x 1.5″ | 8 | $32.99 |
Subfloor Frame Materials
Pressure treated lumber was used as this was an exterior frame for the subfloor. Using pressure treated lumber will resist the elements better than untreated lumber. In cases where untreated wood is used, the elements will cause the wood to rot whereas pressure treated will maintain its integrity in contact with harsh elements.
| Material | Size | Quantity | Price/Unit | Price (CAD) |
| Pressure Treated Lumber | 2 x 4 x 8′ | 9 | $6.98 | $62.82 |
| Pressure Treated Lumber | 2 x 4 x 10′ | 28 | $8.99 | $251.72 |
| Pressure Treated Lumber | 2 x 4 x 14′ | 2 | $10.08 | $20.16 |
| Pressure Treated Lumber | 2 x 10 x 8′ | 2 | $18.80 | $37.60 |
| Pressure Treated Lumber | 2 x 10 x 12′ | 1 | $28.69 | $28.69 |
| Plywood | 4’ x 8’ Sheets ⅝” Tongue and Groove |
12 | $33.99 | $407.88 |
Additional materials:
| Material | Quantity | Price/Unit | Price (CAD) |
| Tape Sheathing Red | 1 | $8.99 | $8.99 |
| Tape Sheathing Blue | 1 | $10.79 | $10.79 |
| Deck Screws 3″ – 1000 | 1 | $38.69 | $38.69 |
| Self Drill 12-24×4” Wafer Square Socket #4 Zinc Plated W/Wings (Wood to metal with reamer wings) | 12 | $5.09 | $40.72 |
| Silicone – Clear | 1 | $6.29 | $7.11 |
| PL Construction Glue | 1 | $43.96 | $49.67 |
| Foam Sealant | 1 | $13.45 | $15.20 |
| Typar (9′ x 100′) | 1 | $125.99 | $142.37 |
How to Build the Subfloor For Your Tiny Home
- Seal any openings
- Roll the Typar out
- Cut styrofoam and seal
- Build the subfloor frame
- Build a subfloor frame extension (optional)
- Square it up
- Screw subfloor frame into metal crossmembers
- Place the plywood
Step One: Seal Any Openings
Seal any large openings between underside metal sheeting and trailer with silicone in order to prevent any rodents chewing through your insulation or trailer wires. Last thing you want is finding little critters making tiny homes in the insulation under your floor!
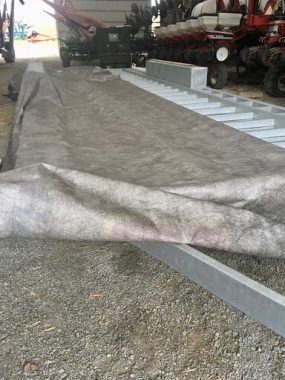
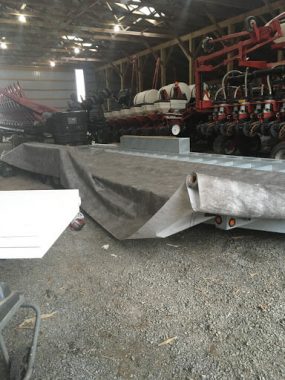
Step 2: Roll the Typar Out
Roll Typar out down the length of trailer and tape together using sheathing tape (blue). Ensure you have left approximately 2 feet overhang on ends and either sides of the trailer.

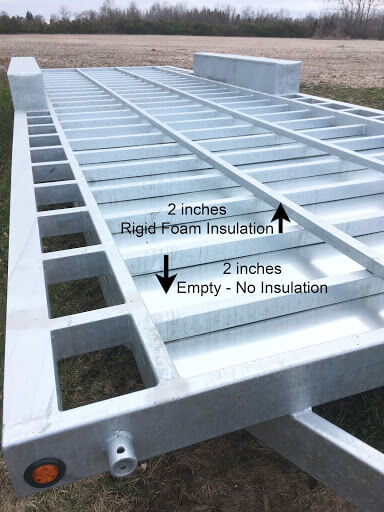
Step 3: Cut the Styrofoam and Seal
Cut styrofoam to fit between crossmembers of your trailer. Seal any cracks between metal crossmembers and styrofoam with spray foam/foam sealant.


Step 4: Build the Subfloor Frame
Build the subfloor frame: I didn’t want any metal from my trailer in direct contact with my floor therefore I built another frame on top the trailer crossmembers to eliminate any heat loss through the crossmembers. Use pressure treated 2’ x 4’ lumber to build the subfloor on 16” centres. Cut and place another 3.5” of foam in the subfloor frame. NOTE: My local lumberyard only carried Pasti-Span in 2” thickness so I used a high R-Value rated foam Iko Enerfoil 1.5” to build up the remaining thickness.


Step 5: Build a Subfloor Frame Extension (optional)
Build a subfloor frame extension on the tongue of the trailer. NOTE: my custom trailer was built with an extended tongue in order to maximize this option. Ensure your extension within a range that will not interfere with hitch or truck when turning.
Step 6: Square It Up
Ensure your subfloor frame is square to your trailer.
Step 7: Frame, Meet Trailer. Trailer, Frame.
Screw subfloor frame into metal crossmembers using self-drilling screws to eliminate any loose or bouncy framing. This will ensure you will not have a creaky floor!
Step 8: Place the Plywood
Place and nail down 4’ x 8’ ⅝” tongue and groove plywood to the subfloor frame.


Note: At this time I have not bolted down the subfloor around the trailer perimeter. This will be done once wall framing is completed.
Now you’re ready for the wall framing to begin!
Tips and Tricks
- Nails vs. Screws: Nails will bend with movement whereas screws will break. Since your tiny home will be travelling and experience movement, consider using nails (a nail gun will save time and energy too!).
- Plywood vs. OSB: weight is comparable, plywood offers more structural stability than OSB.
- Make sure the metal sheeting is securely fastened under the trailer and any large cracks or openings are sealed using silicone. You want your home to be critter free without any unwanted visitors taking up residence in your floor insulation!
- As noted in Step #7: if you decide to build a subfloor frame on top of trailer to avoid any metal in direct contact with the floor, ensure you screw down 2×4 crossmembers with self-drilling screws to avoid a creaky floor. All 2×4 should be firmly sitting on the trailer crossmembers without any bounce to them.
To view a timelapse and overview of my subfloor build, you can find the full episode on my YouTube Channel, Overalls On Wheels – Ep.2: The Subfloor: