Hey! This site is reader-supported and we earn commissions if you purchase products from retailers after clicking on a link from our site.
I can do a lot of things in terms of do-it-yourself projects when dealing with my RV but running a sewing machine and creating upgrades for my rig using fabric is just something I have never done before. In fact, it’s more likely that I’d have better luck landing a commercial airliner with an incapacitated pilot and co-pilot than I would successfully sewing two sheets of fabric together using a machine or any other method. Yes, I can hand sew a hem or reattach a button on my shirts or pants with a needle and thread, but I lack the knowledge to operate a sewing machine and before any of you folks decide to write in and tell me I should buy a sewing machine or practice sewing, thanks, but no thanks. A tailor or seamstress I will never be, and I’m good with that.
However, doing some research on my own as well as talking with other RVers, I found some alternatives for those that want to create their own curtains without having to sew them by hand or with a sewing machine. In this tutorial, I’ll share those alternatives with you and how you can create your own curtains without too much effort, cost or time.
Find the right fabric for your curtains
First, you’ll need to start by finding the right fabric that will work for your needs. Amazon has a nice collection of various colors and patterns and you can purchase it by the linear yard.

- Specially designed for quilting, also suitable for sewing and craft projects
- Designed and Manufactured by COTTONVILL
- Fabric care instructions: Machine Wash Cold/Tumble Dry Low
Last update on 2025-06-29 / Affiliate links / Images from Amazon Product Advertising API
What is a linear yard of fabric?
A yard of fabric will always be cut off the roll or bolt to a length of 36 inches, but a linear yard will have a width of 54 inches. This size piece of fabric will give you a coverage area of approximately 1,944 square inches. To determine how much fabric you’ll need for your project, measure the width of your window, and multiply that measurement by length of your curtains.
Cutting and bonding your curtain fabric
While most scissors can be used when working with fabric, it’s best if you use a type that is specifically designed for fabric or sewing projects. These scissors (also referred to as pinking shears), are designed to prevent the fraying of the fabric during the cutting process.

Last update on 2025-06-29 / Affiliate links / Images from Amazon Product Advertising API
The next task will require that you have an iron to establish a nice crease on the edges of your curtains’ fabric. Once you have measured out your fabric (be sure to add an inch to three of the sides and three inches extra for the top), cut your fabric to the proper dimensions and fold in your top two inches and then iron the fold to create a crease, Repeat this process for the other three sides of the panel but only fold it in one inch on these sides.
Now that you have established the creases for the top and sides of your curtain panels, it’s time to bond them in place. To do this, I like to use Heat-n-Bond® ultra-hold iron-on adhesive tape.
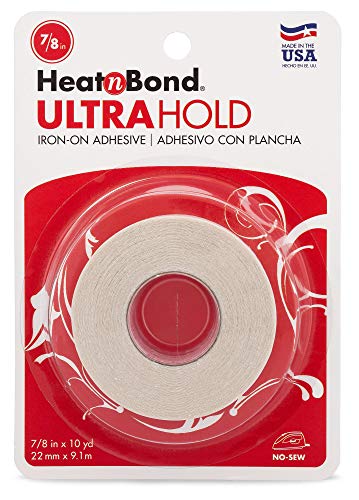
- Use for #5 Ribbon, Medium to Heavyweight Lace, Trim and Home Decor items - NOT intended for Hems
- Heat activated; Permanent; Double-sided solid film adhesive on paper liner
- For bonding items to fabrics without the need for pinning
Last update on 2025-06-29 / Affiliate links / Images from Amazon Product Advertising API
Since this tape is 7/8” of an inch wide, be sure to inset the tape 1/8” of an inch from cut edges of your panels or basically directly along your creased edge on the three sides with the one inch extra sides. For the top of the curtain, do not place the tape along the crease. Instead, place the tape 1/8” of an inch from the side of the panel.
This two-sided tape is heat activated, set your iron to medium heat and iron your tape so that it adheres to the fabric. Don’t use the steam setting and applying the heat for six to eight seconds should be enough time for it to properly adhere to the curtain panel.
Once you have done this, remove the paper backing from the tape that you just ironed onto the panel and fold over the fabric to adhere it to the back of your curtain. Now, iron those seams in place too. When your sides and bottom are secured in place, repeat the process for the top of curtain to secure that hem in place as well.
Final thoughts
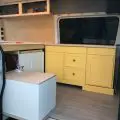
With this, you have now created a nice panel or an entire curtain for any window in your RV. Of course, you could always expand on this project by adhering a backing and even different patterned types of fabric that show on the outside of your RV. There are literally numerous possibilities when creating your own curtains, be it a fabric design or the way they are installed. In this tutorial, I stressed the need for allowing extra area in the top seam of your curtain panels because my design allows for the use of a 1 to 1.5-inch curtain rods to hold them in place. Your designs may vary, and I welcome you to come up with better ideas and share them with me.
And finally, if you’re just not into creating your own curtains, be it sewing or otherwise, a good alternative is to do some thrift store shopping. As a rule, this takes time and it’s likely your measurements will be off, but it’s a good way to get a base for your new curtains at a reasonable cost.
As always, my friends, thanks so much for following along, and I hope to see you out boondocking, camping, or taking a road break out there someday.