Hey! This site is reader-supported and we earn commissions if you purchase products from retailers after clicking on a link from our site.
If you like to boondock in remote locations as much as I do, then an inverter is an essential part of any RV electrical system. In many cases, you’ll find that one has already been installed in your rig by the manufacturer. Simply put, an inverter takes the 12-volt DC power from your RV batteries and electronically changes it to 120-volt AC that operate items such as televisions, personal computers or various cooking appliances. Often times, many people confuse the inverter with the converter, which reverses the inverter process and takes a 120-volt AC current and reduces into a 12-volt DC power supply.
What size inverter do I need?
This really depends upon the amount of power you need to operate the appliances, tools or electronics that you deem essential at any given time. For example, many smaller RVs have 12-volt refrigerators that always drain your DC power supply so it’s important that you understand how much voltage you’ll need.
To do this, look at the specifications for any appliance you intend to have drawing power and add those wattage figures together. Be sure to add 20-25% onto this total sum because pumps, air conditioning units, heaters, microwaves and some tools have high surge requirements to get them started. In short, be sure you include these figures in your final calculation.
Be sure to use the surge rating of all the equipment to size your inverter. It’s best to buy an inverter that has a continuous rating that matches the surge total of all equipment and then add another 20%. For example, one common equation is this example. If the total appliances running at the same time including the surge is 3,600-watts but the running watts are only 2,000-watts. You would get an inverter that is 3600 x 1.20 which equals 4,320-watts. Since inverter manufacturers don’t build an inverter with that exact wattage, you’d be well advised to step up your inverter size and purchase a 5,000-watt model.
Where do I locate my inverter?
It’s important to have your inverter located close to your battery supply. As a rule, the longer your cables are between your power supply and the inverter, the more voltage you’re going to lose. Generally, it’s best to locate your inverter within 2-5 feet from your batteries, or you may have to change the size oy your cables between them.
What are cables?
Cables are the wires that take your power supply from the batteries to your inverter. In this diagram you’ll see that you’ll need three small cables per line between the batteries and one longer cable for positive and negative runs that will connect to your inverter.

If you have a small rig or you just don’t need that much reserve power, you may only have one battery hooked up through your cables and you would simply install your cables to the negative and positive terminals on your battery. However, if you have two or more batteries, it’s best to align them in parallel shown in this illustration. This ensures a better flow of current and helps to prevent voltage loss in the cables.
What size cable do I need?
There are two reasons why it’s important to have properly sized wires when installing an inverter into your RV. The first reason is that you want your wire to carry the correct amperage without heating up, and secondly, the wire needs to carry those amps with minimal voltage drop at the outlet or load end.
Keep in mind that you will need one black cable and two red cables when installing your inverter as you will be installing a circuit breaker between your power supply and your inverter.
Each wire size has a specific amperage rating which should not be exceeded. That rating can be easily looked up by researching the manufacturers specifics printed on the wire’s protective covering.
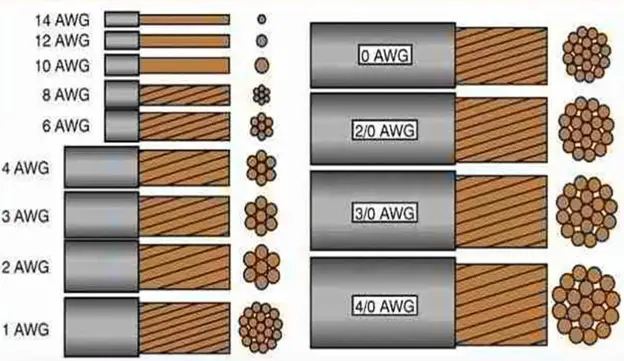
Also, be sure to check your manufacturer guide included with your inverter to see what cable they recommend for your size inverter. However, it’s a safe bet that your supply cables should be 2/0 AWG or higher when connecting most inverters.
Remember, it’s important to buy quality products when dealing with electricity so stay away from cables that are manufactured in China.
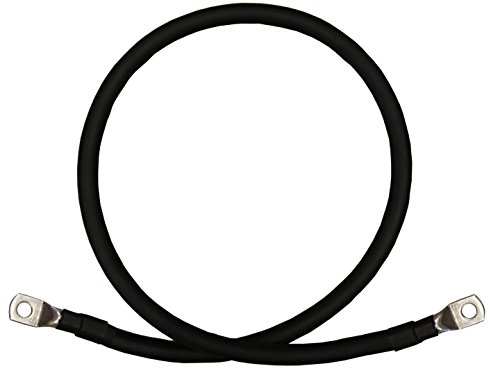
- Includes one black 2 gauge cable pre-assembled with marine grade cable lugs. Use selection tabs to...
- Manufactured with ultra-flexible WindyNation Power-Flex Cable. 100% fine stranded PURE COPPER cable...
- Made in the USA by WindyNation Inc. Cable is SAE J1127 compliant and rated for up to 600 volts from...
Last update on 2025-06-13 / Affiliate links / Images from Amazon Product Advertising API
Windy Nation cables are manufactured in the United States and I recommend them for this project. These can be purchased in various lengths with the proper sixed lugs already installed, or if you’re handy and have the proper crimping tool you can buy the wire and lugs separately and create your own power cables.
Once you have chosen your inverter, you’ll need to mount it. Personally, I prefer this inverter because it has it allows for multiple small appliances to run simultaneously while holding the line load.
Another nice feature of this inverter is that it has four 110/120-volt outlets as well as two USB ports which allows you to wire USB port from the inverter to the inside of your rig. It also has cooling fans making it less likely to overheat while it’s turned on.
This model is on Mike’s list for the best RV inverter as well.
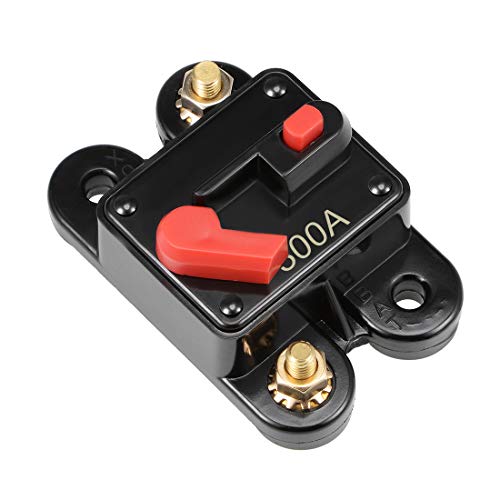
- Rated Voltage: DC 12 to 48 Volt; Rated Current: 300 A
- Thread Size: M6; In-line Diameter: 6.5mm / 0.25 inch
- 2 AWG in to 2 AWG out automatic recovery circuit breaker.
Last update on 2025-06-13 / Affiliate links / Images from Amazon Product Advertising API
Wiring your inverter
Wiring your inverter to the power supply is an easy task that should take less than five minutes once you have your fuse and the inverter mounted where you choose to locate them. First, wire your negative (black) cable from your power supply directly to the inverter. Now, take one of your positive (red) cables and wire that from the power supply to your inline fuse box like the one shown here (make sure it is in the off position). Once you’ve done that, use the other positive cable to move your power from the fuse box to the inverter. At this point, you have successfully joined your power supply to your inverter. However, most inverters will have a ground wire (this wire is usually supplied), but if not, a simple 8 AWG steel wire will work.
Connect this wire to the ground terminal on the inverter with the appropriate nut. At this point, you may have to drill a small hole in the floor to the outside of your rig. Once you have done this, attach the wire to the frame of your RV. Usually, the framework of most RVs will have numerous pre-drilled holes that will work perfectly for this purpose. Simply take a self-tapping sheet metal screw that is slightly larger than your hole and drill it into the hole until it’s firmly set. Now, wrap your ground wire around the screw and continue to install the screw and until it and the ground wire are attached snuggly to your RV’s frame. Now you have completely installed your inverter and you can test it out by plugging something in to one of its four 110/120-volt outlets.
Now that you have wired your inverter to supply yourself with a 110/120-volt load while off-grid, let’s take a look at tying your inverter into an existing wiring system in your RV, or one that you are installing on your own.
Hard wiring your new RV inverter to your breaker box
Now that you have chosen and installed your new inverter into your RV, let’s examine the three different methods for distributing your power throughout your RV. Although not very practical, the first method would be to use extension cords from your inverter to what ever appliance you wish to power. Unless you plan on powering only one or two appliances temporarily, this would not be my recommended method of wiring.
The second method for wiring your inverter is to put in some dedicated power lines that have outlets that are solely intended for use when drawing power from your battery bank through your inverter. This method bypasses wiring your inverter into your AC breaker box and is a good alternative for those looking for limited use outlets for when they are camping off-grid.
For this project, I recommend using Romex 14/2 wire. This type of wiring is commonly used to power a single outlet although it is rated for wiring up to 12 receptacles on a single line. However, from an inverter, I wouldn’t advise wiring more than 2 receptacles on a single line if you’re drawing power from an inverter as this could overload your inverter.
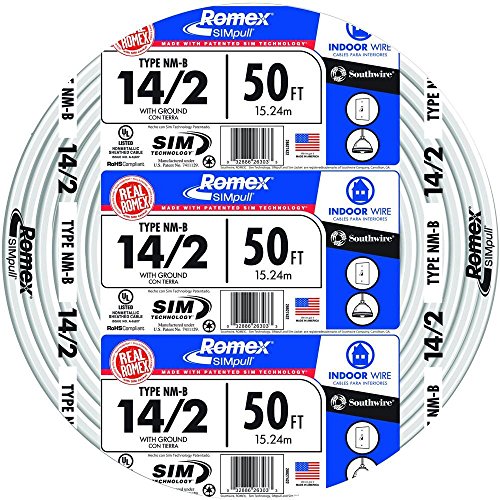
- Coated in patented SIMpull Cable Jacket for easier pulling, stripping, and installation
- Romex Type NM-B Copper Building Wire is commonly applied in residential building wiring as a branch...
- Installation above ground and in dry locations only
Last update on 2025-06-13 / Affiliate links / Images from Amazon Product Advertising API
Instead, I would use this wire to power a single outlet to power my living area for my computer or television and then run a separate line into my kitchen to power a microwave, refrigerator or toaster.
Installing aftermarket wiring to your RV can be tricky because you don’t want to cut any existing power lines that were installed by the manufacturer. For this reason, I recommend that you remove the cover from an existing receptacle and try to determine where your wiring is located before you attempt to cut the hole for the new receptacle box.
As a rule, you’re usually safe to install a box on the opposite side of the stud from an existing outlet, but this may not work if the power supply to the existing outlet comes in from the side of the box.
Once you have located where you want to place your outlet, use a jigsaw (preferably a variable speed model) to carefully cut the opening for your outlet box.
Whenever I have installed aftermarket wiring, I have always worked my way from the outlet back to the power source. This ensures that I have the correct length of wire without coming up short and it prevents drilling holes for the line in the wrong places.
Depending upon where your inverter is located, determines the complexity of wiring your inverter only outlets. For example, you may have an outlet you want to install in the kitchen area and your inverter is located in a nearby cabinet making it very convenient to wire the outlet. However, if your outlet is located several feet away from the inverter, you may have to drill holes through the flooring and run the wiring on the underside of your rig.
Anytime you place wiring outside of your rig, I highly recommend using weather resistant tubing to protect it from the elements. This will also prevent the wire from chafing at its entrance and exit points in the wall or floor.
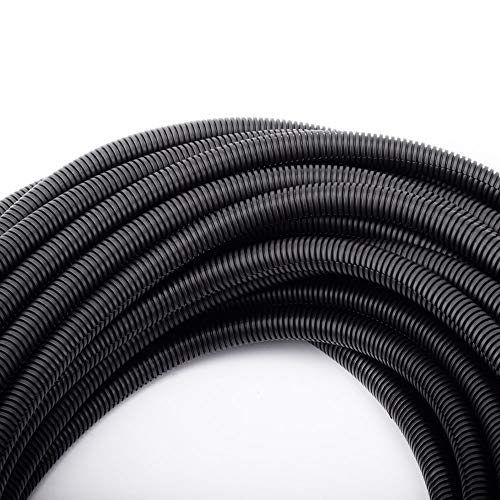
- More High Operation Temperature Range: -40 to 257 | It is more high-quality and safer than other...
- High quality material and high operating range flex tubing will protect your wires from oil or heat...
- High Quality Polyethylene Material: with newly high tech to heighten density, our wire protector...
Last update on 2025-06-13 / Affiliate links / Images from Amazon Product Advertising API
Folks, when it comes to wiring and electricity, try not to install cheap discount store junk to save a buck. Yes, you can buy an outlet from a dollar store for as little as .79 cents but do yourself a favor and install quality products. They’re far less likely to short out or overload which could damage your electrical system or worse yet, cause a fire.
Personally, I always recommend Leviton products whenever I do any electrical wiring. The outlet shown here would be my choice when wiring a direct line from my inverter. Not only does it allow for various amperages, but my favorite feature is the USB ports and a built-in converter for powering laptops, tablets and of course cell phone chargers.

- POWERFUL: 2 high-powered charging ports with 3.6A of charging power
- SMART: Built-in smart chip recognizes the individual device’s charging requirement to optimize the...
- CONVENIENT: No more searching for charging adapters. Upgrade your existing outlets so you can charge...
Last update on 2025-06-13 / Affiliate links / Images from Amazon Product Advertising API
Be sure to follow the manufacturers directions as to which wire connects to which terminals, but this is a simple process as the wire and terminals are color coded and well identified.
After you have installed your wiring, the outlet box and outlet, your last task will be to install a plug on the other end of your power line. Again, I recommend using a Leviton product such as this one to complete your project.
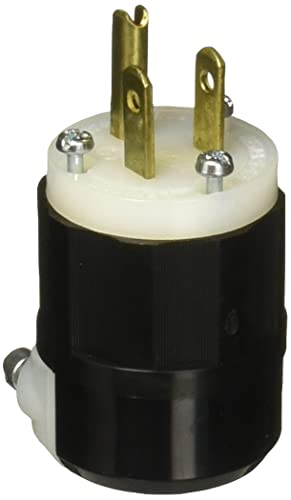
- Leviton 2 Pole Industrial Grade Male Plug, Straight Blade, Black And White, 3 Wire, 125 Volts, 15...
- Electrical Specifications Grounding: Grounding
- This is manufactured in United States
Last update on 2025-06-13 / Affiliate links / Images from Amazon Product Advertising API
Like the outlet I recommended earlier, this plug is of superior quality and will come with easy-to-understand directions for wiring it onto your electrical line correctly.
Just as I did with the outlet, I’m not going to give you a walk through on how to wire this product. The manufacturer has included a clear and concise set of directions pertaining to the proper installation of their products and those are the directions you should use when wiring their products.
Wiring an inverter into an existing electrical block can be complicated. Next, I’ll explain how best to avoid any complications as well as the best way to accomplish this task.
Hard wiring your RV inverter to an existing electrical block
The last way to hard wire your inverter is to wire it directly into you RV’s existing electrical system. I have seen many RVers do this the correct way, and unfortunately, I have seen several people do it the wrong way and ultimately damaging their inverter along the way.
These days, many RVs come equipped with an onboard generator and all of them are fitted with a shore power system of 110/120-volt wiring that supplies power when they are on the grid. In most designs, if your RV has a generator and shore power supply, there’s going to be a transfer switch between the two sources of power.
Generally, this switch is automatic when installed by the manufacturer. In other words, it knows what power source is being accessed and it only allows that load to be delivered or returned to that source. This prevents what is known as back feed.
Electricity will always energize any line that allows the load to flow into it and this is known as back feed. With that said, any line that doesn’t have a switch to stop the load will be energized and this could cause electrical shock to you and it could also cause damage to components such as your generator and inverter. For example, your inverter takes a 12-volt load and electronically converts it to a 110/120-volt load, so if you were using your shore power without a switch between your inverter and the shore power, this will deliver a 110/120-volt load to your inverter which will ultimately damage the inverter because it’s designed to output that voltage load and not intake that amount of voltage.
For this reason, I would highly recommend installing a power switch between your inverter and 110/120-volt onboard fuse box. Ultimately, this will prevent any back feed of a power load from your generator or shore power from entering your inverter when it’s not in use.
Now, you can go out and purchase an automatic transfer switch made specifically for RVs, but they can be costly and a little bit more complicated to wire. When I wired my inverter into my RV, I opted install a manual on/off switch such as the one shown here.
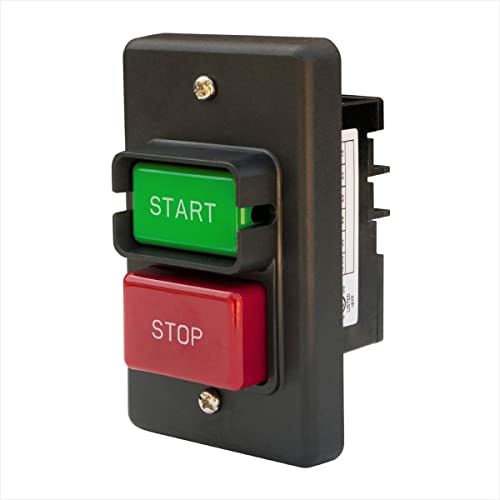
- SPECIFICATIONS: Dual Voltage: 120V/230V; Single Phase | Rated Current: 2HP/28 Amps at 120V; 3HP/16...
- INCLUDES: (1) Single Phase On/Off Switch | Please note: This product may require an appropriate box...
- FUNCTION: Provides you with a master or emergency power off safety switch box designed to safeguard...
Last update on 2025-06-13 / Affiliate links / Images from Amazon Product Advertising API
My rig doesn’t have an onboard generator, so I also installed this switch on my shore power line between my fuse box and its input outlet. Remember, the more line electricity has to energize, the more voltage it loses through delivery. Since my shore power input outlet was almost 20 feet away from the inverter, I installed this type of switch to prevent any unnecessary back feed to that outlet as well.
Wiring your inverter to your DC power box will be similar to wiring your outlets directly as we did before. By that, I mean you will be wiring your 14/2 Romex to a plug just like you did before. However, you will be wiring this power load to a switch then to your power box.
The next thing you’ll want to do is to create a small jumper wire that will connect your two breaker blocks. This is installed using your #8 black wire and it will connect the breakers to provide a continuous supply of power into your loads. This small line will be located at the bottom of your breaker switches and you’ll see a couple of terminals like the ones in your inlet fixture. Install this line just as you did before and then start installing your three lines to the AC distribution box.
On a standard 30-amp distribution box, in the upper left of the box you’ll see a series of terminals. The first thing you need to do now is to strip your white wire end and secure it to the terminal furthest to the left. This is called a neutral bus bar.
Now that you have done this, the next step is to take your black wire and repeat the process except that you’ll be connecting this wire into the bottom of the left breaker terminal in the same terminal as your jumper wire. Secure that wire down tightly.
Final thoughts
For information on how to wire your inverter power supply into a main fuse box, I recommend you visit my series of wiring your teardrop trailer living space where I guided you through how to build and wire your own teardrop camper. Pay close attention to instructions as to wiring your shore power as the process is exactly the same.
As always, my friends, stay safe, stay healthy and tanks for following along.