Hey! This site is reader-supported and we earn commissions if you purchase products from retailers after clicking on a link from our site.
Wall paneling… once you’ve got your insulation done it’s time to get some walls up in your van! This part is super exciting because it will really transform the interior of your van. With the metal and insulation all covered up, it becomes rather cozy. So keep reading and I’ll tell you wall about it.
Table of Contents
- Timing and People Needs
- Materials You Need
- Tools You Need
- Cost of Paneling Your Converted Van Walls
- Step-by-Step: How To Install Wall Paneling in Your Van
- Tips and Tricks
Timing and People Needs
4-6 hours. Because you really need to make sure the panels line up with the bends and curves of the van, it can take a while because you’re going to have to go back and make adjustments before getting the perfect panel. You’ll also need to polyurethane all your panels and each coat takes about an hour to dry. Plan on this being an all-day project.
2 people needed. This step definitely requires at least two people because the panels are pretty big and you need at least one person holding it up and pressing it up against the side of the van while the other attaches it.
Materials You Need
| Material | How Much You Need | Cost Range | Where to Get It |
|---|---|---|---|
| ¾” Plywood | 4 sheets | $$ | Home Depot |
| Polyurethane | 1 can | $$ | Home Depot |
| 1″ Sheet Metal Screws | 1 box | $ | Home Depot |
| Trim Moulding | 6 feet | $ | Home Depot |
Tools You Need
| Tool | Cost Range | Where to Get It |
|---|---|---|
| Jigsaw | $$ | Amazon |
| Table Saw | $$$ | Amazon |
| Power Drill | $$ | Amazon |
| Foam Brush | $ | Amazon |
| Plastic Paint Tray | $ | Amazon |
| Tape Measure | $ | Amazon |
Cost of Paneling Your Converted Van Walls
Depending on the quality of the plywood you buy, this step can vary in price. We opted for nicer plywood that was already sanded but overall this step was about $200.
Step-by-Step: How To Install Wall Paneling in Your Van
Okay, so like I mentioned, this step can be a bit frustrating because it requires precise measurements; you’re going to have to hold them up, fit them, trim here and there, and try again until they’re perfect. But it will all be worth it once they’re in!
Step 1: Measure Your Panels
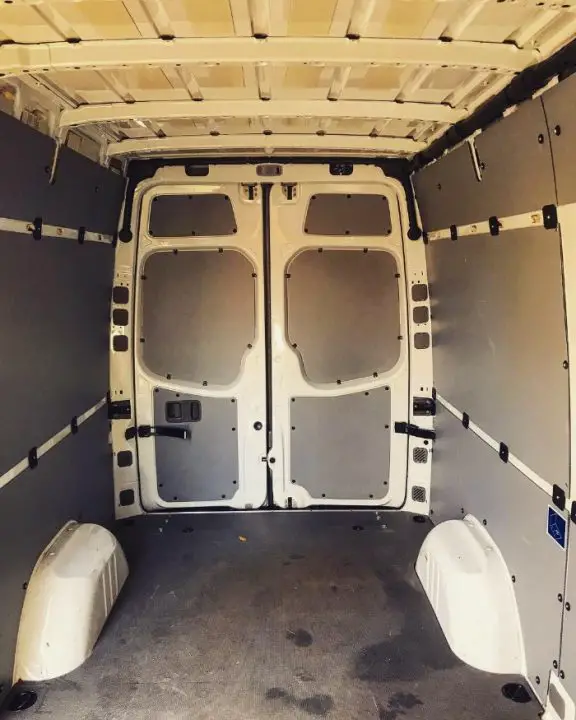
The first step is to figure out how big you need to cut your panels. Looking at our van layout, we realized we had five spaces we needed to cover:
- The lower back (underneath the bed platform)
- The upper back (next to the bed)
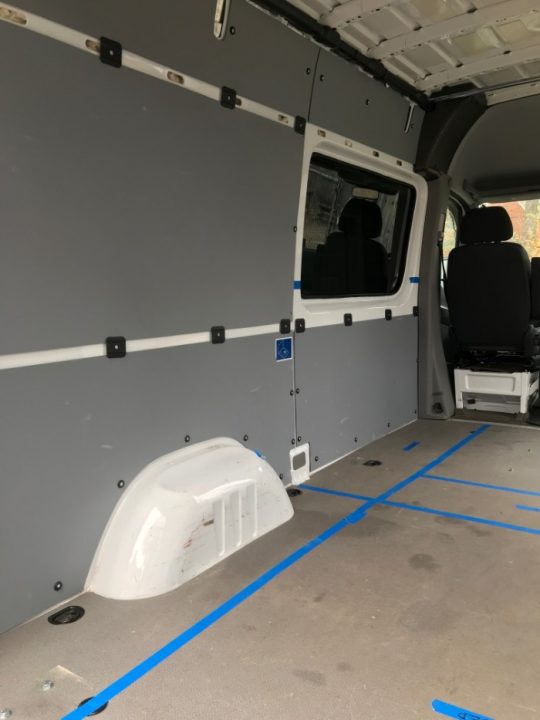
- A panel below the window (kitchen area)
- A panel below the sliding door
- The back doors
You’ll notice that we decided not to panel the entire van and especially the upper section of the walls. This is because of the way the van was when we bought it and our plans for our layout. Because the previous owner had semi-paneled the van already, once we finished the insulation we simply put his plastic panels back on top. They weren’t the prettiest but we knew that we were going to be installing cabinets on top of that area anyway, so the additional step of paneling that section with wood would have been a waste of time. We also decided not to panel the entire doors because it was difficult with the shape of our windows and how the van bent and curved. When it comes to your paneling, decide how much of your van you want/need covered and work from there!
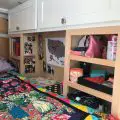
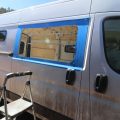
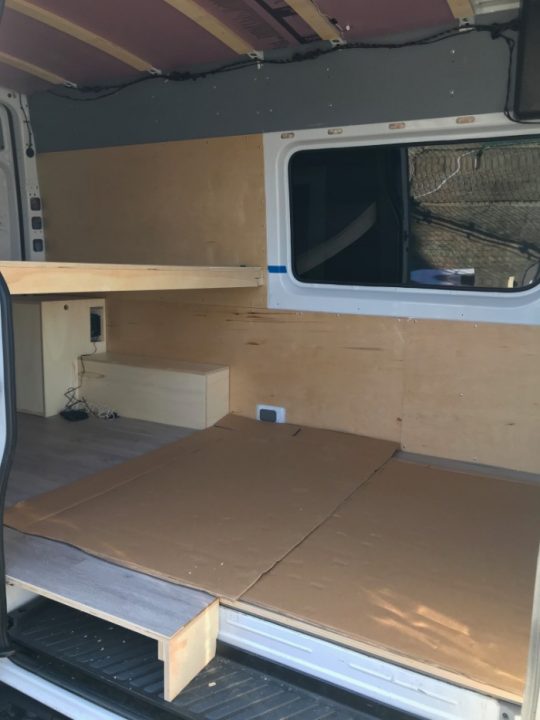
We started with the lower back panels because we wanted them to act as a base for the upper panels to help hold them up. To give you a sense of what we were working with, here’s a picture of the van the day I bought it.
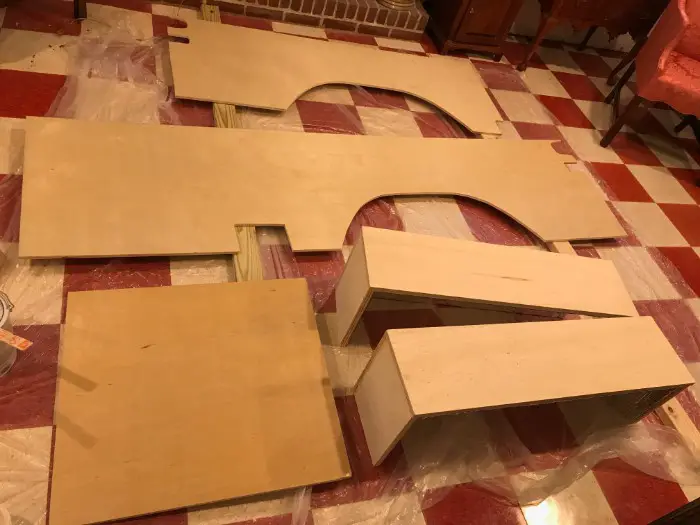
As you can see from the photos, we pretty much had our stencils for our wood panels! Now, I will admit that my situation is not the usual situation and we just got really lucky with the van we bought and the fact that it already had some kind of paneling done for us. But even if you aren’t able to find a van with panels already done, hopefully this can help you visualize the pieces you’ll need for your own paneling! It can be hard to visualize when the entire inside is done and this shows basically what you’ll need to cut out. If you don’t have panels already, you can use cardboard to help you make your template by holding it up and using a box cutter to cut out the curves and edges. Once you have your template traced onto the plywood, use the table saw to cut the larger edges and the jigsaw to cut the inlets and curves for the wheels.
This is what our panels looked like once we had cut them out (including our well well covers which I discuss making in this post):
Step 2: Polyurethane the Panels
Once your panels are cut out, it’s important to prep them before you attach them. Some people choose to polyurethane/paint once they’re already installed, but I didn’t like the idea of painting inside the van.
First, use sandpaper to smooth out your plywood. We bought ours pre-sanded, but we wanted it to be super smooth. Then, using a foam roller, polyurethane both sides of your wall panels. While it may seem pointless to treat both sides of the plywood, trust me it will be worth it. When you’re trying to carry the sheets or slide them in or hold them up, the last thing you’re going to want is rough wood splintering your hand. A smooth piece of wood is always easier to work with.
We opted for a semi-gloss finish to give the panels a bit of a glow, but the type of polyurethane you want is completely up to you! Do you like a glossy finish or a matte finish? Overall we put one coat of polyurethane on the back and three on the front. If you decide to paint your panels with a color, one coat of polyurethane is sufficient before adding primer and paint.
Pro tip: In between each coat, lightly sand again, dust it off, and wipe it down with a wax cloth. This will give you a much smoother finish.
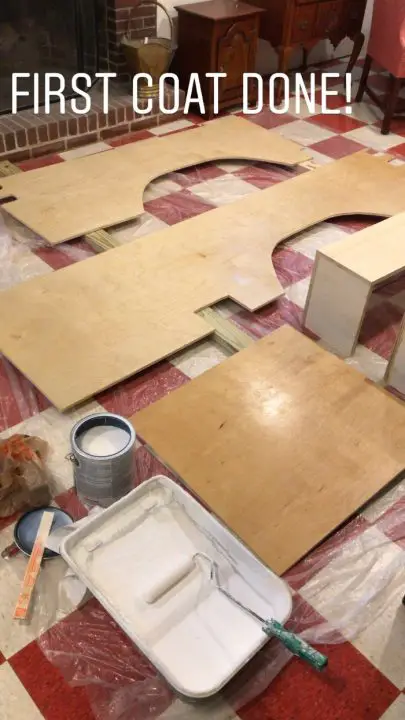
You’ll start to see how beautiful the wood looks after just one coat – the polyurethane brings out all the whirls and colors!
Pro tip: Let your polyurethane dry for an hour between coats and let it dry completely overnight before installing it in the van. You want to make sure the wood has completely absorbed all the chemicals and it won’t get damaged during installation.
Step 3: Attach Panels to the Van
Once all the panels have been cut and primed, it is finally time to attach them to the van! This step required a bit of man power and planning ahead. Take your panels and put them where you intend to attach them; using a pencil, make note of where you want to drill. It’s important to make sure you’re not hitting any holes or wiring. Our insulation was all in the center so we were only able to screw around the edges to truly attach it to the van.
Using the power drill and a bit closest to the size of your screws, drill a hole through the panel and the sheet metal of the van. This requires some upper body strength and there are going to be times that you hit a major support beam behind the wall and you’re not able to drill through. When this happens, move over a fraction of an inch and try again. Even though it’s time-consuming, it’s best to do one screw at a time: drill the hole, change the bit back, and drill in the screw. Because you are attaching wood that has a tendency to bow to metal that is already bent and curved, certain parts of the wood will be harder to drill. There were times when I was using all my upper body strength to push the board as flat as possible against the van while my dad drilled it in. It’s strenuous but if you do it right, once it’s attached it isn’t going anywhere!
Here’s what our panels looked like as we began to attach them:
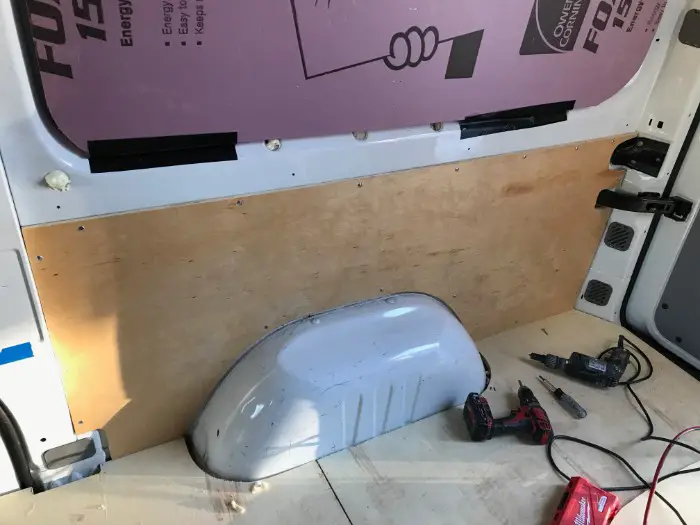
Lower left panel
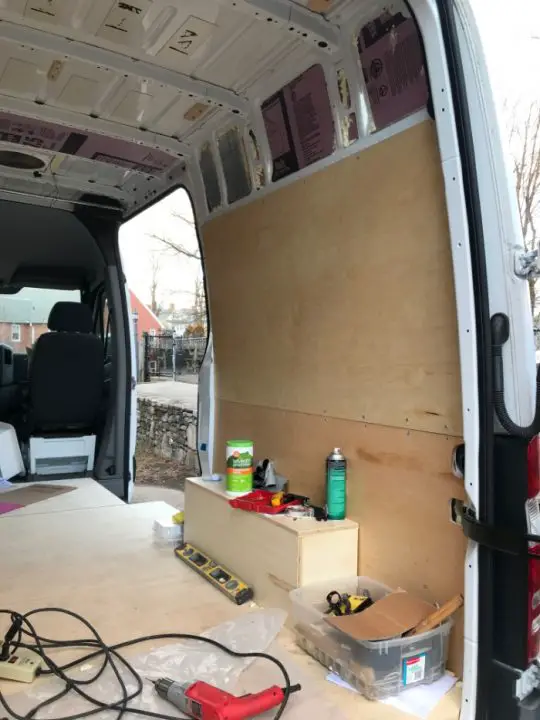
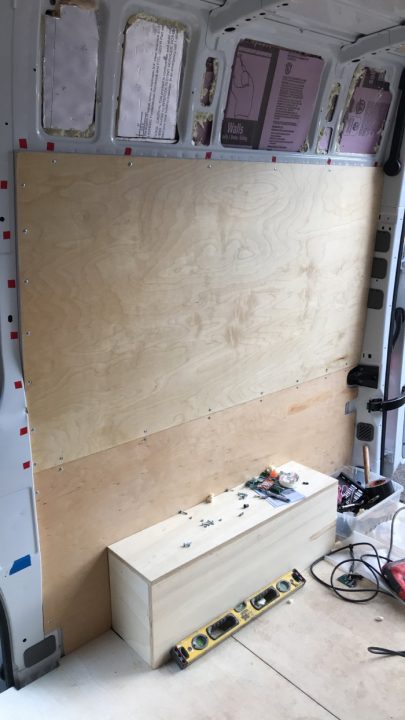
The full back panels
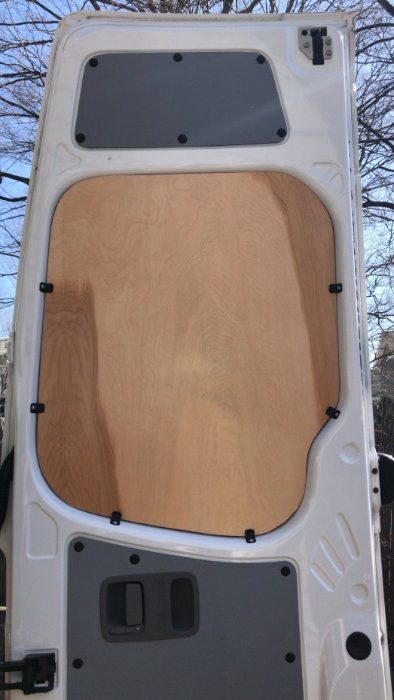
The back door panel
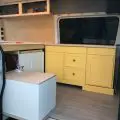
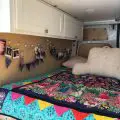
Step 4: Finish the Nooks and Crannies
With all our panels on, the van looked amazing! It was still a bit strange looking because of the plastic gray panels on top but once the cabinets were in, it felt like a cozy, warm cabin. You’ll notice that we decided not to panel around the kitchen window. This is because our kitchen counter came up and covered some of the wall panel anyway and it was going to be a lot of work and measuring for a tiny strip of van showing. There were a few other little spots around the ceiling of the van that had holes and insulation showing and looked pretty unfinished. For these little sections, we cheated a bit and bought some cabinet moulding and used that to cover small areas. Not only did it work, but it made the van look a bit fancier and more finished off!
Pro tip: A little bit of moulding can go a long way. We also used this molding on the ends of our cabinets and it made them look much more professional. Wherever you can fit a bit, use it! It’s really the tiny details that make all the difference in your van build.

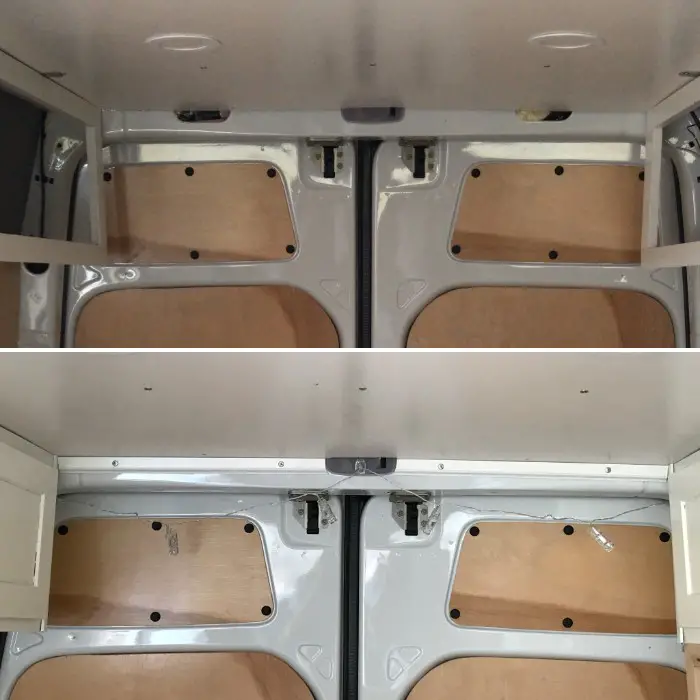
Here’s a comparison of the kitchen area before and after. Before there were 4 visible holes and insulation popping out. It wasn’t a big deal but with just one strip of pre-painted moulding, it looked finished off and covered all the holes!
The back doors of the van before and after adding moulding. So much clearer looking!
Overall, your wall paneling is going to vary based on the size and shape of your van. There are a bunch of different ways to go about paneling and hopefully I was able to give you some helpful tips and tricks to make your van look completely amazing!
Tips and Tricks
Invest in Good Plywood
I’ve mentioned this before but invest in good plywood if your budget allows it! The wood won’t splinter as much, it will hold up longer over time, it’s easier to work with, and it will be able to support your future installations better. I feel like my walls are sturdy and they’re really the base of most of my van build.
Polyurethane Everything
I mentioned this before as well but polyurethane everything!! It seals the wood from moisture, makes it easier to work with, and doesn’t split as easily when you’re screwing it in. The better you treat your wood, the better it will look when it’s in your van.
Use Mould
When in doubt, mould it out. If there’s a little section you can’t quite reach or a part that didn’t come out as well, it can all be covered with moulding or trim.
What did you do to panel your van? Did you panel the entire thing or bits and pieces like me? Let me know!