Hey! This site is reader-supported and we earn commissions if you purchase products from retailers after clicking on a link from our site.
Quick life update: I bought a second van to convert! Second time around I went with a 136 RAM Promaster, which is a completely different beast than the Mercedes Sprinter. Since this van didn’t come with windows already installed, I got to try out a new project. Window installation can be intimidating at first, but it’s not too difficult once you get the hang of it! To save money you could definitely opt to skip installing windows, but they’re great for ventilation and light. So let’s see how we do this thing…
Table of Contents
- Timing & People Needs
- Materials You Need
- Tools You Need
- Cost of Putting in Windows
- How To Install Windows In Your Converted Van
- Tips and Tricks
Timing & People Needs
1.5 hours per window. This differs a bit depending on the size of the window, but it took me about 5 hours to install 3 windows (two small and one large).
Two people needed. Especially if you’re installing a full panel window, it’s a large piece of fragile glass that you’re going to want two people to help get in place.
Materials You Need
For my van, I bought windows specifically for the Promaster, which I’ve linked here. On the Van Windows Direct page you can find more varieties of windows for different van models.
| Material | How Much You Need | Cost Range | Where to Get It |
|---|---|---|---|
| Sliding Bunk Window | 1-2 | $$$ | Van Windows Direct |
| Passenger Sliding Door Window | 1 | $$$ | Van Windows Direct |
| Rust Protecting Paint | 1 can | $ | Amazon |
| Painter’s Tape | 1 roll | $ | Amazon |
Tools You Need
Luckily this only required a few tools which you should already have for your other installation projects.
| Tool | Cost Range | Where to Get It |
|---|---|---|
| Power Drill | $$ | Amazon |
| Step Up Drill Bit | $ | Amazon |
| Jigsaw | $$ | Amazon |
| Metal File | $ | Amazon |
| Foam Brush | $ | Amazon |
Cost of Putting in Windows
As I mentioned before, the cost will differ based on how many windows you choose to install. With my three windows, my overall cost was about $700.
How To Install Windows In Your Converted Van
- Template Your Windows
- Drill Entry and Tracing Holes
- Tape Off Window and Cut Out
- File Edges and Paint
- Screw in Window
Besides cutting a GIANT hole into the side of your van, this installation is pretty scare-free. Let’s go!
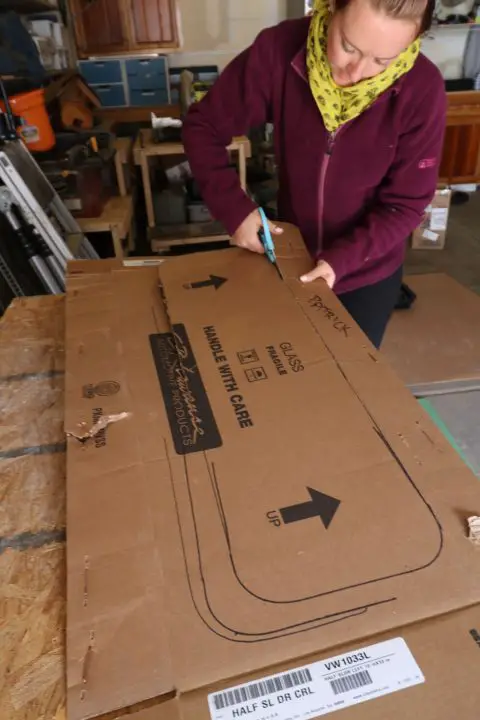
Step 1: Template Your Windows
First things first, you have to figure out the size and shape of the hole for your window. Using the inner rim of my sliding bunk windows, I traced them onto some cardboard and cut out my template. From there, I placed them where I wanted on the van (also very useful to have a second person for a backup opinion) and traced the template onto the inside wall of the van. I chose to put one sliding window at the “foot” of where my bed would go, and one in my kitchen area.
Step 2: Drill Entry and Tracing Holes
Once you have your outline traced on the wall, use the power drill to drill holes all along the outline. This essentially creates a connect-the-dots template for you to cut with the jigsaw. In order to get the jigsaw in to cut, use the step up drill bit to drill a ½” hole on two of the inner corners of the window template.
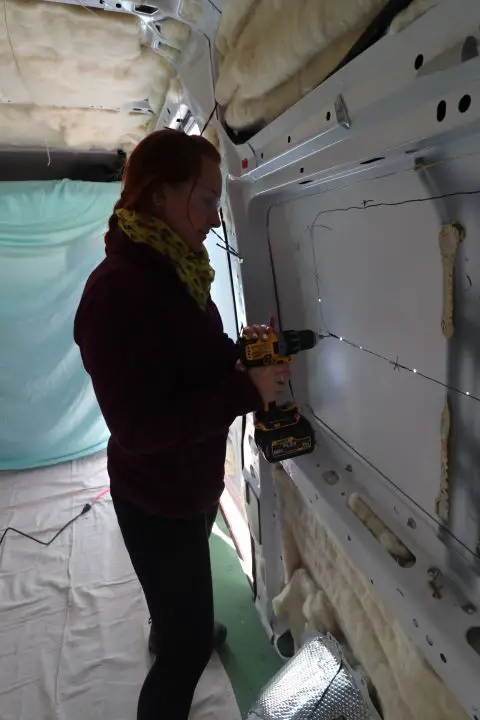
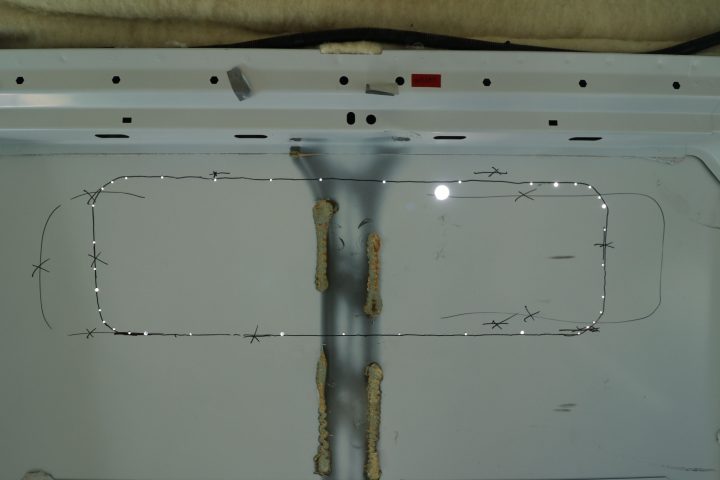
Sometimes you have to trace the outline twice and that’s just fine!
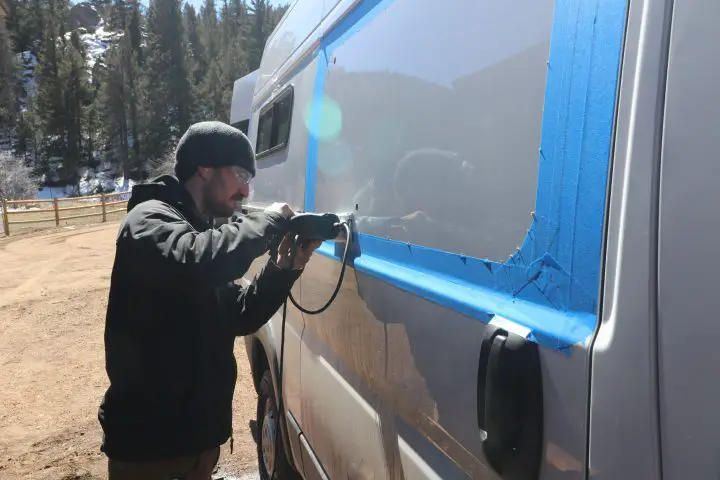
Step 3: Tape Off Your Window and Cut Out
While the dots are pretty, it’s time to make the plunge. Use the painter’s tape to tape off the outside of the window cut. This gives you a straight line to follow with the jigsaw and it also protects your van from getting scratched and scraped by the foot of the jigsaw.
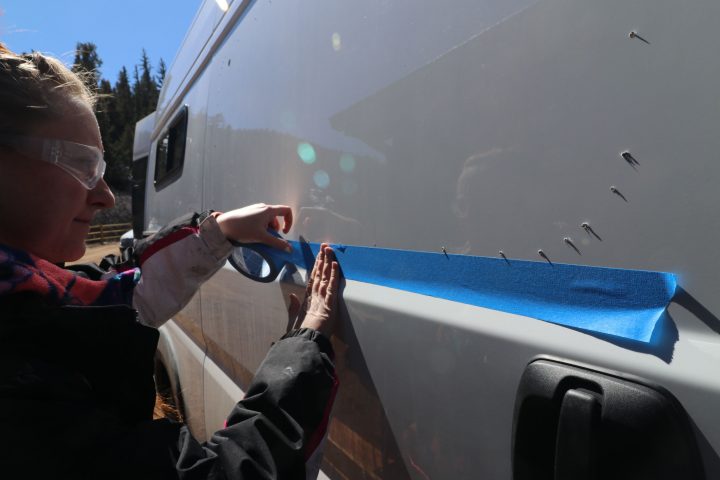
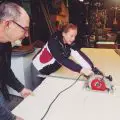
Put the jigsaw into one of the two bigger holes you drilled and get going! To be honest, I really hated this part because it was very uncomfortable for me to navigate the jigsaw sideways; it’s heavy and awkward and if you make a mistake it can seriously damage your van. Go slow and take breaks whenever you need to. Luckily, I had a friend with me who is more skilled with the jigsaw and he was able to help me out.
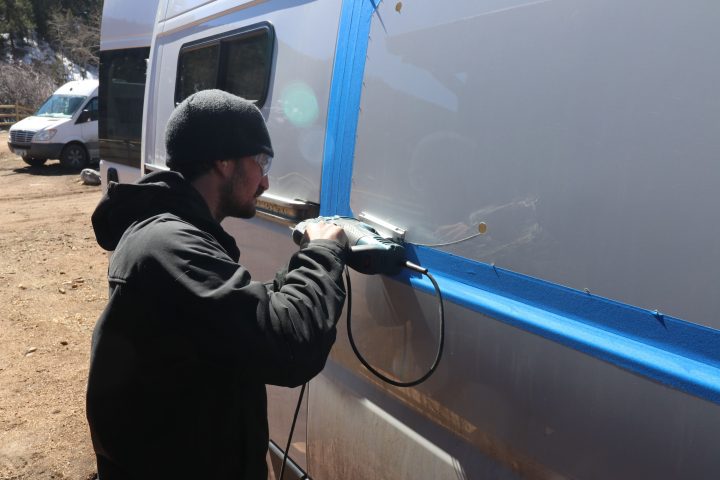
Step 4: File Edges and Paint
Once your hole is cut out, use the file to file down the rough edges of the hole. Then use your rust prevention paint to cover all exposed pieces of metal. It’s nice to have paint the same color as your van metal, but it’s not essential because it will be covered up by your window anyway (as long as you keep the paint within ¼” of your cut).
Step 5: Screw in the Window
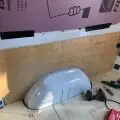
As long as you traced and cut well, your window should slide right in! Windows 1 and 2 fit in perfectly, window 3 took a few tries…With your window placed where you want it to be, fit the trim ring around the inside edge and screw it in with the screws provided.
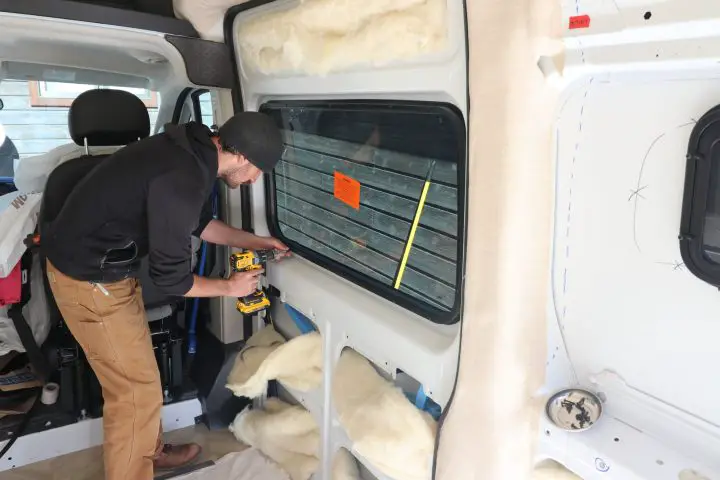
Pro Tip: The screws are VERY temperamental and if you screw them in too hard, metal on metal will cause them to break and your window won’t be as structurally sound. Screw them all in about 60% and then come back and finish them by hand.
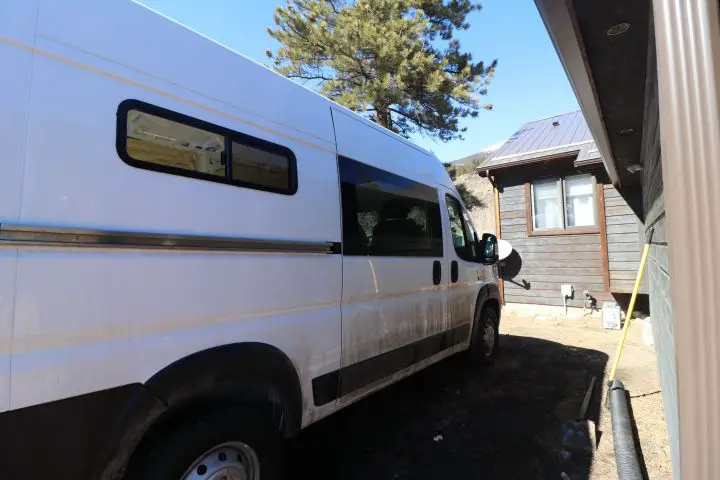
Look how great she looks with those fresh windows!

Make sure to take a cool selfie with your handiwork
Tips and Tricks
Removing the Beam on Your Van Wall
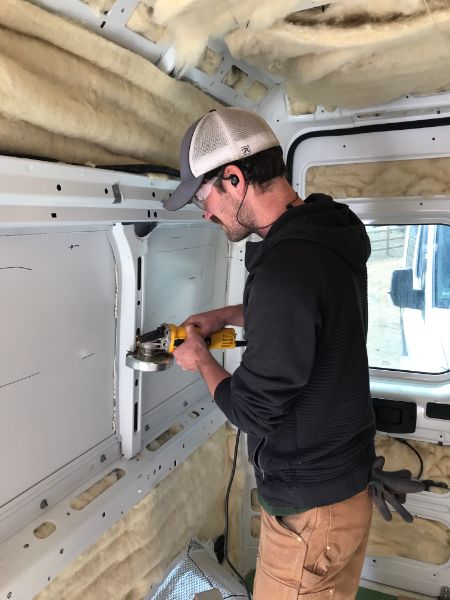
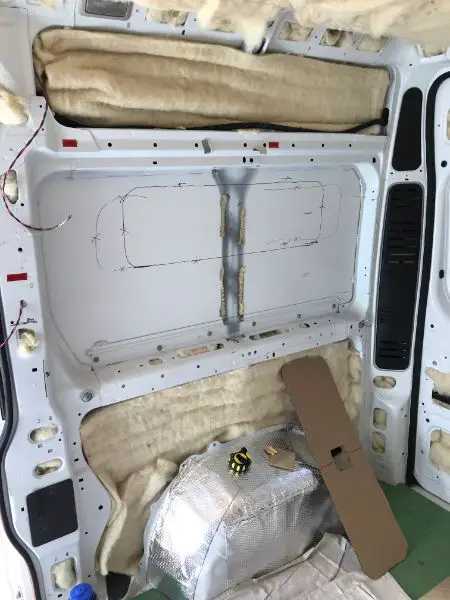
If you’re feeling a little more adventurous with your window installation and/or you have access to more power tools, removing the beam on your van wall will help you trace a more accurate template and cut a cleaner hole. Specifically if you have access to an angle grinder you can remove that piece easily! Here’s my before and after with the wall.
Keep It Straight!
When lining up your window to make sure it’s straight before screwing it in, take a look at it from the inside, outside, near, and far. The ribs of the van are not aligned with the ground and can be deceiving for what is straight.
Invest in Screw-In Windows
Although they are a bit more expensive, I would highly recommend investing in screw-in windows like the ones I got! If not, you’ll have to get window weld (MESSY) and trim lock which will add about $100 in materials anyway and the process is much more difficult. You will also have to let the windows settle/dry for 24 hours which means you won’t be able to open the door of the van or work on that side and hope for warmth and sunshine to let it fully dry.
For more on windows, read Brian’s guide on understanding RV windows.