Hey! This site is reader-supported and we earn commissions if you purchase products from retailers after clicking on a link from our site.
When it came to things I knew I needed for the van, frankly a ventilation fan never crossed my mind. That’s what windows are for, right? WRONG. For one, the windows in the back part of the van don’t even open so unless I open the doors, it’s impossible for me to get any fresh air in the van. Second, when I’m cooking I need a way for the gas from the propane stove to get out properly. Most importantly, my friend Mark likes to tell me that I need a way for all my farts to escape.
Timing & Level of Difficulty
4 hours. This was a nice afternoon project.
2 people needed. There are times when one person needed to hold the fan in place while another measure or drilled so having two people was really helpful.
Easy/moderate level of difficulty. The idea of the fan was very overwhelming but the instructions are SO straightforward that we were able to install it without any problems. The only difficulty might come from handling the power drill or jigsaw with the van’s sheet metal.
Materials You Need
| Material | How Much You Need | Cost Range | Where to Get It |
|---|---|---|---|
| Maxxair Ventilation Fan | 1 | $$$ | Amazon |
| Lap Sealant | 1 can | $ | Amazon |
| Sandpaper | 1 sheet | $ | Home Depot |
| Self-Piercing Lath Screws | 1 box | $ | Home Depot |
| 1×4″ 8-foot Beam | 1 | $ | Home Depot |
| Safety Goggles | 1 pair | $ | Home Depot |
| Adhesive Spray | 1 can | $ | Home Depot |
| 14-Gauge Wire | 10 feet (red and black) | $ | Home Depot |
| Wire Connectors | 2 | $ | Home Depot |
| 14-Gauge Spade Terminals | 2 | $ | Home Depot |
Tools You Need
| Tool | Cost Range | Where to Get It |
|---|---|---|
| Jigsaw | $$$ | Amazon |
| Table Saw | $$$ | Amazon |
| Power Drill | $$ | Amazon |
| Caulk Gun | $$ | Amazon |
| Clamps (4) | $ | Amazon |
| Pull Saw/Hand Saw | $ | Amazon |
| Cutting Pliers | $ | Amazon |
Cost of Installing a Roof Fan in Your Van
This was a fairly expensive project only because the fan cost so much money ($212). Luckily, the rest of the tools and supplies were very cheap. Overall, you’re looking at around $300 for this project.
How To Install the Roof Vent
- Cutting the fan opening
- Attaching the receiving flange
- Screwing the fan to the roof
- Fitting the interior garnish trim ring
- Connecting the fan to electrical power
So, clearly installing the fan requires a lot of steps. But luckily, each step was pretty straightforward and easy enough to accomplish. I was also very impressed with the instruction manual that came with the fan. Normally, instruction manuals are impossible to figure out, but this one was awesome. Okay, so let’s get started on what will be a fantastic project!
Step 1: Cut the Fan Opening
Although at this point I had already made several renovations to my van including screwing plywood to the floor, the first step for installing the fan required me to cut a GIANT HOLE in my roof. The previous modifications were pretty minimal and easily reversible. There was literally no going back at this point.
My dad and I hopped up on the roof (yikes!), took the base of the fan (called the Roof Receiving Flange), and traced it where we wanted to cut the hole. We placed it near the front of the van over where I knew I wanted the kitchen to be.
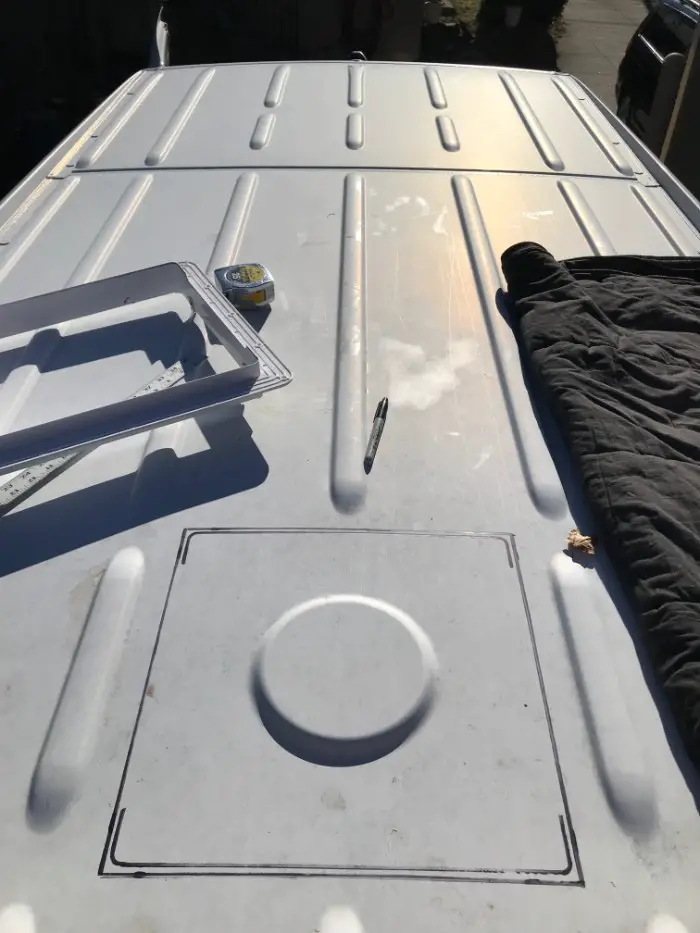
I installed my fan before my solar panels. If you are doing this as well, make sure you take into consideration where you want those to go when you are picking the placement of your fan. I used the foam packaging from the solar panel boxes to roughly mark where they would be. I only had two solar panels, so there was plenty of space. If you have more than two panels, you may have to do more maneuvering.
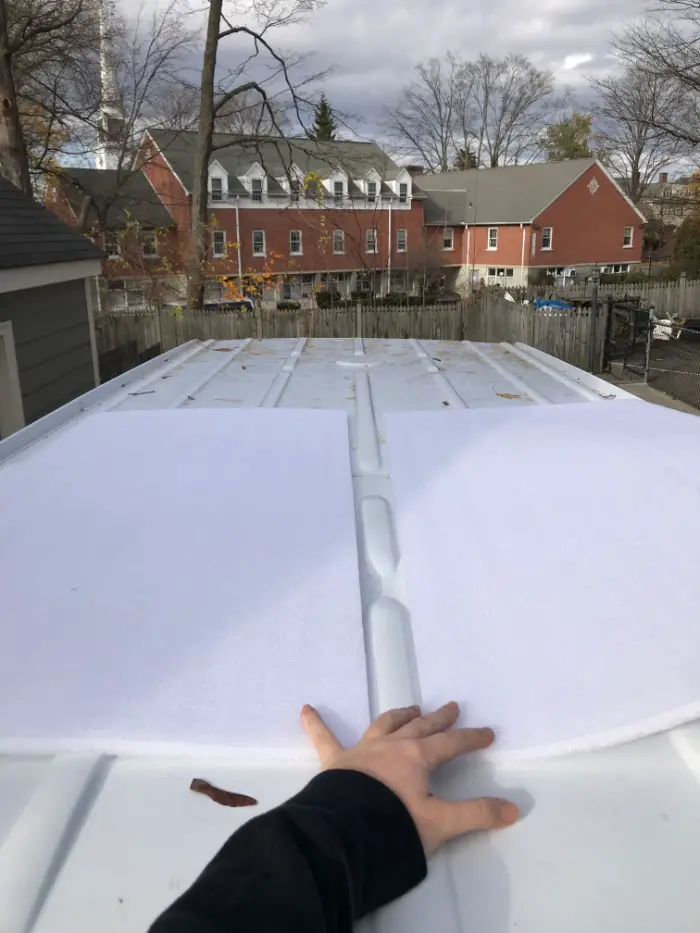
Once we had our outline, we used the power drill to drill a hole in each corner. With those openings cut out, we were able to use the jigsaw to (carefully) cut along the line until the square popped right out!
I am the worst when it comes to power tools and safety. What are gloves? What is going slowly? What are instructions? But WEAR SAFETY GOGGLES when cutting out your hole!! Because you’ll be cutting into sheet metal, little shards of glass and metal will by flying directly at your eye. So unless you’re going for a pirate look with a nice eye patch, safety goggles will be your best friend.
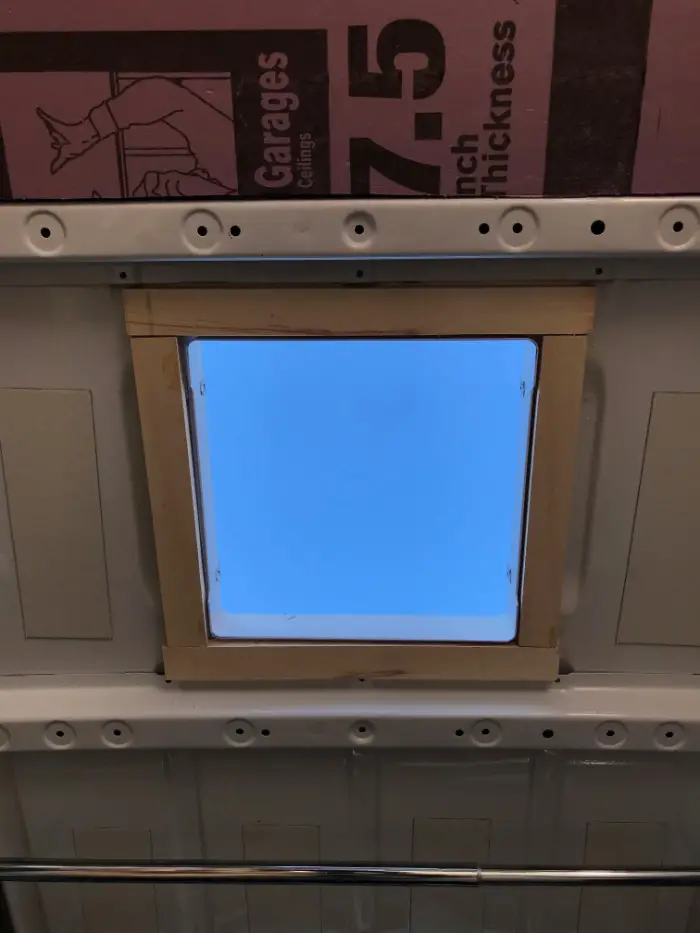
OMG there’s a hole in my roof.
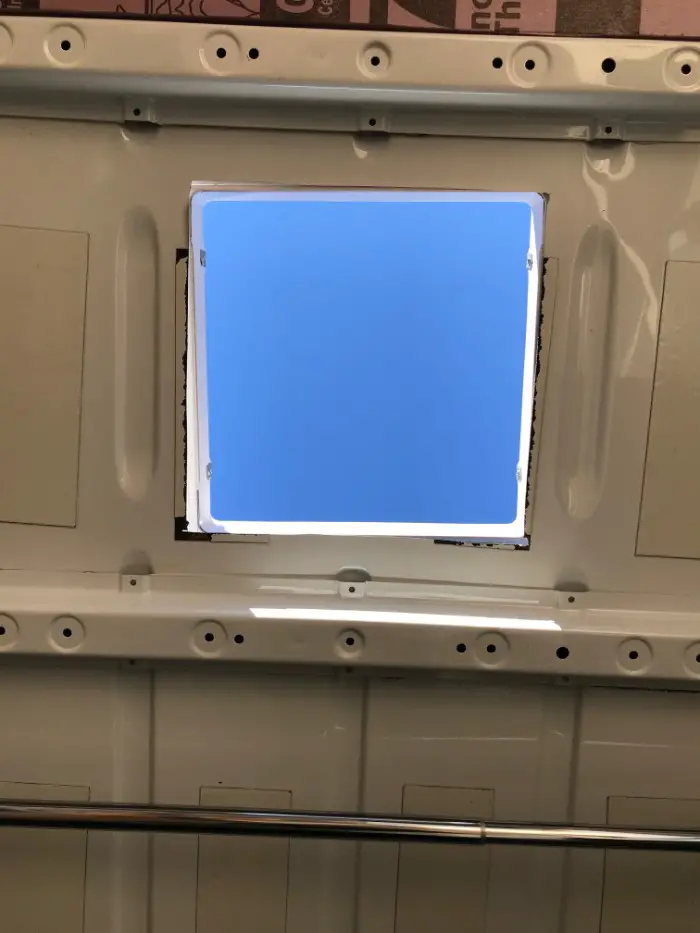
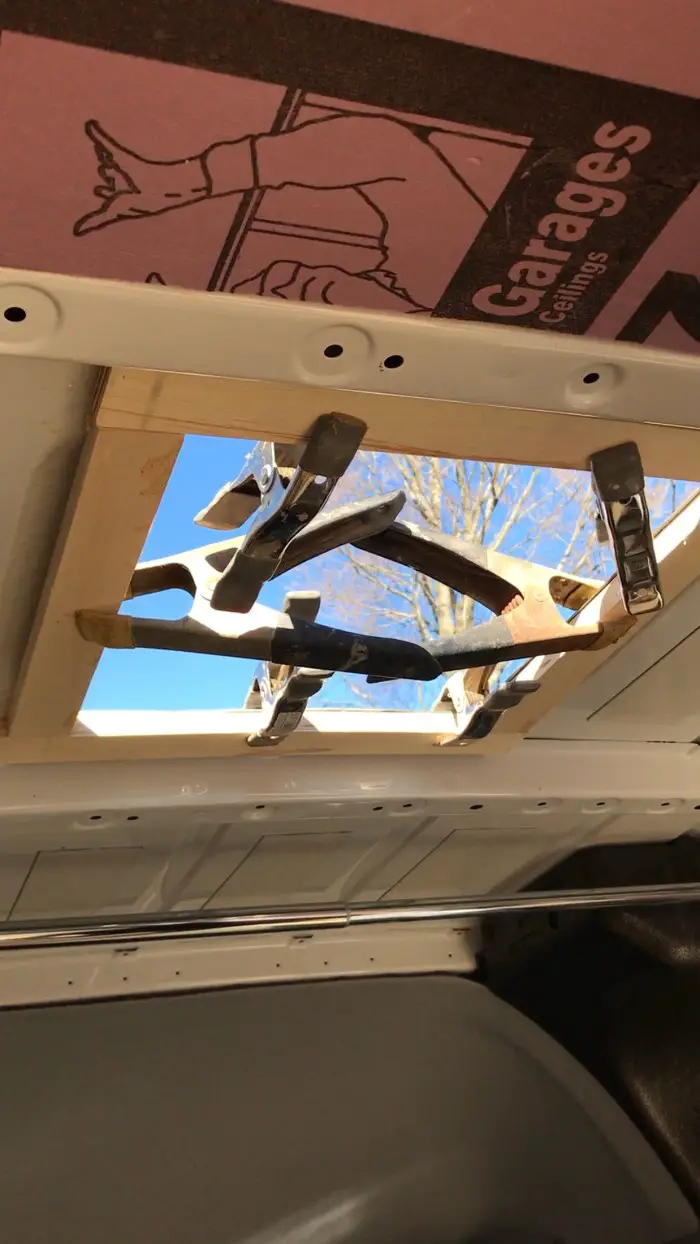
We tried out the receiving flange on and it fit perfectly!
Step 2: Attach the Receiving Flange
Now that we had our hole, it was time to attach the receiving flange! This is also where we diverted from the Maxxair instruction manual a bit. According to the instruction manual, we were supposed to glue the flange to the roof and then screw it in using the screws that came with the kit. My dad wanted something more for the flange to attach to so we decided to put a wooden frame around the hole on the inside of the van.
After using the sandpaper to smooth down the hole on the inside and outside, we cut a 2×4″ beam down the middle with the table saw to make a 2×2″ beam. We then cut two strips at 13″ in length and two at 9″ in length to make our frame. We made sure they fit snugly and then used the super glue spray to attach them to the roof and used the clamps to hold them in place while they dried.
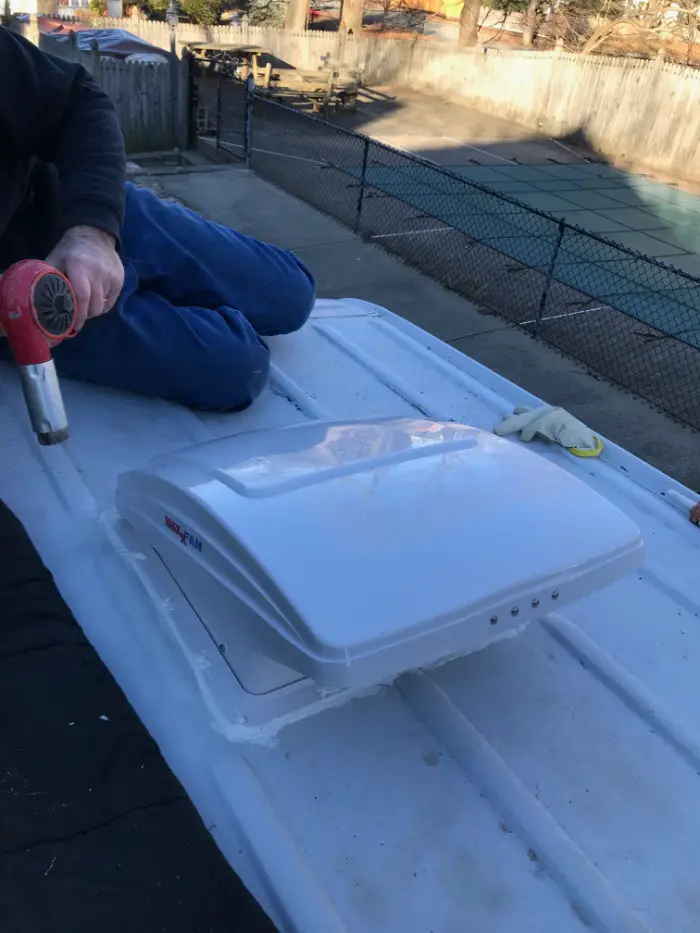
Once the glue was mostly dried, we hopped back up on the roof to actually attach the receiving flange. With the caulking gun, I put the lap sealant all around the edge of the hole and placed the flange on top. Next, I used the power drill to screw the flange into the roof using the screws provided in the kit. I wanted to be extra careful with the sealant, so I applied more on top of the screws and around the edge of the flange. No water will be leaking in this hole!
Step 3: Screw the Fan to the Roof
With our receiving flange all screwed in, it was time to attach the actual fan! Basically, we just lowered it into the receiving flange and fastened it at the connecting holes with the screws provided.
Just like with some of our other steps, we were working in weather conditions that weren’t the best for some of our materials, mostly the glue and lap sealant. To make sure it was sealing properly in the cold, we used a heat gun to expedite the drying time. It was an extra precaution but it seemed to do the trick!
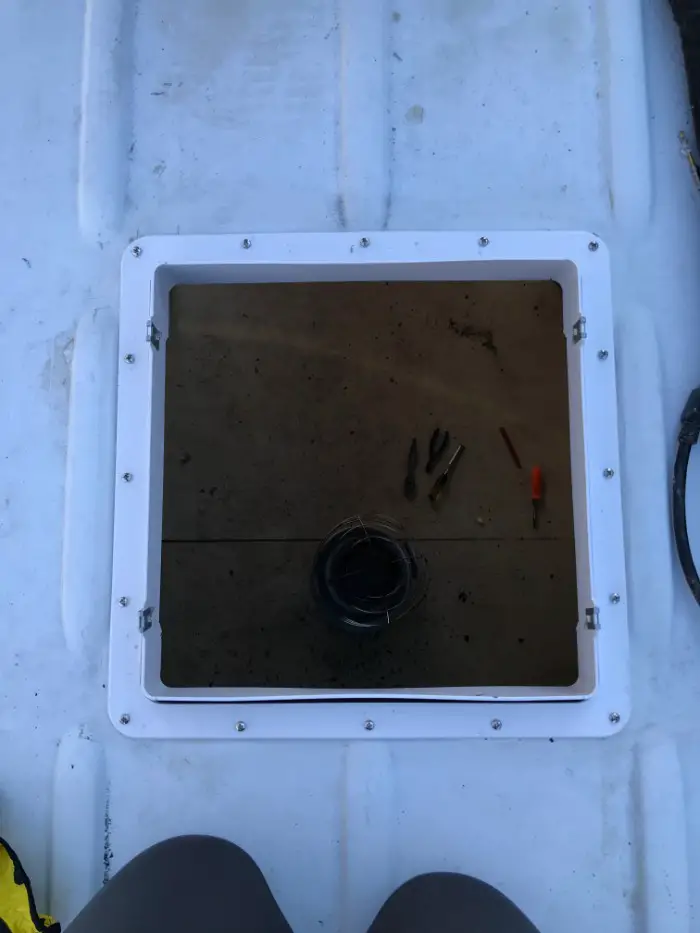
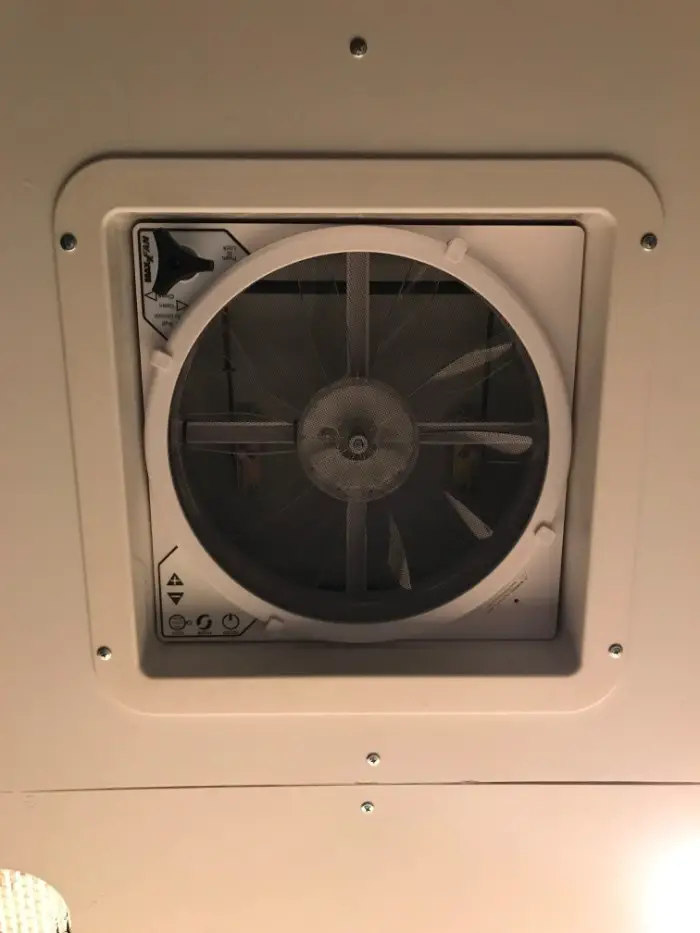
Step 4: Fitting the Interior Garnish Trim Ring
The fan was installed and on the outside on the roof, it looked awesome! On the inside, it definitely still looked unfinished because of the plastic and wires that were hanging out.

At this point, I had to take a pause from my final fan installation until the ceiling was more complete. The Maxxair fan kit comes with an interior garnish trim ring to be fitted around the hole on the inside of the van. It purposefully comes too long to actually fit next to the fan with the idea that once you figure out how deep your ceiling will be, you can cut the ring to fit accordingly.
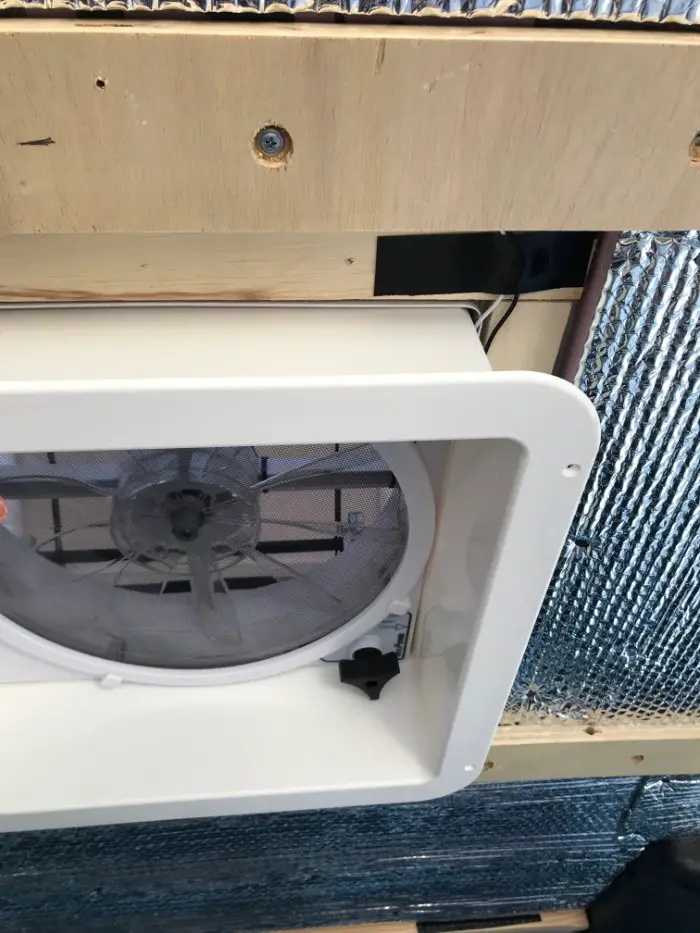
A couple weeks later, the insulation was finished on my ceiling and I knew the width of my ceiling panels so I was able to cut down the garnish ring to fit the hole. I traced a line where I wanted to cut and made my first incision…with a jigsaw…which was a horrible idea. It turns out that trying to use a jigsaw to cut relatively flimsy plastic boxes makes the saw jump out and the box go flying. SO we decided to use a manual saw instead and settled on a pull saw, but pretty much any hand saw would be just as effective.
We cut the ring, fit it in, and it looked great! A couple weeks later, we finished our ceiling panels so we were able to officially attach the garnish ring. All we had to do was slide it in and drill in the screws using the power drill.
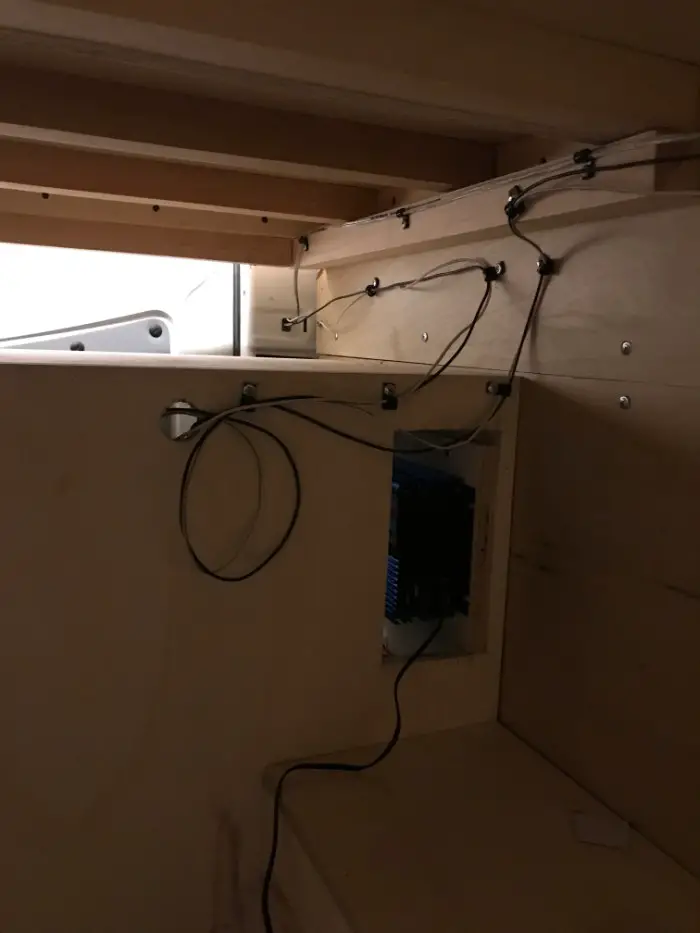
Step 5: Connect the Fan to Electrical Power
The final step of the fan installation is connecting it to power so that you can, ya know, use it. Luckily, the fan comes with two wires that are labeled ‘positive’ and ‘negative’ so all I had to do was connect the respective wires to their positive and negative partners and connect those wires directly to the fuse bar in my electrical box.
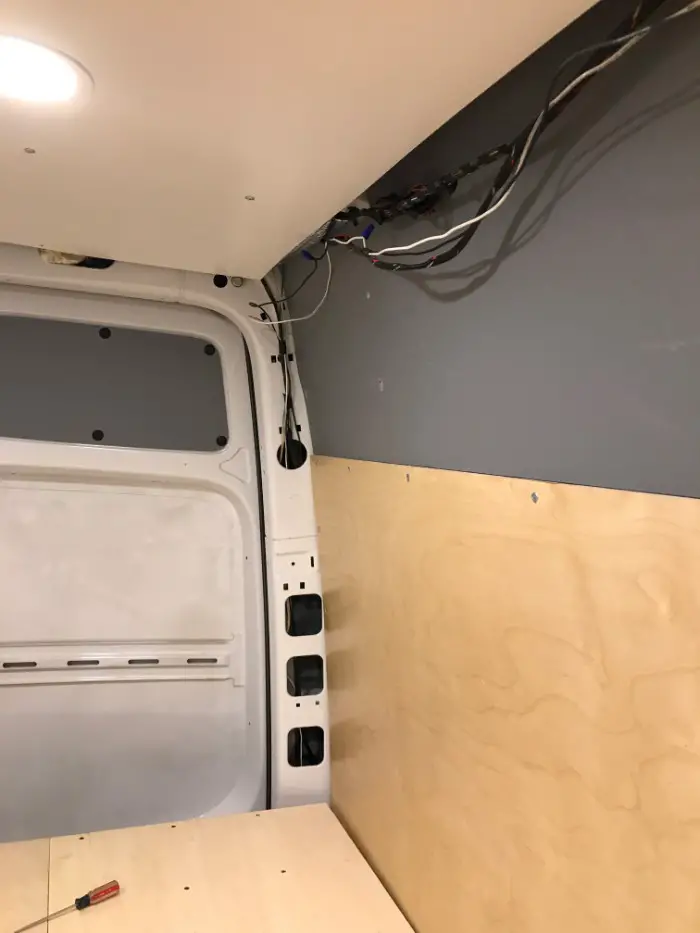
These are the wires leading from the fan down the side of the van and eventually to the fuse bar in the electrical box.
The final test was to see if it would actually work…we turned it on and air started circulating immediately! Fantastic!

Enjoy a beer (or your beverage of choice) because you’ve earned it!
Final Tip: Find the Right Fan for Your Situation
Do some research on what kind of fan you’d like for your van. I decided on the Maxxair because it made the most sense for my setup and my budget. There are other fans that come with remote controls (mine is manual) and some that come without rain covers (I don’t recommend that). This one was super easy to install and so far it seems to be working perfectly and brings a nice flow to my van! It also effectively clears out all my farts which is key.