Hey! This site is reader-supported and we earn commissions if you purchase products from retailers after clicking on a link from our site.
Let’s face it RV owners, there’s a good chance that at some point you’ll need for DIY RV roof repair, especially if you own it for several years, use it often or your RV is exposed to varied natural elements. Another thing to keep in mind when using your RV, is that when you are in motion, you’re exposing your RV roof to the constant wind leading to the need for an RV roof repair.
More so than traditional homes or businesses, so this causes additional stress to your RV roof as well as other components that may be attached to your roofs such as vent covers, air conditioning units, or solar panels for those that enjoy boondocking.
In this article, we’ll examine what types of roofs are used for RVs and how to identify those roofs to conduct proper DIY RV roof repair. I’ll also explain the differences in rubber roofing and what may work best for you when replacing this type of roofing. Additionally, I’ll touch upon the importance of proper RV roof maintenance, how often you should inspect your RV roof, and what course of action you should take for any RV roof repairs or replacements.
Table of Contents
- Identifying Your RV Roof Type
- How to Replace or Repair Your Roof – RV Roof Repair
- Remove the Termination Bars
- Installing a New Rubber Roof
- Reattaching Your Termination Bars and Fixtures
- Final Thoughts
Identifying Your RV Roof Type
As RV owners, in today’s world of RVing, there are really only four different types of roofing currently being used by manufacturers and unless you have a self-built RV or an antique RV built before World War II, it’s unlikely that your rig has a tin or wooden RV roof.
Aluminum Roofs
With that said, the most uncommon RV roof you’ll find in today’s commercially manufactured RVs is an aluminum RV roof. Generally, the weight of a suitable-sized piece of aluminum of the correct thickness, width, and length will add more weight as well as more costs.
However, there are some exceptions, such as manufactured and home-built teardrop campers and of course, the iconic Airstream trailers which are still made completely of aluminum as they were when the company was founded by Wally Bram, a noted publisher who lost his company in 1929 when the stock market crashed.
At that point, Bram decided to go in another direction and as a hobby, he started building travel trailers. He started first by building them out of Masonite, but quickly learned that this material didn’t stand up to the elements and chose to switch over to aluminum which was rust resistant and far more durable than tin.
Soon, neighbors and friends admired his prototypes and he started taking orders from these folks to build more travel trailers from his home workshop near Los Angeles, California. Popularity for this newly discovered freedom quickly grew and Bram then built a manufacturing plant and Airstream, Inc. was off and running.
Unfortunately, in 1941 the United States entered World War II and production of travel trailers ceased. However, Bram was undeterred and just as many other manufacturers did at this time, he began making surplus items needed for the war effort.
When the war ended, Americans were hungry for travel, cars and trucks were being manufactured again, the housing market was booming and of course, the Federal-Aid Highway Act of 1956 started the ball running for the RV industry too.
Fiberglass roofs
The third most popular RV roof is a fiberglass roof. While Wally Bram was manufacturing his travel trailers using aluminum, a Canadian named Ray Olecko developed a handheld slingshot made of a new composite known as fiberglass epoxy resin. These toys were extremely popular in the 1960s and he formed the Boler Manufacturing Company in 1963 and started mass producing his slingshots.
Two years later, Olecko was working for a company called Structural Glass Ltd., a Winnipeg company that started operations in 1961 and manufactured septic tanks. It was here that he began studying how fiberglass molds were designed for larger products and being a travel and outdoor enthusiast, he came up with the idea of a fully enclosed fiberglass box that could be attached to a prefabricated trailer making it structurally stronger than most other travel trailers being manufactured at the time.
In 1968, knowing that manufacturing the body and building a finished product was going to be far more costly than making slingshots with fiberglass, Olecko quickly took on a business partner and the “Boler” travel trailer was soon to be on the market. Sales were brisk, but the newly formed company lacked employees and manufacturing space and was only able to produce three travel trailers a week during its first year.
Popularity for the Boler travel trailer gained a lot of momentum and by the summer of 1969 Olecko and his partner Sandor Dusa, the mold maker he was employed with when they worked together at the septic tank manufacturer, knew they had to take on more partners. And they did.
Soon, the Boler travel trailer was being manufactured at four times the rate of the previous years and they had added a pickup topper to their product list as well. Over the years the Boler travel trailer was manufactured over 10,000 times and the company ceased production in 1988. With that said, the initial design concepts and manufacturing processes are still used today in such camper models as the Trillium, Scamp, and Casita all still manufacturing light-weight fiberglass trailers that started with the Boler.
Today, fiberglass roof isn’t as popular as it once was. It’s still used in some components of many RVs, but it’s still heavy and hard to work with when repairs are needed. Repairing a tear or hole in your fiberglass is time-consuming, labor-intensive, and sometimes extremely complicated.
However, I’ve spent a lot of time restoring old travel trailers and boats from that time era because I love the design and lines and if that’s what you want to do, then go for it. You’ll be glad that you did. In a future article, I’ll share some of my tips for upgrading a vintage travel trailer using fiberglass and how sometimes using an epoxy fiberglass resin will add to the design and value of the RV.
Rubber Roofs
The last two types of material used for most RVs being manufactured now are made of rubber or composites and polymers that are in the rubber family. Of those two choices, the Ethylene Propylene Diene Monomer (EPDM) is less preferred by most DIYers and manufacturers because this application is heavier, stiffer, and harder to install when in sheet form.
Oddly enough, the TPO (Thermal Poly Olefin) RV roof is the most popular rubber composite RV roof currently being installed these days by DIYers and many manufacturers. However, it is more expensive and lasts half the time than an EPDM roof lasts.
Now that we have identified the type of RV roof, you should always examine why the manufacturers chose to seal their RV roofs with a product that costs less and is harder to install. Why didn’t they install an RV roof that lasts longer, costs more, and is easier to install?
Repairing and replacing your RV’s roof is a complicated decision, and in my experiences of doing just that, I had to make many varied decisions based on my RVs construction. Below, I’ll share my tips for working with rubber roofs, as well as repairing older types of RV roofs.
How to Replace or Repair Your Roof – RV Roof Repair
Now that you have determined the type of your RV’s roof, it’s time to evaluate the extent of the damage to your roof and other parts of your RV, and then begin the necessary RV roof repair. Above, we covered the four types of RV roofs you’re likely to encounter when making RV roof repairs with those being, aluminum roof, fiberglass roof, and the last two which are different types of rubber or rubber composites and polymers that are in the rubber family.
Below, I’m going to focus on how to conduct RV roof repair or replacement on rubber roofs as these are the more popular type of RV roofs and the ones you’ll likely encounter when working on an RV roof repair. First, we’ll begin by explaining how to replace the TPO and the EPDM in sheet form, and then we’ll look at replacing your RV roof with EPDM in liquid form.

- Will not chalk, fade, or streak
- Color is balanced throughout roofing membrane
- UV protection
Last update on 2025-06-21 / Affiliate links / Images from Amazon Product Advertising API
TPO and EPDM can each be purchased in full kits such as the one shown here. As a rule, the width will always be the standard 8.5 feet that will cover any RV with a couple of inches left over that will need to be trimmed off once the RV roof is in place. However, the lengths of the rolls of roofing vary, so you’ll need to measure your RV roof before purchasing a kit, so you don’t come up short or order more than you need.
Remove Fixtures
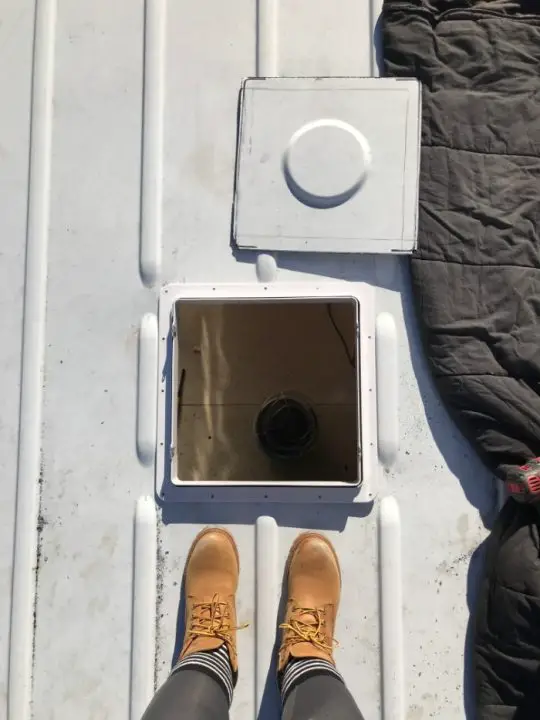
Before you begin your RV roof repair, you’ll need to remove any fixtures from your RV roof. These would include vents, antennas, and even air conditioning units. Basically, anything that would obstruct you when you lay out and adhere to your new RV roof sheeting.
To start this process, scrape away any of the old RV roof sealants around your fixtures. For this task, I recommend using high-quality stainless-steel putty knives to carefully remove the old RV roof sealant. If you plan on reusing the fixture, you’ll need to be careful when removing the old sealant to avoid any damage to the fixture.
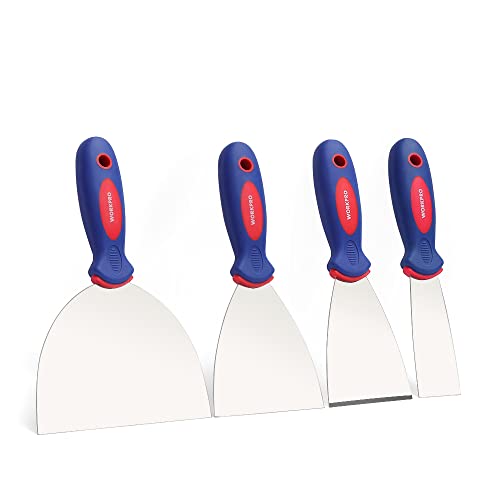
- High Quality: These putty knives are made of stainless steel, ensuring high quality, flexibility,...
- More Robust: Mirror-polished for enhanced durability and rust resistance. Note: After using the...
- Safe to Use: The ergonomic handle, made from PP & TPR materials, provides a comfortable and soft...
Last update on 2025-06-21 / Affiliate links / Images from Amazon Product Advertising API
Now that you have removed any sealant from around and on your fixtures, you’ll need to remove the fasteners that secure those fixtures to your RV. Typically, manufacturers use Philips head screws or ¼” hex head screws to attach fixtures to an RV, so it’s in your best interest to have those two drill bits on hand when you remove your RV roof fixtures.
Remove the Termination Bars
Once you have removed your RV roof fixtures, the next step in the RV roof repair process will be to remove your termination bars along the sides and the front and back of your motorhome or camper. The terminations bars are sometimes referred to as termination boxes, these are usually in the rear and contain your upper marker lights and wiring too.
The termination bars or boxes secure the edges of your RV roof to the framework and when installed properly will prevent any moisture from breaching the seals and leaking into your RV.
Just like your fixtures, these are likely to be secured with Philips-head screws or hex-head screws although it’s not unusual for the manufacturer to use rivets when attaching your termination bars or caps. If this is the case, then you have two options when removing rivets. The first would be to drill them out with a bit just a little larger than the rivet, or my preferred method for rivet removal is to use a sharp wood chisel and a hammer to break the head of the rivet.
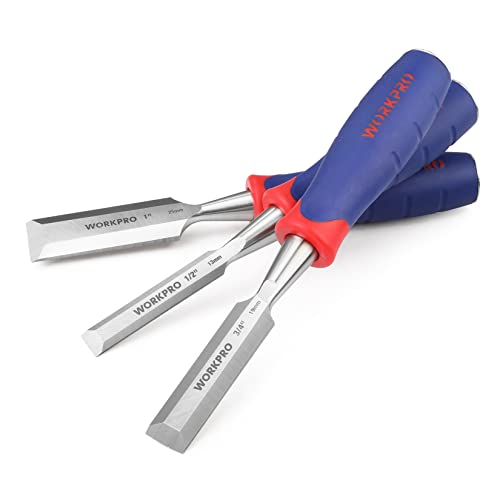
- Drop forged chrome-vanadium steel blade for durability and heat treated for edge retention;
- Bevel Edge for woodworking carving multi-purpose use, suitable for all soft wood, hard wood and...
- Steel butt designed for heavy pounding with a hammer or mallet;
Last update on 2025-06-21 / Affiliate links / Images from Amazon Product Advertising API
Once you have done this, the termination bar can be pulled away from the surface. However, it may be necessary to use a wrecking bar (or even the wood chisel) to pry the bar up if the caulk or butyl tape is holding it in place. Don’t worry about the rest of the rivet, this can be tapped back into the body of your RV and you’ll just use a self-tapping hex-head screw when you need to reattach your termination bars. Remove your termination bars carefully so you don’t break them and be sure to thoroughly remove any sealant from them before you put them back in place.
Pro tip: Replacing your RV’s roof can be time consuming, especially when doing it by yourself. For this reason, I recommend that you have a tarp or two on hand in case it rains.

- 100% HAPPINESS GUARANTEED: We strive for excellence, we’re proud of each and every King-A-MA-JIGS...
- LIGHTWEIGHT: An alternative to our more expensive, heavy duty large tarps that are meant to last...
- TARPS: Ideal tarp to bring on a hunting, backpacking, or outdoor camp camping trip, as it does not...
Last update on 2025-06-21 / Affiliate links / Images from Amazon Product Advertising API
While it’s always best to make these types of RV roof repairs as quickly as possible, sometimes that can’t be done. Weather issues or the discovery of a larger problem such as having to replace some of your roof’s base before the rubber membrane is attached can cause delays.
Frankly, it’s best that you have all your ducks in a row when taking on any DIY project, but it’s especially important when you take on this task. Simply put, plan for delays, plan for added cost and have a plan on how to deal with those problems.
Remove the Old Rubber Roofing
Now that you have removed your fixtures and termination bars, it’s time to remove the old rubber RV roof. As a rule, much older rubber RV roof is made of two-ply applications with the bottom ply being black in color and the top ply being white so it reflects UV light and helps to keep your rig cooler during warm weather when most people use their RVs.
So, in a nutshell, if you climb up on your RV roof and see that it’s black with patches of white or vice-versa, you’ll know that the rubber RV roof needs to be replaced.
To remove your old RV rubber, you’ll probably going to be using your putty knife again. I recommend using a knife that is six to eight inches wide because it’s likely that your old RV rubber roof is going to come off in small pieces.
Pro tip: If your old roof is coming up in small pieces, instead of throwing the pieces down to the ground and then having to clean them up later, take a garbage bag and insert it through one of the openings from where you removed your fixtures. Use some duct tape to keep it in place and as you accumulate the waste, simply sweep it into the bag. This will save you a tremendous amount of time and energy when it’s time to clean up.
Inspect Your Plywood Sub Roofing and Remove Damaged Areas
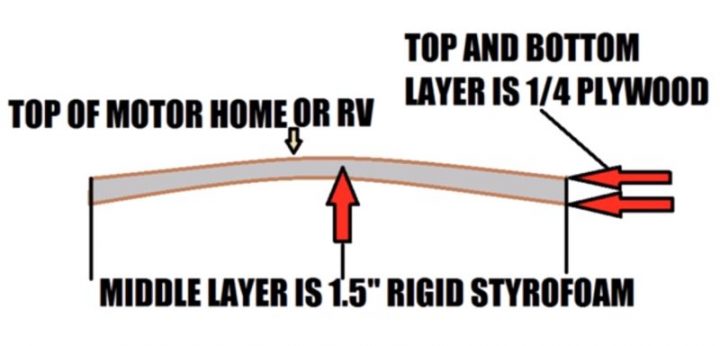
Now that you have removed the old roofing material, the next step in the RV roof repair is to thoroughly inspect your plywood sub-roofing. Normally, your RV roof will be two inches thick, with your ceiling consisting of two ¼-inch plywood sheets and 1½ inches of rigid Styrofoam in between the plywood. If you discover any damaged wood, this would be the time to replace that material.
Unless you’re replacing an entire sheet of plywood, it’s likely you’ll need to cut out a section of your old roof. While you can use a full-size circular saw to do this task, it’s difficult to get all the way to an edge because of the size of the saw blade.
For this reason, I recommend using a mini circular saw. They’re lighter, will get you closer to an edge without overrunning it, and are extremely easy to operate. Also, it’s highly unlikely that your cut will be too deep when using a min circular saw.
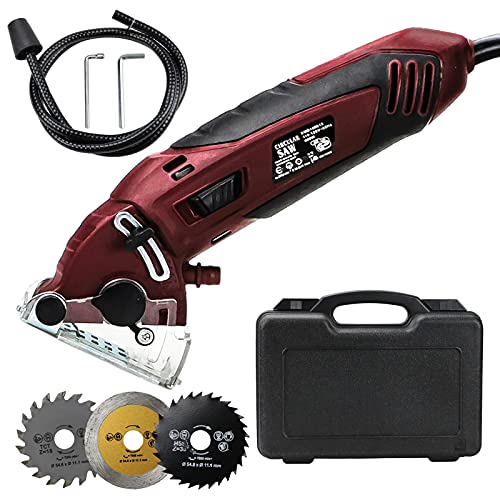
- Material: The multifunctional circular saw is made of high quality metal alloy material, with...
- Multifunctional Mini Saw Set Includes: Mini Electric Saw + 3 Saw Blades + 2 Hex Keys + Silicone Cord...
- Ergonomic Handle: The soft and comfortable leather handle can effectively reduce the impact force...
Last update on 2025-06-21 / Affiliate links / Images from Amazon Product Advertising API
Keep in mind that when you do remove a plywood panel (or a section of one) that it’s likely to be screwed down and secured to the Styrofoam by an adhesive. You’ll need to take extra care when removing the old plywood and this is again another example of when your putty knife will come in handy to avoid damaging the insulation.
Place the New Plywood
Once you have removed the damaged area of your RV roof repair, be sure to thoroughly clean the Styrofoam surface. If the surface is smooth, it would be a good idea to give it a nice tooth for the new foam glue to adhere to. For this task, use a wire brush but don’t get too aggressive as you only need to roughen the surface lightly.
Now that you have prepared the surface for the new plywood, cut the plywood to size and dry fit it in place. Depending upon the model of your RV, you’ll either have wooden 2”x2” framing or the same size aluminum framing. If the framing is metal, you’ll need to install your new wood with self-tapping screws suitable for wood or metal use.
Now that you have dry-fitted the replacement panel in place, drill a pilot hole in each corner and secured the wood in place temporally with four of your wood-to-metal self-tapping screws. The next step is to use a countersink drill bit where your framework aligns with your panel and pre-drill a hole every five inches. This will ensure that your screws will be flush with the surface.
Now, remove the panel and set it aside.
Install the Replacement Panel
Now that you have prepped the Styrofoam and the replacement panel, you’re ready to install the panel permanently. For this task, I recommend Great Stuff Pro Series® foam adhesive and a foam gun.
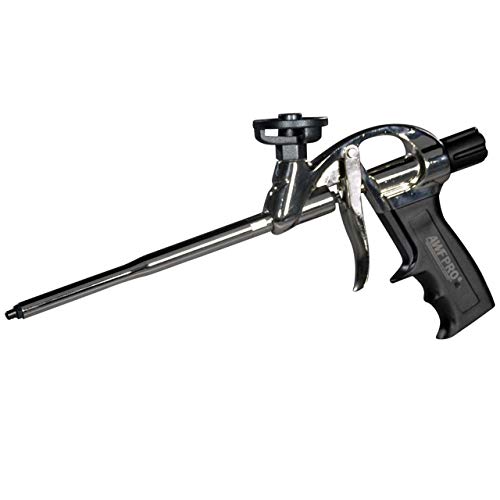
- Compatible with Great Stuff PRO and other branded PRO foam cans
- Designed with top-grade materials for High-quality performance and longevity
- Proper cleaning and storage ensure reliable functionality, making this a long-term investment
Last update on 2025-06-21 / Affiliate links / Images from Amazon Product Advertising API
While the foam gun is not necessary for this repair, it will save your foam from setting up inside the cheap plastic tube that they supply you with when you purchase the adhesive. Its been my experience that when using any foam product, the products harden quickly, and you waste what is left in the can because the applicator is clogged up with hardened foam. To prevent this from happening use a gun but be sure to immediately use a can of cleaner after you have run foam through the gun. This will flush out your gun and you’ll also be able to use what’s left in the can for a future project or another RV roof repair.
Spray your foam adhesive on the Styrofoam in lines approximately two inches apart and immediately lay your panel in place. Using your wood-to-metal self-tapping screws, secure each corner in place, and then start using installing the rest of the screws into the countersunk holes you drilled earlier.
Once you have your panel in place, it’s a good idea to use some stucco patch in the seams and any screw holes that may be too deep. Simply apply it with a putty knife, wait for it to dry, and sand it smooth.
Seal the Seams
The final step for preparing your RV for its new rubber roof is to seal all the seams. For this, I recommend using Ziollo RV Flex Repair Tape. This tape is peel and sticks so you can apply it in small increments and using the brayer that comes with the purchase of the tape, you can easily force any air bubbles from under the tape. Now that you have done this, you’re ready to install the new rubber RV roof.
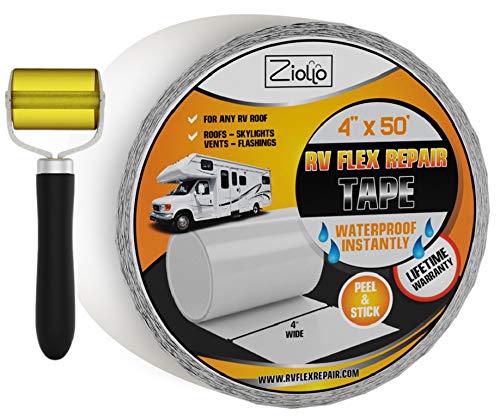
- CAMPFIRE STORIES OVER ROOF WORRIES — While other waterproof tapes peel faster than marshmallows...
- DIY WEEKEND WARRIOR APPROVED — One simple roll tackles 25 feet of trouble spots in minutes. Our...
- FREE SEAM ROLLER INCLUDED — Every roll comes with our handy yellow tape roller to activate the...
Last update on 2025-06-21 / Affiliate links / Images from Amazon Product Advertising API
Installing a New Rubber Roof
For this part of the RV roof repair, I recommend that most people buy a complete roofing kit suitable for the length of their RV, however, you can install your new roof using individual components purchased separately. For example, I prefer to use Dicor® as a sealant along my termination bars or my fixtures. Frankly, if I were to buy a kit to replace my rubber roof, I would give the sealant from the kit to someone that needed it or I would save it for another project where I could test it out.
It doesn’t matter whether you lay your new rubber roof from the front of the rig to back of the rig, or from the rear to the front, what does matter is that you lay it correctly. Personally, I recommend going from front to back as it’s likely that you’ll need to tuck some of the EPDM material under some flashing or fiberglass overlay.
With that said, you should begin the installation by attaching your new rubber roof at least 24” from the front or back of the RV. In other words, it’s easier to come back to that part of the installation than to start from that location. I recommend rolling out your new rubber covering in small sections of three to four feet lengths and laying down a generous amount of adhesive beforehand.
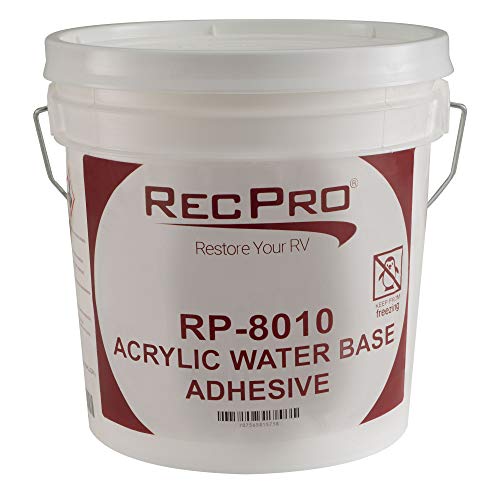
- Universal adhesive for RV Roofing
- COLOR: White
- COVERAGE: 160-200 sq ft/gal (1side @ 8-10 mil)
Last update on 2025-06-21 / Affiliate links / Images from Amazon Product Advertising API
As a rule, the rubber needs some time to relax and the ideal temperature for proper installation is 75º(F) or higher. After you have applied the adhesive to the area with the appropriate applicators shown here, roll the rubber onto the rubber roof.
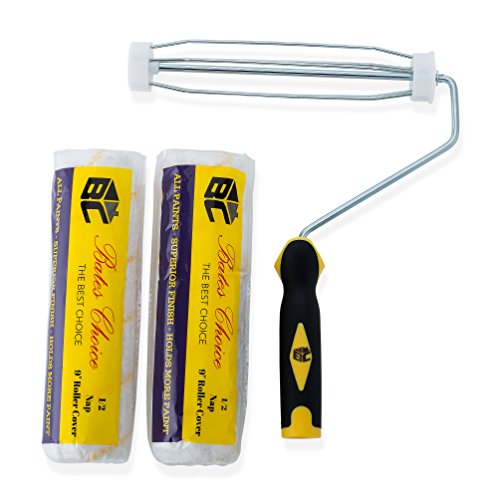
- Professional 9” Roller Frame And 2 Roller Nap
- Package Includes 3 Pieces: 1 Paint Roller Frame (9-Inch), 2 Roller Covers (9-Ich)
- Roller Frame: Sturdy 5 Wire Cage With Nylon End Caps, Comfortable And Lightweight While Durable And...
Last update on 2025-06-21 / Affiliate links / Images from Amazon Product Advertising API
Just as you did when you applied the flex tape, you’ll need to push air bubbles from under the rubber coating. The small brayer that was supplied to you when you purchased the tape is not going to be enough to accomplish this task as quick as you should. For that reason, I recommend using a common kitchen rolling pin to speed up that process.
Once you have forced air bubbles from under the coating, repeat the process until you reach the end of your RV and at this point you can trim away any excess roofing material with a utility knife. Remember to return to the front of the RV and finish off the small section that you didn’t glue down when you started this part of the rubber roof installation. Also, be sure to mark the openings for your fixtures to avoid stepping into one of them.
When cutting out the fixture openings, go inside and drill a hole through the rubber in each corner of every opening. This is done to prevent the rubber from tearing. Now go back up top and cut the openings for the fixtures from hole to hole.
Reattaching Your Termination Bars and Fixtures
The final step of the RV roof repair is reattaching the fixtures and termination bars. Here, you must make sure any caulk or old sealant is thoroughly removed and the surfaces of the fixtures, termination bars, and the RV and completely clean and free of any debris.
Apply Butyl tape to your fixture and termination bars before you screw down these items. This tape is two-sided, and it will form a strong bond between your RV and fixtures.
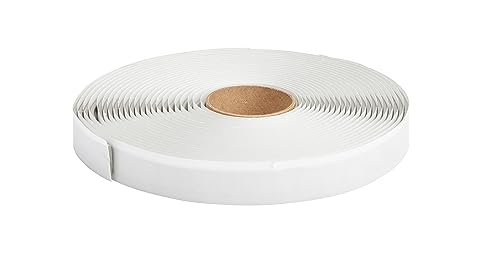
- TAPE USE: Ideal for sealing uniquely shaped joints; Installs quickly, without gaps; Because the...
- EASY APPLICATION: Sticks and conforms to any smooth or irregular surface, including S-locks; Apply...
- USE WITH COMPATIBLE PRODUCTS: Provides an instant and permanent seal underneath the caulk-and-frames...
Last update on 2025-06-21 / Affiliate links / Images from Amazon Product Advertising API
If you are using the same holes to reattach your fixtures, consider filling them first. I like to use wood glue and kitchen matches for this task. Simply remove the match tip, spread the glue on the matchstick, then use a small hammer to tap it into the hole. Repeat as necessary until the filler wood is good and tight in the screw holes. Sometimes I even use toothpicks around the matchsticks to get more wood into the holes.
When reattaching your termination bars, I recommend using 1½” metal to wood galvanized roofing screws. These hold up well to the natural elements and the rubber washer on these screws prevents any moisture from leaking into your RV.
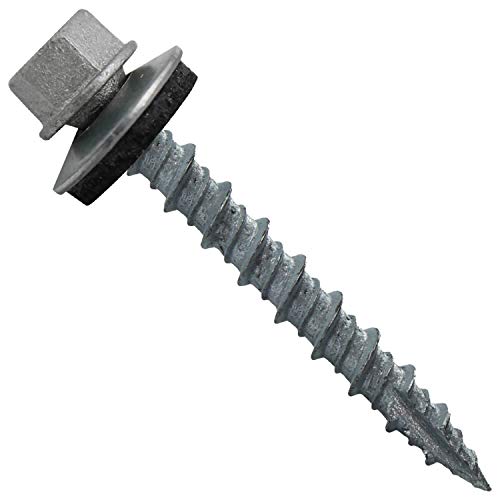
- Metal Screws are painted to closely match many brands of metal roofing though color may vary
- Colored roof screws head are painted with a two part polyurethane for longer product life (Not Zinc)
- Corrugated roofing and corrugated siding screws for pole barns, storage shed, shops, etc
Last update on 2025-06-21 / Affiliate links / Images from Amazon Product Advertising API
Once you have done this task, all you need to do now is to seal your termination bars and fixtures edges or sides with lap RV roof sealant such as the one provided with your kit or my personal favorite, Dicor (it’s on our list of the best RV roof sealant too). And, now you’ve successfully completed your RV roof repair.
Final Thoughts
As RV owners, repairing and replacing components due to wear and age is a necessary evil. The best way to avoid these issues is to always best to inspect and maintain your rig to the best of your ability. In the long run you’ll be glad you did, as it will save you hundreds of dollars, a lot of work, and numerous headaches.
In a previous article about maintaining and inspecting your RV’s most important components, I took a look at what you should always be concerned about when maintaining your RV and how to avoid costly RV roof repairs. I hope you’ll look at that articles as it could save you time and money down the road.
As always, my friends, stay safe, stay healthy and I hope to see you on the road in the future.
Also be sure to check out Mike’s guide on the best RV roof cleaner.