Hey! This site is reader-supported and we earn commissions if you purchase products from retailers after clicking on a link from our site.
It happens in almost every RV out there on the road. At one point you’re likely to discover that your RV monitoring panel isn’t operating correctly. Several factors can cause this to happen, and, in this article, I’ll be sharing the best ways to troubleshoot your RV monitor panel as well as some things to do to remedy common problems you may experience with your RV monitor panels.
Does Your RV Monitor Have Power?
One of the most common problems with RV monitor panels is that they simply blow a fuse. Without a doubt, this problem can easily be solved by simply keeping replacement fuses on hand as well as the necessary tools to replace them.
Frankly, I highly recommend always having a ready supply of spare fuses on hand when RVing. More often than not, you’re going to need a fuse or two while traveling with your camper, tow vehicle, and motorhome and it’s always a good idea to have an assortment on hand when you’re on the road.

- 120 PCS INCLUDED:Package including 120pcs Standard Blade Fuses (5amp-10pcs, 7.5amp-10pcs,...
- EASY TO USE AND STORE:Color Coded for easy identification.Comes with a box with 6 compartments for...
- PROTECT FOR ALL:Protect your car and your electrical device from short circuit, overload, blow off...
Last update on 2024-07-14 / Affiliate links / Images from Amazon Product Advertising API
Is Changing the RV Monitor Panel Fuse Difficult?
Absolutely not. Simply locate your RV’s 12-volt fuse box and look at its factory-installed chart on the inside of the box door. This should indicate which fuse supplies power to the RV monitor panel.
Once that fuse is located, carefully remove the fuse using a pair of needle-nosed pliers. Be sure to not stick your pliers into the socket when removing the fuse. Instead, firmly grasp the fuse head and gently wiggle the fuse until it pulls out of its socket.
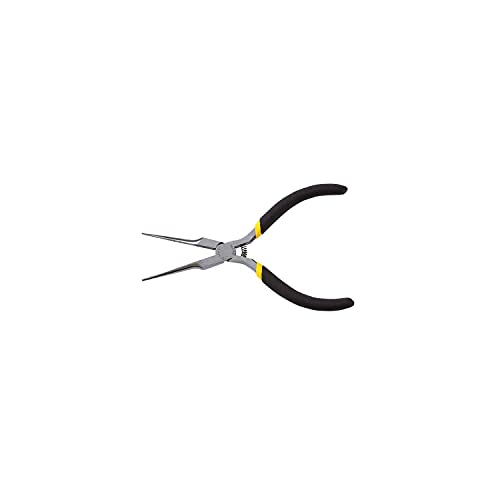
- Long tempered jaws for working in hard to reach areas
- Excellent for work in tight places
- Forged, chrome-nickel steel construction with rust-resistant finish, hardened cutting edges, and...
Last update on 2024-07-14 / Affiliate links / Images from Amazon Product Advertising API
Once you have done this step, inspect the fuse. If the copper wire in the head of the fuse is broken or the covering is miscolored or damaged, replace it with the exact same type of fuse that was removed. Always replace fuses with the same amperage rating because to do otherwise may damage your components located on that power supply line.
The Fuses Are Good, but the RV Monitor Panel Still Isn’t Working, Now What?
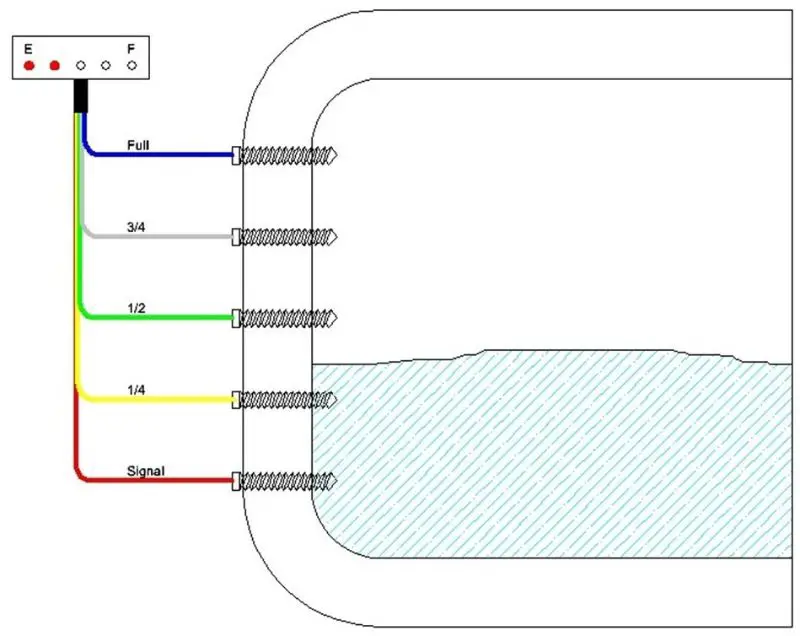
The next thing you should check is your gray and black water tank sensors. As you can see in this image, most tanks will have either three or four sensors to inform you as to the fluid level in your tanks and another sensor (labeled here as signal) that is your ground wire, which will always be the bottom sensor.
Depending upon the location of your tanks, these sensors can usually be tested easily, and you should do that before you replace them. Because of the raw sewage in your black tank and sediment in the gray water, it’s not unusual for these sensors to be fouled. Mineral buildup in the fresh water tank can also foul up your sensors as well.
How Do I Test the Sensors?
The easiest way to test a sensor is by using an alligator lead. Clip the lead to your lowest sensor (signal or ground) then clip the other end of the lead to the next sensor up from your signal sensor. By doing this you are bypassing the sensor and supplying a 12-volt electric supply to the next sensor, which should cause the first light on your RV monitor panel to light up.

Last update on 2024-07-14 / Affiliate links / Images from Amazon Product Advertising API
Once you have done this, go inside and press the display button on the RV monitor panel. If your panel is in working order, the ¼ full light should be lit. Repeat this process for each sensor and each time you should see additional lights being lit up. If you do this for each sensor and they continue to light up, then you’ll know that your sensors are bad and will need to be replaced.
On the other hand, if your lights aren’t lighting up during this process, then it’s likely that your entire RV monitor panel should be replaced, and I will discuss this later in this article. However, first, we’ll go over replacing your faulty sensors.
Replacing Your Tank Sensors
Some sensor probes are different from others. These shown here are typically used for black water tanks, however, I have seen them used in gray and freshwater tanks as well. Also, you may find that your sensors don’ have that probe, but don’t worry, these are interchangeable so either type will work for you.
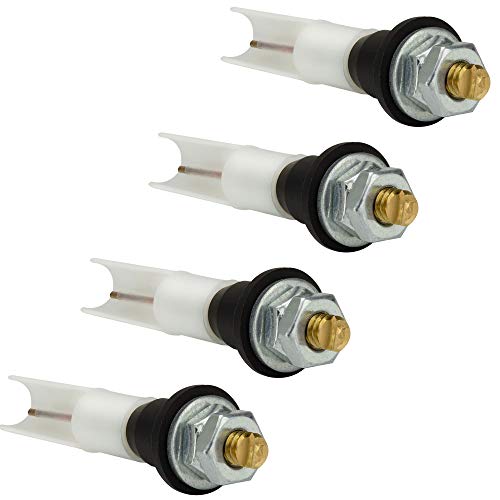
- 4 Probes Included
- Black Water Tank Sensors
- Dimensions – 2 1/2" L Dimensions – 3/8” Dia. Dimensions – 1 1/2" Pin Depth
Last update on 2024-07-14 / Affiliate links / Images from Amazon Product Advertising API
To begin, drain your tanks, and if you can thoroughly flush the black water tank to remove any sediment. Next, remove the wire between each nut on the sensor. I recommend doing this step individually so that you don’t mix the wiring up after you install the new sensors.
After you have removed the wire, your next step is to remove the entire sensor. Now you can use a pair of pliers to do this, but I recommend using a rivet removal tool to gently pry it away from the tank. Once you have done this, use your pliers to pull it out of the tank. Now, replace the sensor with a new one and repeat this process for each sensor.
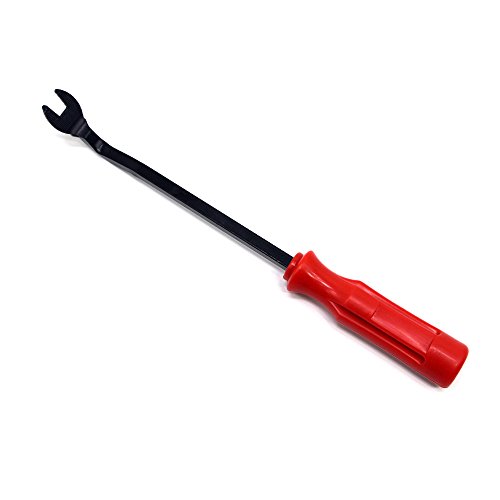
- Removes plastic hold-down fastener
- Comes in skin-pack
- Use button to protect vehicle surface
Last update on 2024-07-14 / Affiliate links / Images from Amazon Product Advertising API
Once you have replaced your sensors, fill up your tanks with water and test out your RV monitor panel. I recommend doing this step in several parts meaning fill your tank partially then test the RV monitor panel and so on until you have tested each light on the panel. If your sensors are working properly, then you’re good to go. Remember to drain the fresh water from your black and gray tanks.
Changing Your RV Monitor Panel
As I said before, if your panel is not working after you have tested the sensors, then it’s likely that the panel should be replaced. This is a relatively easy process and I recommend that you closely follow the directions that will be included when you purchase your new RV monitor panel.
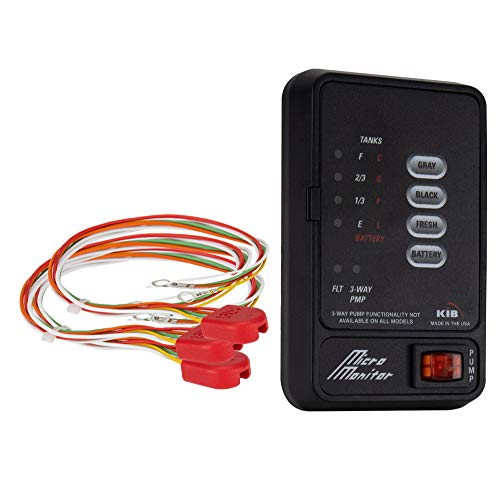
- This durable monitor is available in back or white to match with your interior.
- The easy to understand display uses lights to indicate levels.
- Once tied into your 12V system it will keep an eye on your fresh, gray, and black tanks as well as...
Last update on 2024-07-14 / Affiliate links / Images from Amazon Product Advertising API
New panels are inexpensive, and you can purchase them with or without a set of new sensors. Frankly, I recommend the latter as it may save you a considerable amount of time in the future.
Final Thoughts
While some RVers are fanatical about a lot of their gadgetry always being in working order, others may not be. I happen to be one who does not really care if my RV monitor panel isn’t working because I never use my monitor panel. Why? Because I know how long it takes to fill my gray and black tanks and I know that once my gray tank is nearly full, then it’s likely that my freshwater tank will need to be filled.
Additionally, I empty my holding tanks and refill my freshwater after almost every stay at a campground or longer boondocking experience. This all comes with experience and knowing your rig and sooner or later you’ll have this experience too.
Thanks again for following my articles and should our paths cross over the road, be sure to stop by and say hello. Safe travels to you all.