Hey! This site is reader-supported and we earn commissions if you purchase products from retailers after clicking on a link from our site.
I’m just going to put my opinion out there: decals and RV dealership garbage like promotional license plate frames and vinyl decal advertisements for the seller or manufacturer are totally annoying and unnecessary. In fact, most of those “swoops and contouring” decals the manufacturers regularly install, are unnecessary and should be refused when ordering a new or special RV build. Furthermore, if any one of those decals showed up on an RV that I specially ordered, I would immediately decline delivery.
However, if I were buying a used RV that may have issues with its factory installed decals, I am fully educated and prepared to repair and restore the manufacturers decal layout even if it means applying paint, border taping, or even a redesign by a manufacturer that specializes in a customize design in a self-applicable format.
Essentially, when dealing with cracked or faded decals, you have three options:
- Remove the decal
- Replace the decal
- Paint over the decal
Removing decals
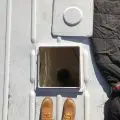
There are numerous methods for removing decals from your RV. Some of these ways include using solvents, using a heat gun, and even manually peeling them off provided they cooperate with you.
However, one tool I have found exceptionally useful when removing decals is this rubber wheel eraser. These are relatively inexpensive, attach to your power drill using included arbor, and really turn the task into a short project.

Last update on 2024-10-16 / Affiliate links / Images from Amazon Product Advertising API
The wheel will not damage your paint or the surface you are using it on whether it’s metal or fiberglass. Usually, it will remove all of the adhesive residue, but if it doesn’t, a cloth and some rubbing alcohol should do the trick.
One thing to keep in mind when completely removing decals from your RV permanently, is that the area beneath your decal is likely to be much lighter than the areas surrounding where the decal was placed. The reason for this is because it wasn’t exposed to sunlight which fades the surface, or dirt that can build up over time.
To combat this, I suggest using a polishing compound on the faded areas.

- Heavy duty paste that cleans dull, oxidized finishes
- Quickly and easily penetrates through the oxidized surface to remove scratches, blemishes and...
- Restores faded finishes
Last update on 2024-10-16 / Affiliate links / Images from Amazon Product Advertising API
Once you have applied the compound, you should then use a drill attached polishing wheel.
This should help to restore the original finish although I do recommend you practice a bit before using this technique, as improper pressure or too much time spent in one area could damage the finish of your RV. And finally, once you have polished the areas around where your decal was placed, finish that off with some wax and you should be good to go.
Replace the decal
Getting an exact match for your RV decal replacement project could be quite a chore, and in many cases, an impossibility. For example, my 5th wheel is 20 years-old and its manufacturer has long since ceased operating becoming a victim of the recession of 2008. While most mechanical parts of my model can be interchanged with other manufacturers parts with little to no adjustments, cosmetic items such as decals or an exact paint match, are exceedingly difficult to find or even duplicate if the model of your RV has been discontinued or its manufacturer has gone out of business.
Because RV dealerships take-in trades when selling to consumers looking to purchase new models, they often sell those trades at auctions that are geared toward smaller dealerships to purchase and resell, or they detail and clean up the nicer units they take in as a trade and remarket them too. One option you should consider is to reach out to some of these dealerships parts departments and inquire as to who they hire when replacing decals and detailing your RV.
They may also be able to give you some advice as to where they purchase decals such as local vinyl printers that can print and cut a version of the decal that you’re looking to purchase. However, when choosing this option, it’s likely that you’ll will have to do a lot of measuring to try and duplicate your decals design. One option here is to take several pictures of the decal before you remove it and secure a tape measure or ruler in numerous photos that will give the printer a rough idea of its overall dimensions. This is especially important when the design has tight radiuses, numerous turns, and varying widths. You should be aware however, that this option can be quite costly although these types of replacement decals will in all likelihood be the highest quality of all of your options.
There are less costly options and I have researched most all of the choices you have when replacing an RV decal. Some people give great testimonials about purchasing lower cost RV decal kits from buyers on Etsy and eBay, but I always have to question the quality of their product. Why would someone cut a kit, package it, and market the kit for 25% of what local printers are charging you? Is it because they have cut the cost of their quality and if so, how soon will you need to replace these decals? These are considerations you should decide on when choosing the low-end seller.
One online seller I recommend for replacing your RV decals is rvgraphicpros.com. While this can be a costly alternative to having an individual decal replaced, they do sell decals sets to match specific RVs and their original manufacturers design and layout. In fact, their match to models is very impressive, but it’s likely that you’ll be spending anywhere from $1,200 to $2,500 for a complete set of decals that you’ll need to install yourself. Of course, this all depends upon the size of your rig, and their prices vary greatly by how many decals you need and the length and height of your RV.
Painting over your decals
One of the best ways to save money when addressing worn out decals is to paint over them. As an RVer that loves to attack, understand, and perfect many DIY projects, I’ve come to understand the value of painting over decals as opposed to replacing them with new decals that may or may not match the original design and are far more costly to replace.
While painting over a decal is more time-consuming, in my opinion, the cost savings is well worth the time spent completing the project. With that said, in the ideal weather conditions, you should plan on this project taking from 3-4 days as several coats of paint and sealant will be applied. Also, it’s likely that most of your first day will be spent framing the ¼” painters’ tape to seal the tight radiuses in the decal’s design. Be sure you tightly secure this inside tape along the border to avoid an overspray under the border of the masking tape.
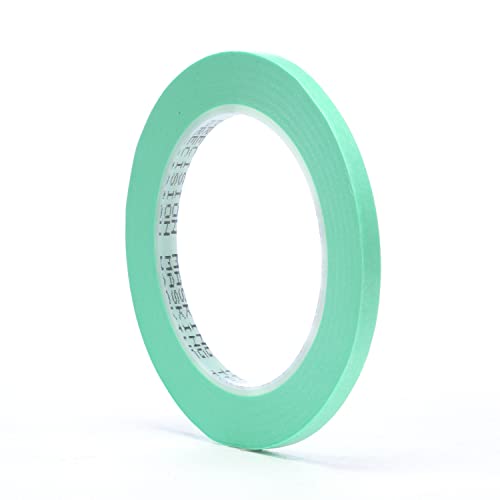
- Prevents seepage and edge bleed with waterborne and solvent paints
- Thinnest 3M tape for automotive won’t leave high paint edges, great for two-tone jobs
- Semitransparent for better visibility
Last update on 2024-10-16 / Affiliate links / Images from Amazon Product Advertising API
Once you have tightly secured the ¼” tape along the decal outline and through its tighter radiuses, it’s time to create a larger barrier for the protection of over-spray paint. To build up build up that barrier, you’ll want to use the wider tape. Essentially, this is when you use wider tape to further protect the borders along the decal.
I recommend using at least 2-3 wider strips of painters’ tape to tighten up that seal around where you plan to paint. Just keep the tape tightly secured around the border and be sure to slightly overlay each layer as you apply the next. Keep in mind though, that during this process you’ll likely have to cut smaller piece of the wider tape around the tighter radiuses, but it’s not rocket science and you’ll get the hang of it quickly.
Now that you have satisfactorily applied your tape layers around the perimeters of your decal, you should expand that area even further by applying masking paper. As I said earlier, this is a 3-4-day project. Because the amount of layers of primer, paint and clearcoat are numerous, as is the sanding of those coats between applications, it’s important to tape more protection in place around where you what to apply coverage to your decal.
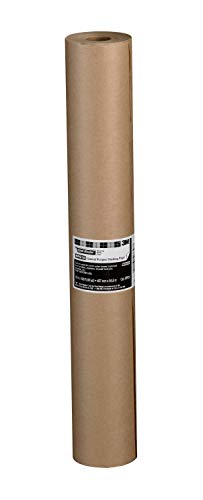
- For use with 3M Hand-Masker Tools M3000 and M1000-SB
- Use to protect windows, trim, railings, etc from paint drips and overspray
- Great for both pro painters and DIYers
Last update on 2024-10-16 / Affiliate links / Images from Amazon Product Advertising API
In some scenarios, when wind direction or the amount of sunshine has a bearing on the drying time of the applications, it may be necessary to reposition your RV.
Before we begin the painting process, it’s important that you create a “tooth” on the decal to ensure that the paint will adhere correctly. Essentially, this means to create a rough surface.
For this task, I recommend that you use a 110-grit piece of sandpaper to scuff up your decal. A good choice here is to buy a multi pack of sandpaper such as this available from Amazon. This is an excellent choice because you’ll also be needing a 400-grit paper as the task progresses.
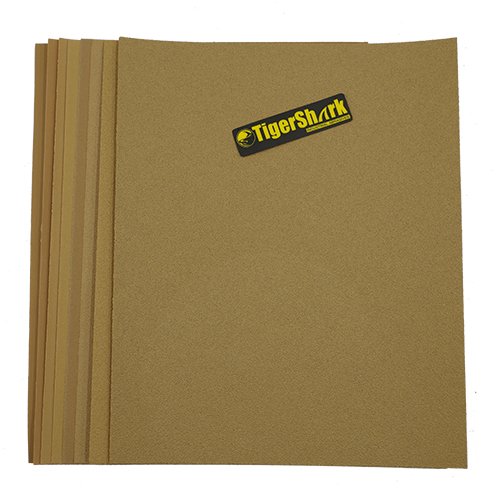
- Top quality fused zirconia alumina grain increase durability and sharpness
- High tech producing formula ensure excellent Anti-clog Performance
- Heavy Duty German quality latex paper reduces edge tear out for much longer sanding and save time
Last update on 2024-10-16 / Affiliate links / Images from Amazon Product Advertising API
Being careful to avoid the tape you laid down, gently rub the 110-grit paper over the decal. In fact, you might consider doing this task prior to applying your masking tapes.
With that said, once you have created a tooth for your primer to correctly adhere to the surface, you’ll need to wipe the surface clear of any dust created by the sanding. This can be done with soap and water or isopropyl alcohol, but you should do this between sanding any laying primer, paint or clear coat that will be applied throughout this task. However, be sure that the surface is completely dry when moving on to the next task.
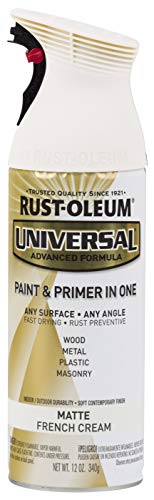
Now that you have established a good tooth for the primer to adhere to, it’s time to apply the first coat of primer. While the choices of colors vary from deep hues such as Primary Rust Red to this French Crème color shown here, I recommend always laying down numerous layers of primer before you begin the painting process using the specific color you have chosen.
- Works on virtually any surface including wood, plastic, metal, fiberglass, concrete, wicker, vinyl...
- Oil-based formula with excellent adhesion prevents rust, resists fading and chipping for a long...
- Fast drying formula dries to the touch in 30 minutes and covers up to 15 sq ft per can
Last update on 2024-10-16 / Affiliate links / Images from Amazon Product Advertising API
One of the reasons I chose to feature this primer is because of its trigger applicator. Applying a finish by spray using this type of applicator is far easier than the older model spray nozzles that are still popular today. When using this type of applicator, you’ll get a wider field of spray, and it’s far less likely to produce splatter that will have to be corrected later.
Be sure to read the directions on the paint. Some paints require you to be closer to what you are painting than other paints. As a rule, you should apply the paint from 12-18 inches away in a sweeping motion that’s neither too quick nor too slow. Too quick and you won’t be laying down a good layer of paint, and too slow will produce runs.
Now that you have laid down your first layer of primer, you’ll need to let it dry sufficiently and then take your 400-grit sandpaper and scuff up the primer before laying down the next coat of primer. I recommend 2-3 layers of primer repeating the sanding in between layers. Follow the same process when applying your paint over the primer only you should apply at least four coats of paint and remember to sand between the layers of paint. Do not sand the last coat.
Now that you have applied the last coat of paint and let it dry, carefully remove the masking paper and then the tapes. You should do this in the order that you laid them down and take your time. Don’t just quickly pull them off as you have laid down several layers of primer and paint on the tape and the decal. At his point, I recommend using a utility knife to very carefully cut along the tape and the paint to prevent the tape from pulling the paint away as you remove it.
Once you have competed these tasks, you may discover that your tape might not have been as tightly applied as you thought it was, or that there may have been some overspray. If this occurs, take a Q-tip that you have dipped in paint thinner and gently rub it on the overspray and this should remove it from the surface.
Once you have removed all of the masking and are satisfied with the results, now you should protect that surface as well as others on your RV. For this, I recommend using 303 Protectant every month on this newly painted area as well as other decals on your rig.

- Brightens Surfaces And Keeps Your Car Looking Newer, Longer. This Formula Provides Superior Uv...
- Uv Protection Against Fading, Discoloration And Cracking From Harmful Uv Rays.
- Rinse-Free Formula Leaves A Non-Greasy, Dry Matte Finish With No Odor And Is Non Toxic And Water...
Last update on 2024-10-16 / Affiliate links / Images from Amazon Product Advertising API
This is an excellent sealant against UV rays, road grime and even salt buildups brought on by coastal camping or travel on roads treated with salt or sodium chemical compounds designed to clear roadways of ice.
Final thoughts
Thanks for reading and following along my friends. I hope this article gave you some added insight and I hope to see on the road soon. For more maintenance advice, be sure to read my guide on essential RV maintenance.