Hey! This site is reader-supported and we earn commissions if you purchase products from retailers after clicking on a link from our site.
A large component of living in a van is actually living small. It’s no secret that you will have to downsize. I’ve also learned that with such small quarters, it’s essential for everything to have a designated place or it will go flying around while you’re driving. In this article, I’ll show you how we built some of my cabinets and share tips and tricks for keeping everything in place.
Table of Contents
- Timing
- Materials You Need
- Tools You Need
- Cost of Building and Installing Cabinets
- How To Build and Install Cabinets In Your Converted Van
- Final Tips and Tricks
Timing
1-2 days. Depending on how many cabinets you plan on making from scratch or how many you plan on buying pre-made, this time will vary.
2 people needed. This is definitely a 2-person job. Not only will you need two people to build the cabinets, but installing them up high would be impossible to do alone.
Level of difficulty. Medium to difficult. I was fortunate enough to have a building partner who was an experienced furniture-maker. If I hadn’t had him and his expertise, this process would have been pretty difficult for me. It requires a decent amount of planning ahead and modifying when things get wonky.
Materials You Need
| Material | How Much You Need | Cost Range | Where to Get It |
|---|---|---|---|
| Cabinet Doors | 5-6 | $ | Local Thrift Store |
| ¾” Plywood | 1 sheet | $ | Home Depot |
| ½” Plywood | 1 sheet | $ | Home Depot |
| Biscuits | 1 box | $ | Home Depot |
| Wood Glue | 1 bottle | $ | Amazon |
| 1.25″ Nail Gun Nails | 1 box | $ | Home Depot |
| ¾” Self-Lathing Screws | 1 box | $ | Home Depot |
| 1″ Phillips Screws | 1 box | $ | Home Depot |
| Polyurethane | 1 can | $ | Home Depot |
| L-brackets (large) | 10-12 | $ | Home Depot |
| L-brackets (small) | 1 pack | $ | Home Depot |
| Soft-Close Hinges | 5-6 pairs | $ | Home Depot |
| Cabinet Knobs | 5-6 | $ (varies) | Home Depot |
| Child-Proof Magnet Locks | 5-6 | $ | Home Depot |
Tools You Need
| Tool | Cost Range | Where to Get It |
|---|---|---|
| Table Saw | $$$ | Amazon |
| Jigsaw | $$ | Amazon |
| Power Drill | $$ | Amazon |
| Biscuit Cutter | $$$ | Amazon |
| Clamps | $ | Amazon |
| Screwdriver | $ | Amazon |
| Nail Gun | $$$ | Amazon |
Cost of Building and Installing Cabinets
Most of the elements of building the cabinets involved plywood, which is relatively cheap. We were also lucky to find doors and cabinet pieces at a garage sale which brought down our costs. Overall it was about $100 for our cabinets.
How To Build and Install Cabinets In Your Converted Van
- Figure out how many cabinets you want and layout
- Upper cabinet frames
- Attach the upper cabinets to wall
- Upper cabinet doors
- Upper cabinet outside walls
- Building and attaching the lower cabinets
Okay, it’s time to get some cabinets in!
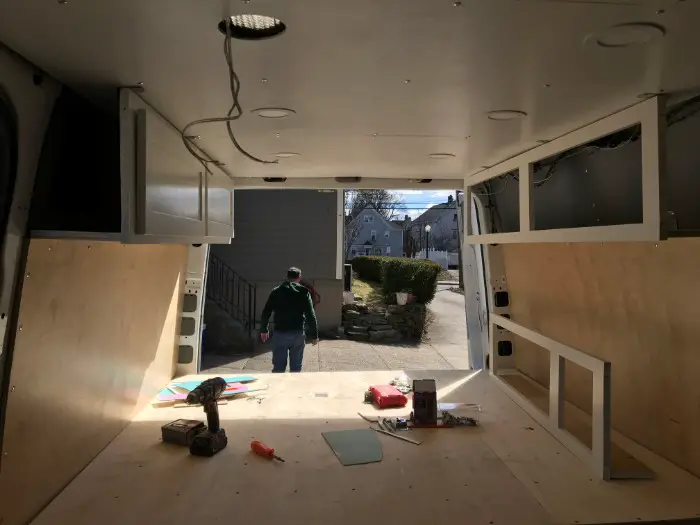
Step 1: Planning and Layout
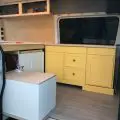
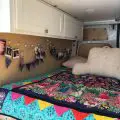
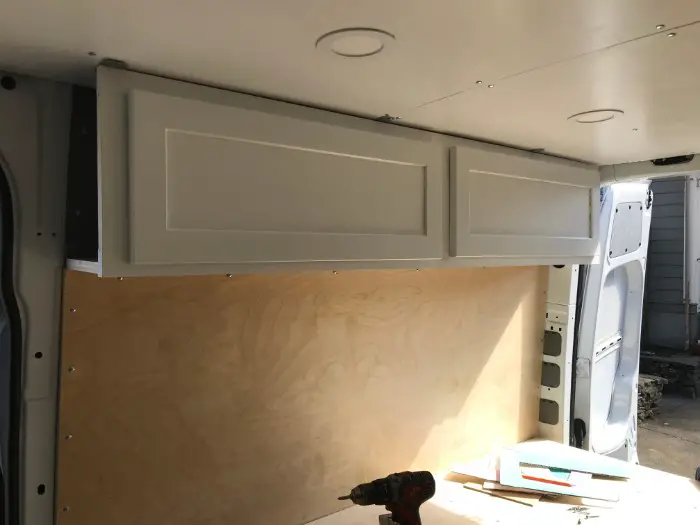
First things first, figure out exactly how many cabinets you want in your van and where you’d like them to be. In my van, I’ve got a full-size mattress pushed up against one side with about 10 inches of space on the other. I decided to have a wall of cabinets in the remaining space and then matching cabinets on the top on both sides. This provided me with 4 full upper cabinet areas, two cabinets with shelves, and an open storage space in-between the bottom cabinets. Here’s what my final bedroom cabinet storage area looks like:
Your cabinet needs will vary based on how many people will be traveling with you and what size vehicle you have. Take some time to plan out your setup.
Some things to consider:
- Will you want to sit up in bed? If so, will the cabinets get in the way?
- How deep do you want/need them to be?
- Do you want your layout to be symmetrical or are you okay having all your shelving on one side?
- What kinds of things will you be storing up above versus down below the van? Aka what will you need to access every day?
Once you have your layout decided, it’s time to start building!
Step 2: Building the Upper Cabinet Frames
As I mentioned before, I was pretty lucky to have a skilled carpenter on my side for this project. He was great at being able to take pieces of furniture we had found at garage sales and turn it into something else. We decided to take the doors from one cabinet ($2 per door) and attach them to a custom frame. Instead of opening side to side like standard door, we turned them so they would open up. Luckily they were the perfect size to fit two doors on each wall of the van! Once we had our doors, we had to make the frame for them. We contemplated just buying cabinets, but unfortunately the walls of the van are slanted so it would have been nearly impossible to attach a 90-degree back to the curved frame. Thus we were left with making our own frames.
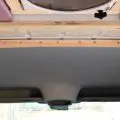
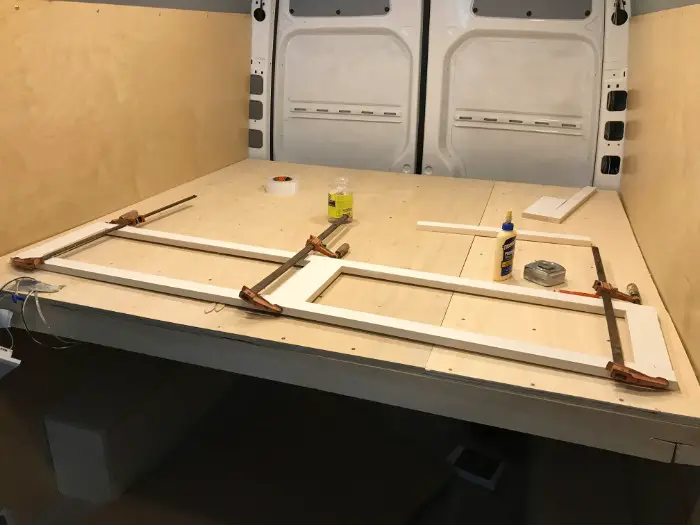
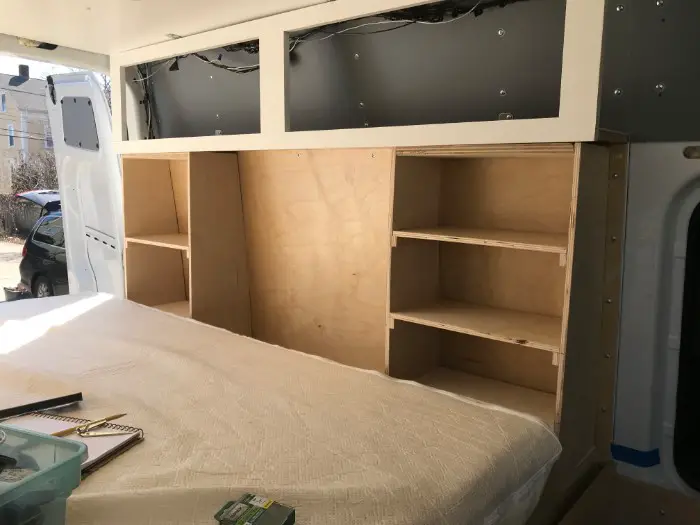
What do I mean by ‘frames’? Here’s a picture of what’s behind the doors:
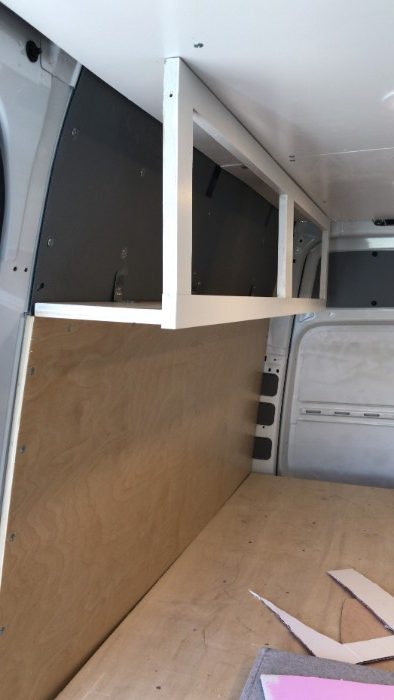
Using your doors as measurement, determine how long you need the base of your cabinet to be and where you’d like your divider of the frame to go. Once we knew how long we wanted the frame to be, we used the ¾” plywood to cut strips 3″ wide for the horizontal pieces and 4″ for the vertical pieces. This next part is where we got a little fancy. Basically, once you have all your pieces, it would be possible to use wood glue and the nail gun to attach them together. We opted to use a biscuit cutter and biscuits to attach them to avoid a nail hole. The biscuit cutter makes a little grooved hole in which you insert the wooden biscuit to hold together the pieces of wood. However, the biscuit cutter is a pretty advanced tool so I would recommend wood glue and nails to a novice builder.
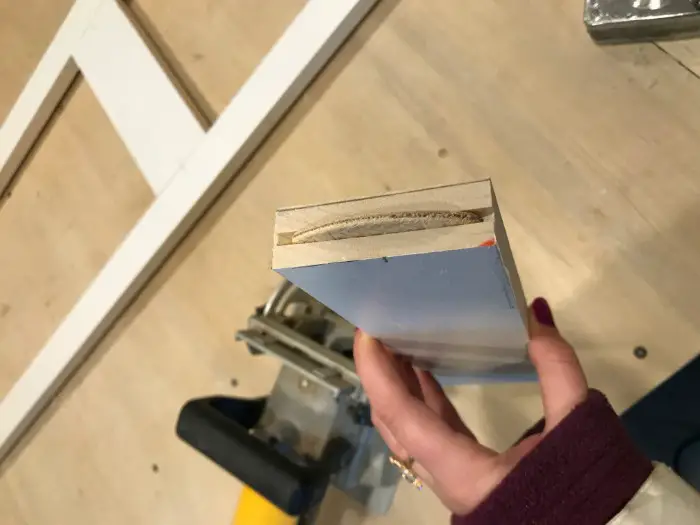
With your pieces all glued/nailed/biscuited together, attach some clamps and let them dry for a couple hours. At this point, you should decide what finish you’d like for your cabinets. We decided to paint them white but at the very least I recommend putting on a few coats of polyurethane.
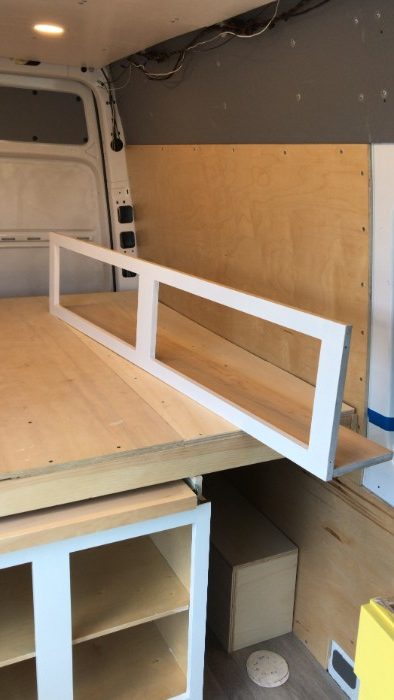
Once your frame is dry, you’ll need to attach the bottom part of the shelf. We wanted our cabinets to be 8.5″ deep to allow adequate storage space without taking away from overhead space. Using the table saw, we cut a long strip 8.5″ wide and the length of our cabinets. Again, we used the biscuit cutter to attach them all together, but it would be possible to attach them using wood glue and the nail gun.
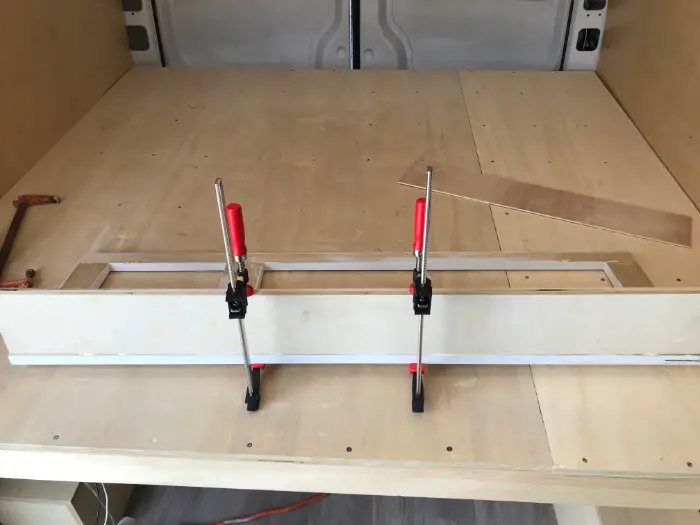
Always clamp and let your pieces dry for a couple hours before installing them anywhere!
Pro tip: Attach your bottom piece about ¼ of an inch higher than the bottom of the front frame to avoid any overhang.
Step 3: Attaching the Upper Cabinets to the Wall
I thought the next step was to finally attach the doors to see how they all looked! However, you need the doors off in order to attach the cabinets to the wall of the van. This is also where I learned that a good L-bracket can work magic and holds up a lot more weight than you would think. Using the power drill and the ¾” screws, I attached 5 L-brackets to each frame: two on the top to attach to the ceiling and three on the bottom/back to attach to the wall.
With one person holding the cabinet up against the wall and ceiling, another person comes in to screw them in. This part is a bit strenuous and it’s awkward to drill in-between the frame but soon they will be up and attached!
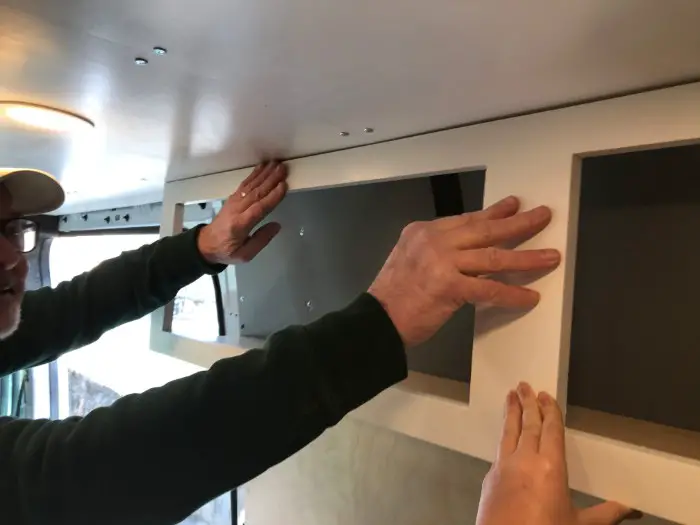

We’re proud of our work!
Step 4: Installing the Upper Cabinet Doors
With your upper cabinets attached to the walls, it’s time to add the doors! Our doors already came with hinges, but we replaced them with soft-closing hinges to avoid slamming. I’m not going to lie these were a bi*%$ to put on because the angle is super awkward. Basically my dad held up the door and I would screw on the door using the power drill and the screwdriver if I couldn’t get the drill in there.
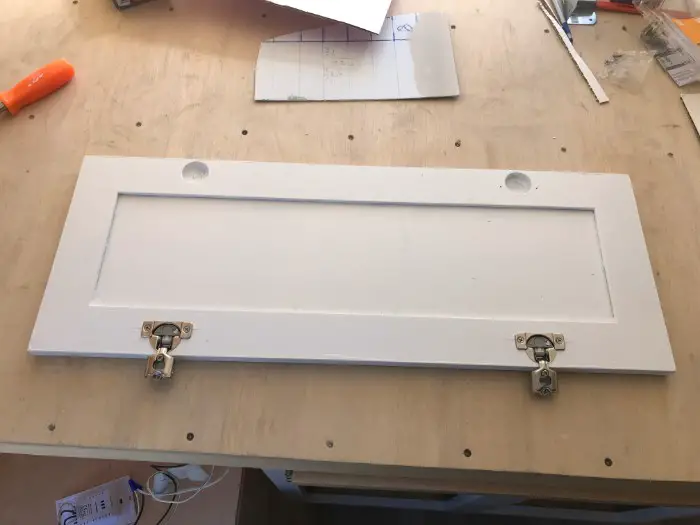
Our doors ready to be attached!
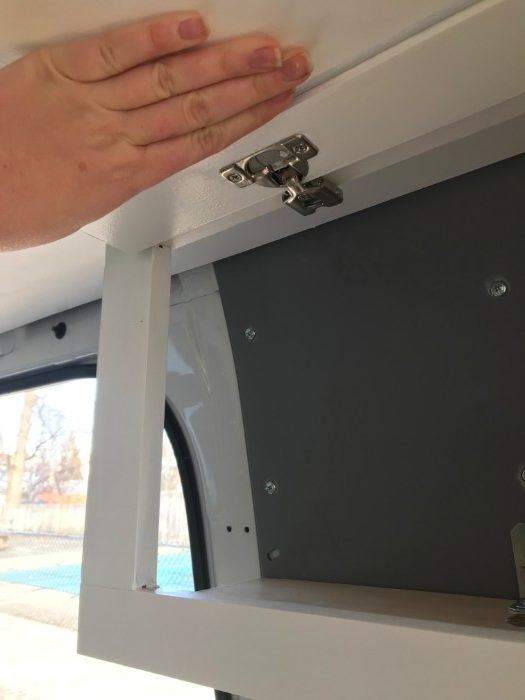
The hinges get attached right into the top of the cabinet frame like so.
Pro tip: Before you screw in the door, make sure it’s centered over the hole of the frame. We forgot to do this the first time and our doors were way off-center and looked absolutely horrible.
Before and after – half the doors are done.
Look how great they look!
With your doors attached, your cabinets are almost done! It’s possible to leave them like that, but I decided to add handles to make it easier to open and close them.
Step 5: Installing the Side Walls for the Upper Cabinets
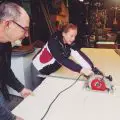
Once the doors are all attached, the last step is to make a little side wall for each of the cabinets so that your things don’t fall out and you can better hide your mess. This step definitely required some trial and error, but it wasn’t too bad. Just like with the sides of the lower cabinets, you’re going to need to use a compass and a piece of cardboard to trace the shape of the curved walls. We kept going back and editing until we felt that we had the closest shape. With our stencil done, we used ½” plywood and the jigsaw to cut it out, painted it white, and attached it to the side of the cabinet using the nail gun.

With the knobs and the sides attached, this is how your cabinets should look when they are all done!
Step 6: Building and Attaching the Lower Cabinets
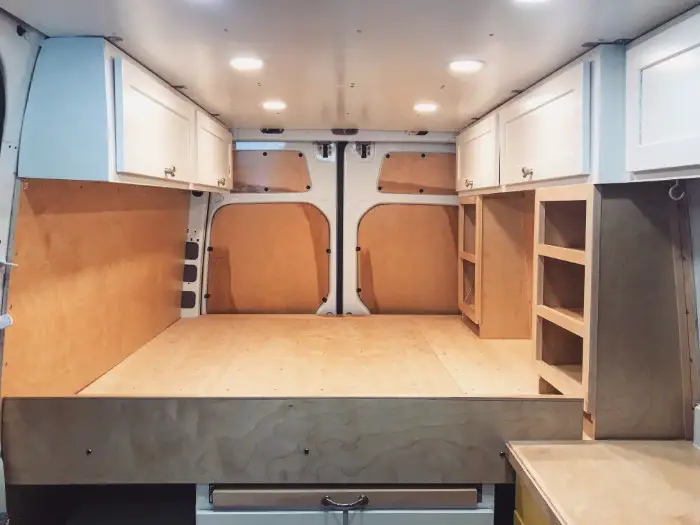
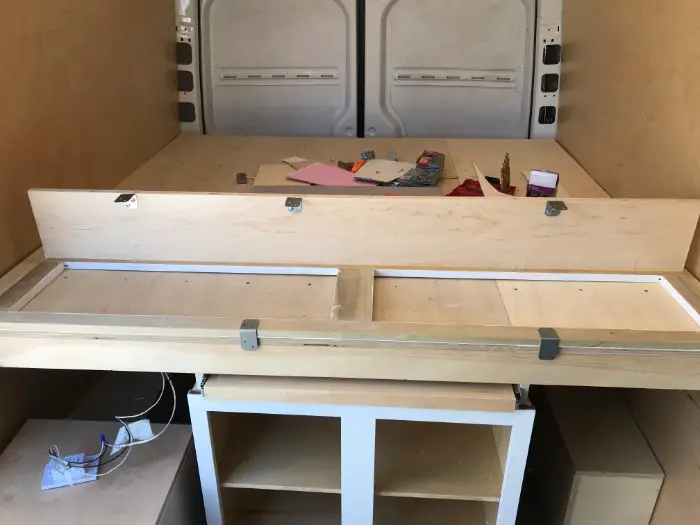
With the upper cabinets basically done and attached to the walls, it was time to make the lower cabinets for the bedroom area. We decided to have one cabinet with two shelves and one with three. Obviously, this is completely up to you and your needs. Here are the cabinets before we installed them and added a final front frame:
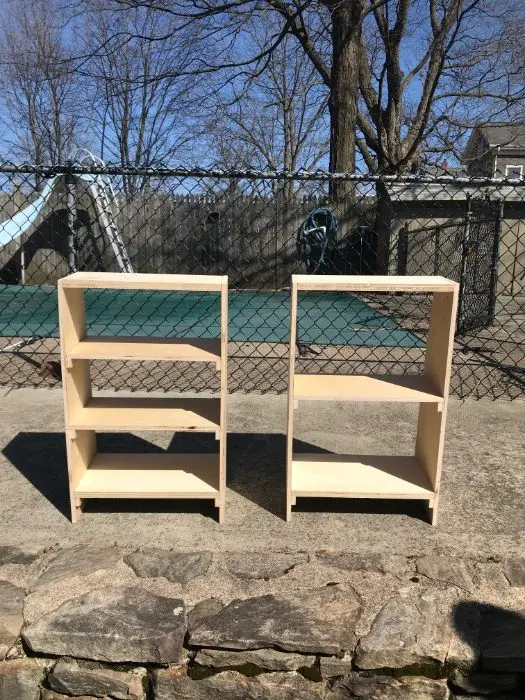
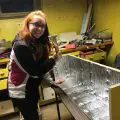
Just like with the top cabinets, we wanted them to be 8.5″ deep. We cut our seven total shelves at 8.5″ deep and 12″ long using the ¾” plywood. For the sides, they needed to be a little curved to fit the back of the van. You can get a better sense of there shape here:
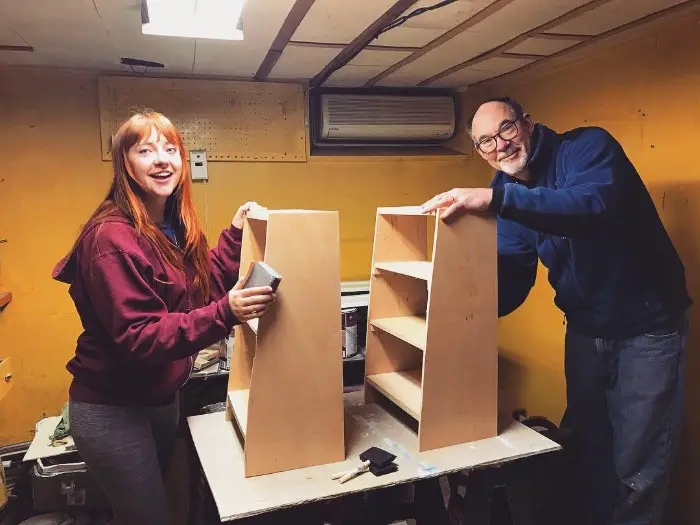
Greetings from the ugliest workshop in the United States!
Using mostly trial and error, we used a compass and a piece of cardboard to trace the general shape of the curve of the wall of the van. It wasn’t an exact fit because we didn’t have the tools to do that, but they were very, very close. Afterwards, we covered any gaps with some decorative trim so no one would be able to tell it wasn’t exact. Decorative trim is your best friend when it comes to beginner woodworking.
Unfortunately, I wasn’t able to get too many pictures of the building process for making the shelves, but I can offer some tips for making sturdy shelves.
- The shelves will need support underneath. Use ½” strips to hold up the shelves and make sure they are straight.
- Use wood glue and a nail gun to ensure they won’t move around.
- Work from the bottom shelf up because it’s easier to keep measuring from the bottom.
Once they are constructed, you can opt to leave them as-is and install them just like that, but I recommend adding a little frame at the front. This gives it a more finished and elegant look and it also provides a bit of a lip to keep your things inside while the van is moving around. Building the frame for the front of the lower cabinets is the same process as building the main frame for the upper cabinets. We used ½” plywood strips and made them about an inch wide to fully cover the shelves adequately. These can also be attached using wood glue and a nail gun with ¾” or 1″ nails.
Before – shelves without the frames.

After – clean, polished, and more effective.
With your shelves constructed, the front frame attached, and fully polyurethaned/painted to your desire, the final step is to attach them to the walls. This is super simple and only requires a small L-bracket that will be attached to the shelf and the back wall. We only needed a few brackets and 1″ self-lathing screws and they felt super secure! You officially have lower cabinets now!
Final Tips and Tricks
Child-Proof Locks
As I’ve mentioned before, as soon as the van starts driving, EVERYTHING begins to shift around. If you think it’s secure, it probably isn’t. As such, it is absolutely essential to install some kind of lock on all your cabinet doors. There are a few different options for how to go about securing your doors and you basically want to child-proof them. I opted for magnetic child-proof locks because they were the most secure. They’re super annoying to install (God bless you new parents out there – I only had to do 10 doors and I can’t imagine trying to do a whole house) but they have been crazy effective! Everything stays in place and so far nothing has broken!