Hey! This site is reader-supported and we earn commissions if you purchase products from retailers after clicking on a link from our site.
It’s not unusual for your RV’s electrical outlets to lose power, in fact it happens quite often. Generally, this type of failure is caused by your RV being in motion while you travel and it usually means it’s as simple as a loose connection on the outlet end of the wire, or less often, the supply line of the electrical run.
Isolate the problem
The first thing to do is to isolate the problem. For example, are all of your outlets without power or is it just one or two on the same wall? If all of the outlets in your RV are without power, then it’s likely that you have what I would refer to as a “global failure”. By this I mean that if all of the 110/120-volt outlets in your rig are without a power supply, then it’s highly likely that the problem is located in your shore power supply or somewhere within the distribution box that delivers that load to those outlets.
On the other hand, if you discover that only a few outlets or light fixtures are missing power, then it’s likely that there is a problem within that load line, and it is ganged from outlet or fixture to the next outlet or fixture. In short, this is where you need to become a detective.
What does “ganged” mean?
110/20-volt outlets have four ports or screws to secure the electrical line into the outlet. If you only have one outlet on electric line, then you would only use two of these ports or screws. However, when you have multiple outlets on a load line you would use the other two ports to continue the load to the next outlet. This is known as ganging.
When you’re dealing with a 12-volt power line, the load is delivered by direct current and any break in the line will cause that line to lose all continuity since the load has to be returned to the power source.
This is not the case when you’re dealing with 110/120-volt power as this uses an alternating current, so the load is returned to the power source by the same line in which it was delivered. If you’ve ever been shocked by 110/120-volt current, you may have noticed the sensation feel like a buzz. That’s because the current is alternating back and forth between you and the power source.
With that said, it’s possible to have a single outlet on a ganged load line that is not working, yet all the other outlets continue to operate normally.
How to check your outlets
The best way to check an outlet if you suspect it’s not working correctly is to use a multi-meter. To do this, you set the multi-meter to the setting that has a single “V” because this is the setting used for checking a 110/120-volt power load. Once your multi-meter is turned on to this setting, you’ll usually see 00.12 or a small number like that. Don’t worry about these numbers because that is just stray voltage that in the air and it’s normal to see these numbers. Now you’re ready to test the outlet.
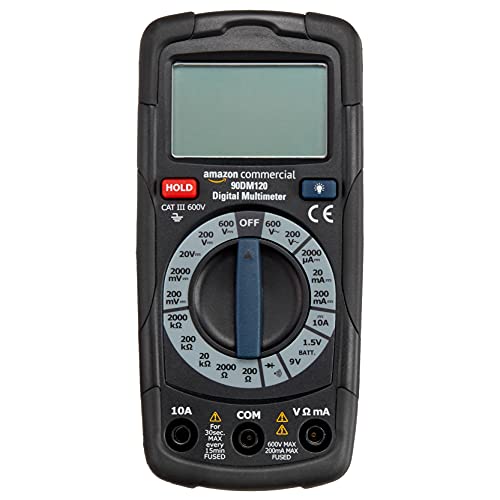
- Auto-ranging handheld digital multimeter for taking voltage and frequency measurements
- Measuring functions: AC/DCV, DCA, diode/continuity test, and resistance/battery test
- Counts up to 2,000
Last update on 2024-10-15 / Affiliate links / Images from Amazon Product Advertising API
Your multi-meter comes with two leads. One will be black and the other will be red and these will be inserted into your receptacles holes to check its continuity. If you’ve ever noticed, most plugs will have one side wider than the other as will the receptacle. The wider slot is how the power load is delivered and the smaller slot is your neutral line.
Unlike direct current where the red line represents the power supply and a black line is a ground wire, when dealing with alternating current these lines will be black, white and a bare copper wire. Your black line is for delivering the power load, your white line is neutral, and the bare copper line is the ground. To test your outlet, take the black lead on your multi-meter and insert it into the wider slot. Next, insert the red lead into the other slot. Your meter should now read 120, which means that part of the socket is getting power. Repeat this process for the other slots on the receptacle and if it reads 120 too, then that outlet is supplying power.
Possible issues
It’s not unusual in an RV for things to come loose as you travel, and your outlets are no exception either. If you’re not getting power to that outlet, turn the breaker off to that load line and inspect the outlet. Are all the wires in place? If not, this one be the cause of the loss of power, and you can simply re-attach the line to its proper port and you should be back in business again. If you have GFCI outlets (GFCI stands for ground fault circuit interrupter), also check to see if they are tripped, in which case you should just hit the reset button on your GFCI outlet.
Final thoughts
As I have said in various other articles where I give you advice about electrical issues, if you don’t feel comfortable dealing with electricity then you may want to find a qualified professional to do this type of work for you.
As always, my friends, thanks for following and have a safe and happy camping experience.