Hey! This site is reader-supported and we earn commissions if you purchase products from retailers after clicking on a link from our site.
If you plan on doing any kind of cooking inside your vehicle, you’re going to need a kitchen. There are a few different setup options based on size and cooking needs, but I’ll take you through how I built my kitchen area. In another post I specifically go into the details of my sink and refrigeration. You’d be surprised how much space you’ll end up with! My New York City friends complain that I actually have a larger kitchen than they do in their apartments – and they’re not wrong.
Table of Contents
- Timing & People Needs
- Materials You Need
- Tools You Need
- Cost of Building Your Converted Van Kitchen
- How To Build a Kitchen in Your Converted Van
- Tips and Tricks
Timing & People Needs
3-4 days. There are a ton of elements to build when it comes to your kitchen. Obviously this can vary based on your setup but since it is half of your living space, block aside a good chunk of time.
2 people needed. This could potentially be done with one person because there isn’t a ton of heavy lifting involved but it’s always helpful to have someone else hold things in place while you install.
Level of difficulty. Medium. This part of the build is time-consuming but not incredibly difficult.
Materials You Need
| Material | How Much You Need | Cost Range | Where to Get It |
|---|---|---|---|
| Lower Cabinets | 2 | $$ | Flea Markets |
| ¾” Plywood | 1 4×8′ sheet | $ | Home Depot |
| Backsplash Tiles | Depends on size | $ | Home Depot |
| 1″ Furring Strips | 1 8′ piece | $ | Home Depot |
| Polyurethane | 1 can of glossy finish | $$ | Home Depot |
| 2″ Screws | 1 box | $ | Home Depot |
| L-brackets | 4-6 | $ | Home Depot |
Tools You Need
Cost of Building Your Converted Van Kitchen
Just like with some of the other elements of the build, the price of this will depend on the quality of wood you opt for and what materials you will be using. I managed to build the kitchen area for around $300.
How To Build a Kitchen in Your Converted Van
- Building the lower cabinets
- Connecting and installing the lower cabinets
- Making a countertop
- Cutting your sink hole
- Making the backsplash and attaching the counter
- Side wall
Step 1: Build the lower cabinets
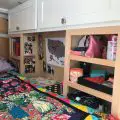
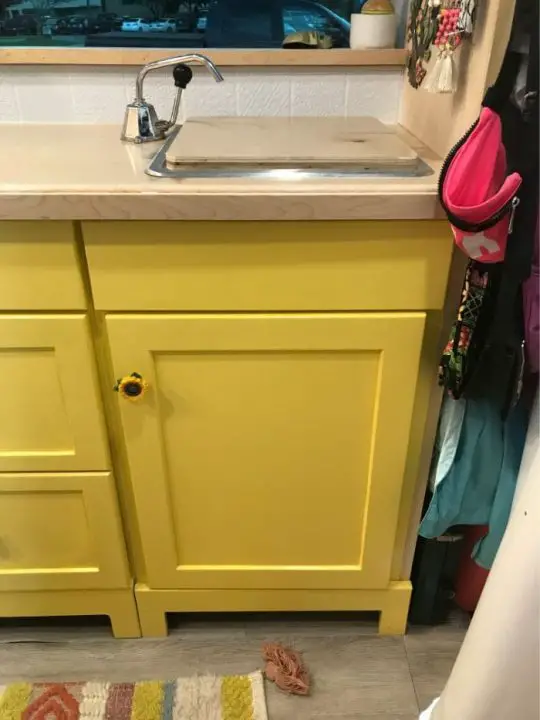
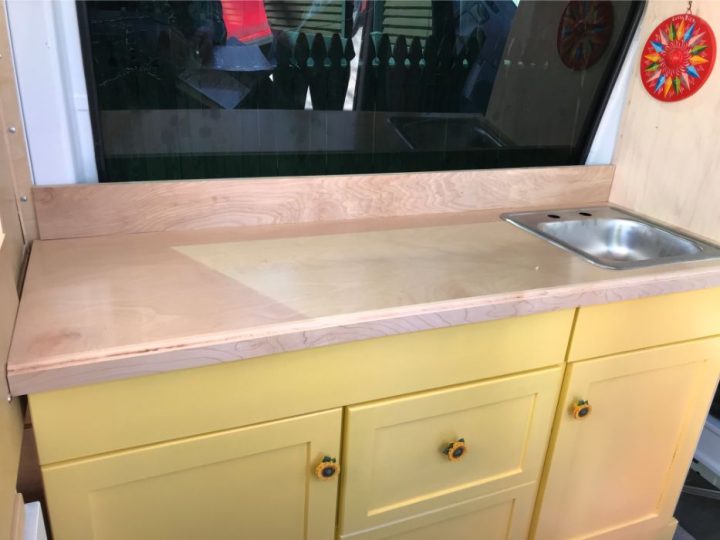
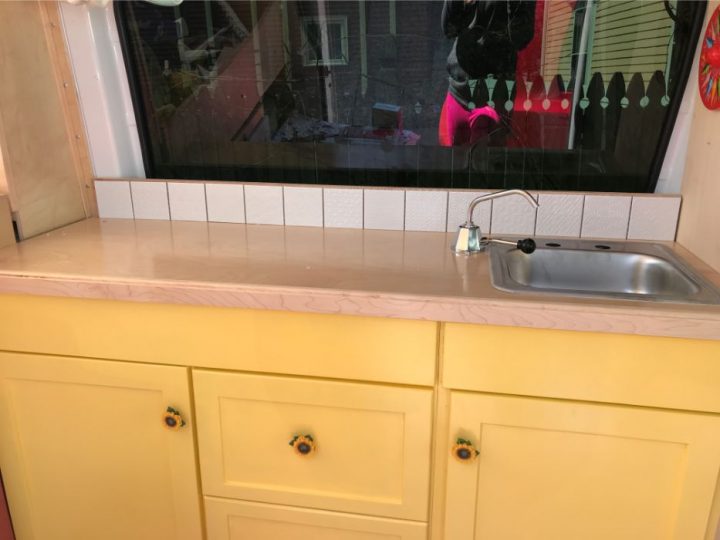
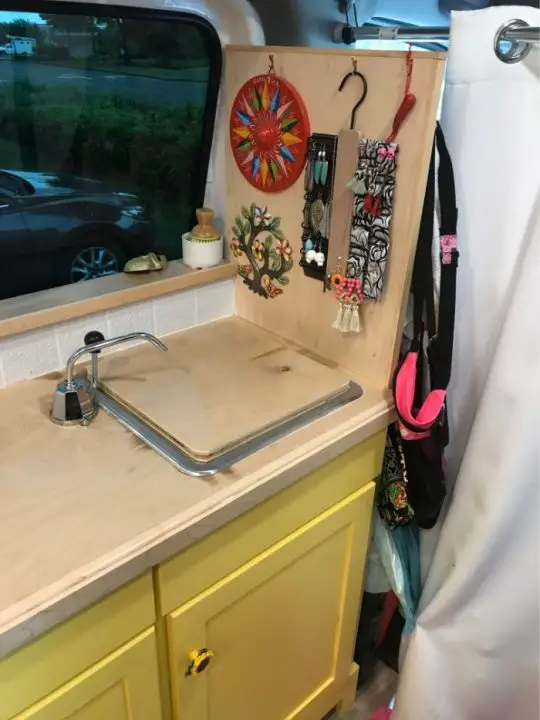
While the kitchen is a lot of work, it will be worth it! Here’s a look at my kitchen:

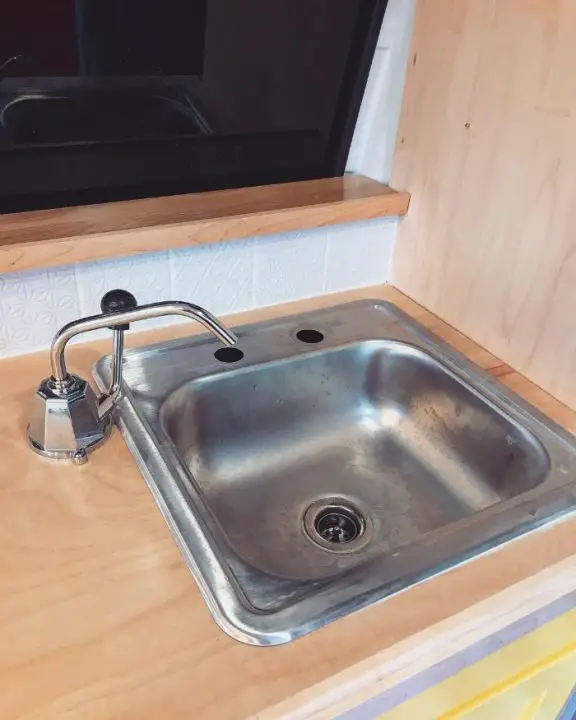
As you can tell, I’ve got two cabinets with two drawers, a countertop, sink, backsplash with a little shelf, and a wall on the right side dividing the kitchen area from the driving area. Because of the layout of the van, my bed ends right before the window and it was the perfect space to add in my little kitchen. The cabinet and two drawers on the left are a cabinet set my dad found at a flea market and the cabinet on the right is one I built to match the rest and fill out the space. I will be honest, I got SUPER lucky with this cabinet find because it just fit perfectly into the space and had an extra door that just happened to match. While you could build all the cabinets from scratch to be custom for your van, this will take a long time. I would recommend scouring flea markets and thrift shops to see what you can find.
So if you’re lucky enough to find just about half your cabinets but need to build a custom one for the rest of the space (or want to build them all), you’re in the right place!
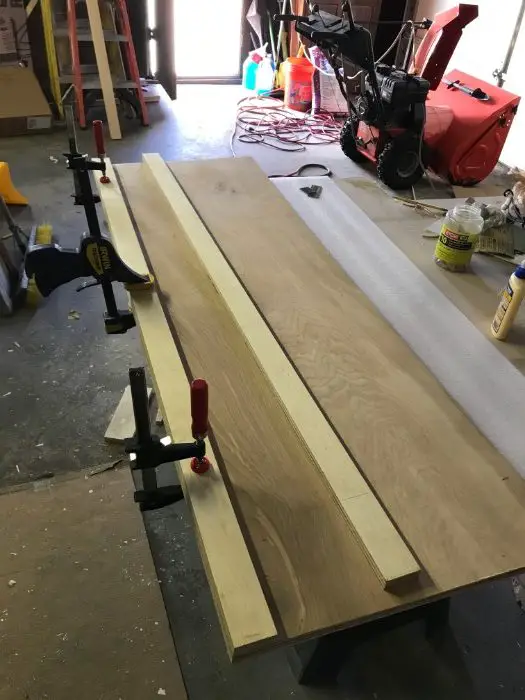
First things first, decide the size of the cabinets you’ll be building. From there you’ll have to build the sides, bottom shelf (or shelves), and add a door. You won’t need a top for any of your cabinets because you’ll be putting the kitchen counter on top.
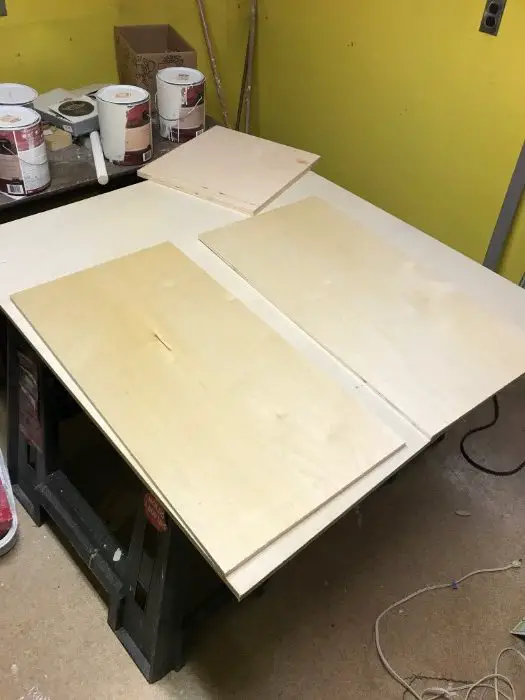
These are our pieces for the walls and the bottom shelf
Overall, the cabinets were 36″ high and just about matched up with the bed frame. First, you’re going to want to attach the two walls to the bottom shelf using wood glue and the nail gun loaded with 1.5″ nails. You’re going to want to nail the support beams from the outside in and nail the shelf from the top to attach it to the support strips.

Pro tip: Measure and double measure to make sure your bottom shelf is straight! Also, to add a little more support, and just like with the side wall shelves, attach a 1″ strip underneath the shelf.
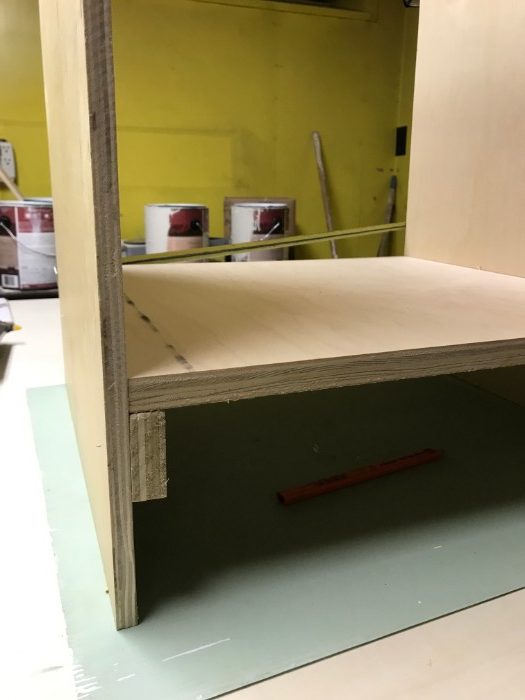
Once you have the bottom shelf attached securely, you’ll need to attach a support beam in the back. This not only adds more support to the structure, but it also keeps the walls straight so you don’t get a bowed cabinet.

This is the 4″ wide support beam that fit in snugly between the two walls. Glue it, clamp it, and nail it in there!
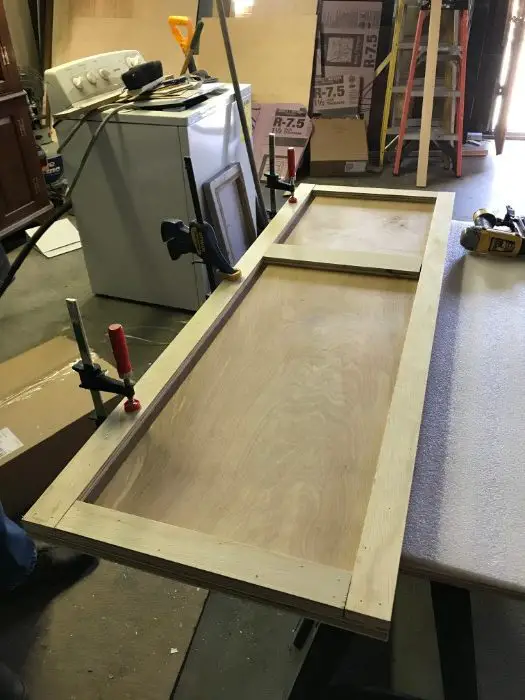
The next step is to add a frame to the front that will match your other cabinets. If you’ve followed my other post regarding making your upper cabinets, you’ve already got some experience making cabinet frames. This frame is very similar, but you won’t need a biscuit cutter to attach the frame pieces. All you’ll need are two strips for the sides and three strips to fit in between: one at the same level as the bottom shelf, one at the top, and one about 5 inches down from the top that will fit the door.
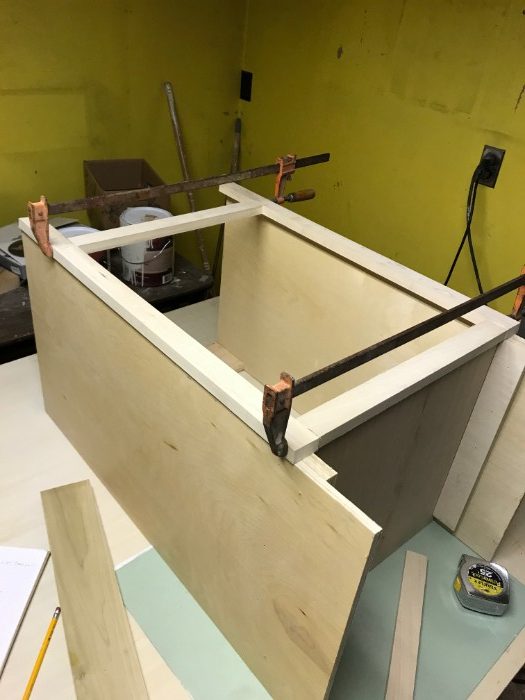
Clamping the frame as I go.
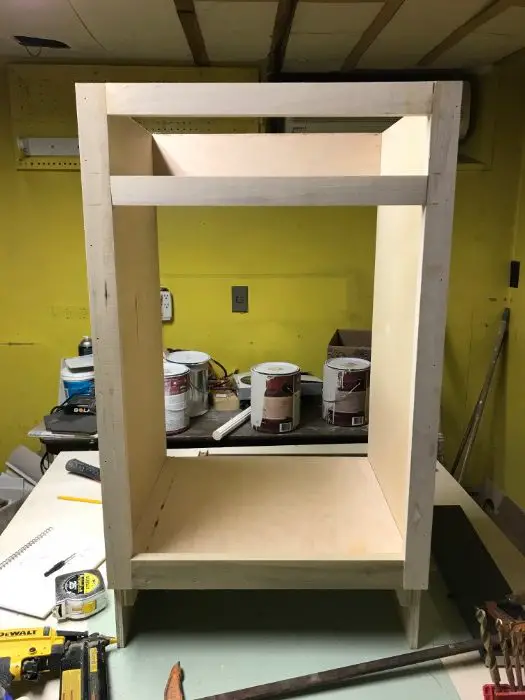
The final look for the base of the cabinet!
At this point, I had to decide on my cabinet color so that I could begin painting them all. I went for a lovely queso yellow (after two different shades of blue and a lemon yellow that just didn’t work) and I began painting so that I could attach them all and install! I discuss some more details about painting tips and tricks in another post. Once you do pick your paint color, all that’s left to do is attach the door to the cabinet. While it would be possible to make a door, frankly this is just a lot of extra work and requires some intricate tools for the hinges. So scour those flea markets, guys! I found a door that fit my cabinet perfectly and with a few screws, I had a door! To cover that last hole at the top and to match the other cabinet, I just cut a piece of plywood out and screwed it in from the back.
Here’s the final installed cabinet, painted and fitted with knobs
Step 2: Connect and Install the Lower Cabinets
Once your cabinets are all made and painted, you’ll need to attach them together and then install them in the van. Technically, they are heavy enough that they could probably stay in place on their own. However, I didn’t want to take this risk and opted to install them firmly to the back wall and the floor.
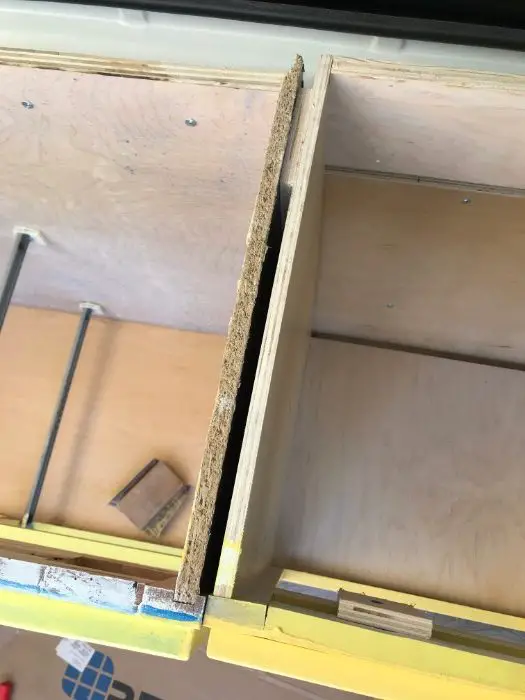
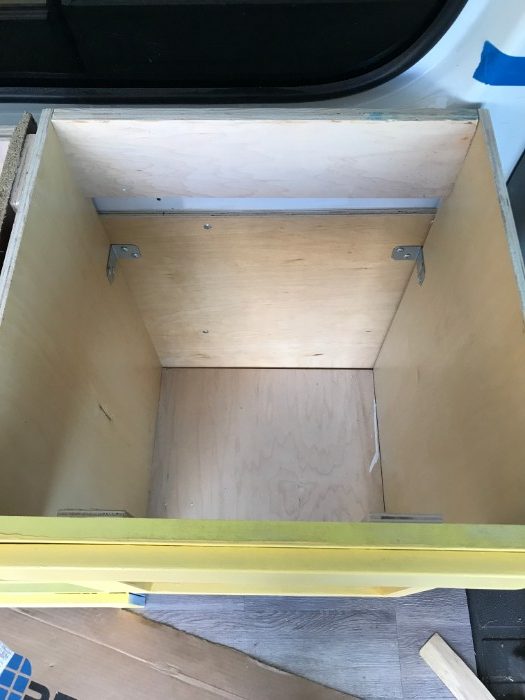
This is a top view of how the cabinets looked when they’re right next to each other. You can see that there’s a bit of a gap between that I fixed by sliding a piece of plywood in-between and screwing them together.
In order to attach your cabinets, you’re going to need to install a few furring strips on the floor that will then be screwed to the cabinets. Start by measuring where the inside of the base of your cabinets are. I just put them exactly where I wanted them to be and traced a line along the bottom. Then move the cabinets out of the way so that you can screw in your furring strips. They should be almost the entire length of your cabinets. All you need are 1.5″-2″ wood screws and they’ll attach right to your plywood floor.
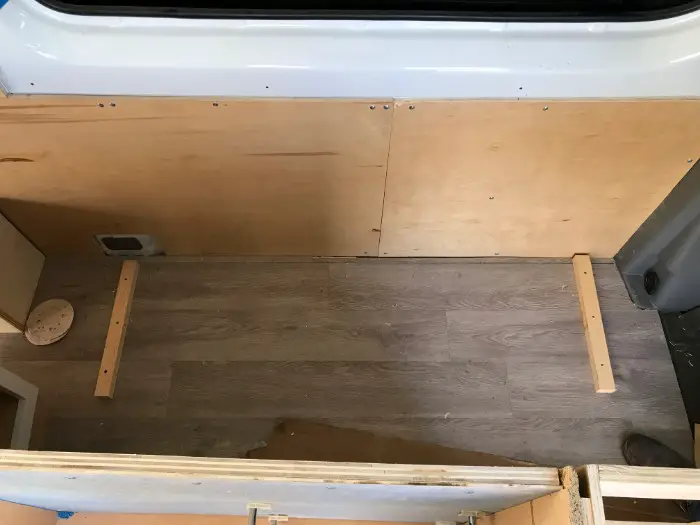
Once your furring strips are firmly attached to the floor, slide the cabinets back next to them and make sure they feel snug. Now all you need to do is screw the cabinets to the furring strips from the outside.
Pro tip: While it may be hard to measure exactly, try to keep in mind where the screws into the plywood are located when you’re screwing from the outside. It’s not a huge deal, but it’s better to avoid hitting two screws against each other because they can break off.
At this point, your cabinets should be firmly attached at the base and now it’s time to add additional support by attaching them to the back wall.
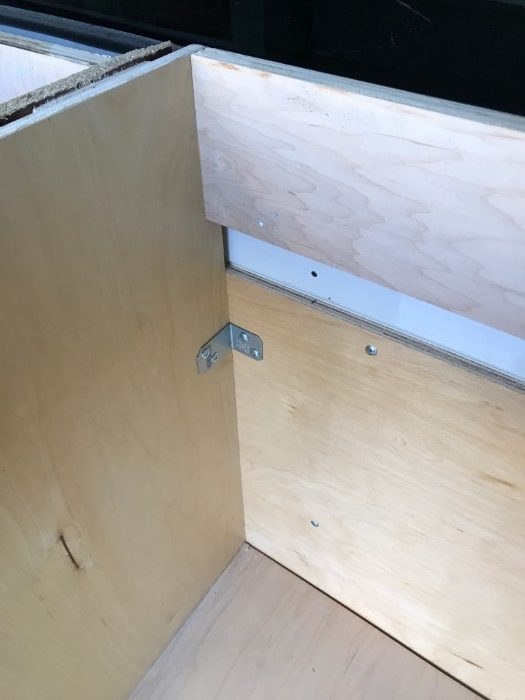
Using a few L-brackets, simply use the ¾” self-lathing screws to attach them to the wall. Easy peasy!
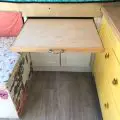
Step 3: Make your kitchen counter
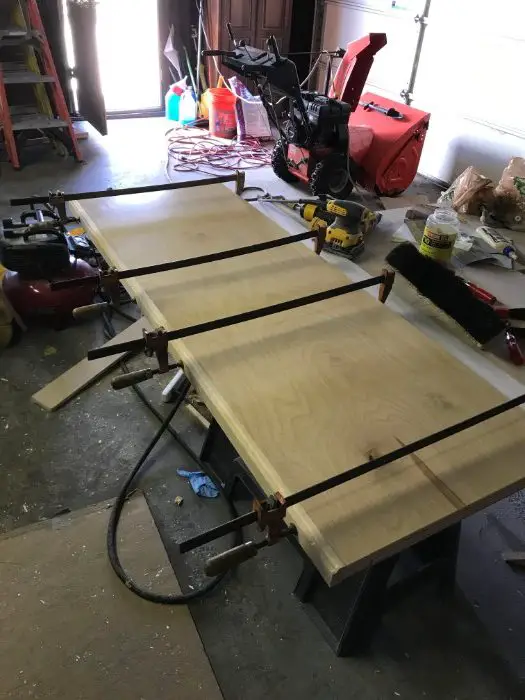
With your base cabinets firmly attached, the next step is to make your kitchen counter. There is some flexibility here for what kinds of materials you’d like to use. Some people opt for getting real stone to make their counter tops. I went to a few granite stores just to check them out and the slabs were literally 300 pounds which is a LOT of extra weight to add to your van. I chose to stick with a piece of ¾” birch plywood with a lovely grain to give it a really natural finish. I measured the size of the cabinets and added an inch on each side to ensure a lip and used the table saw to cut it out. When I placed it on top it looked great! To make sure it really stays in place, you’re going to want to attach some furring strips on the underside that will prevent the counter from sliding around.
Here are those handy clamps again!
Using some wood glue and the nail gun, I made a frame along the entire outside of the counter and fit an additional piece in the middle for the divider between the two base cabinets. Basically, the frame fits exactly around the cabinets so that the counter can sit right on top and have a lip around each of the edges.
This is what it looks like when the frame is completely done.
With the base of the counter completely finished, you could technically nail it right onto the cabinets and call it a day. If you’re feeling a little fancy, you could opt for a decorate trim on the edge of the counter to give it a more finished look. Using a router, I made a decorative edge on a strip of wood that was as long as my counter and 2″ wide. Then using that handy glue and nail gun, I attached the strip to the edge of the counter.
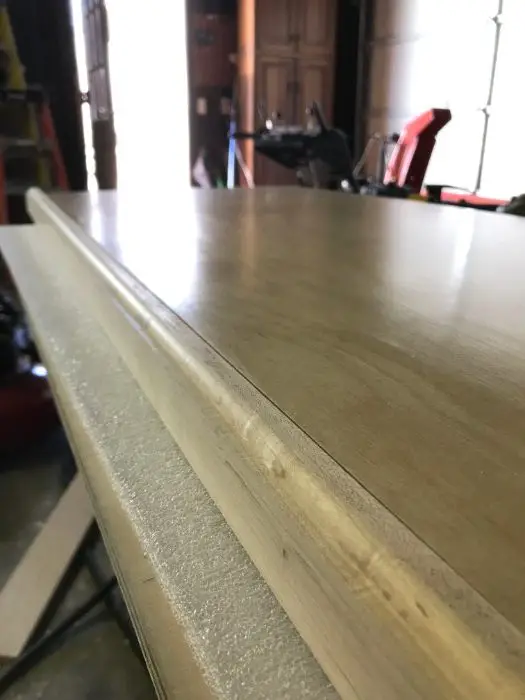
With the decorate edge, the counter looks much thicker than just ¾” plywood, it’s softer (small spaces means you bump into things a lot), and it looks SO much better than just a cut edge of plywood!
Once your counter top is all put together, wait to officially install it because you’ll still need to cut a polyurethane it and cut a hole in it to install your sink. For now, admire all your hard work!
Pro tip: When it comes to polyurethaning your counter, there is no such thing as too much. More so than the rest of the cabinets, the counter needed to be pretty waterproof and I wanted it to be shiny. I bought a glossy polyurethane and added about 10 coats to really seal it all in.
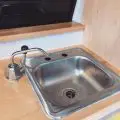
Step 4: Cut your sink hole
While it may seem hard, the next thing you’re going to have to do is cut a big ol’ hole in your beautiful counter top so that you can fit in your sink. In another post I will go into the details of installing the sink and how to set up your water, but I’ll at least tell you here that before you continue on to your backsplash and attaching the counter, you’re going to need to prep for your sink installation. Basically I took my sink, traced the outline on the counter, and used the jigsaw to cut out the shape. Because the sink is larger than your hole, it is not critical for the hole to be absolutely perfect. Obviously mine was perfect, but not everyone can be on my level.
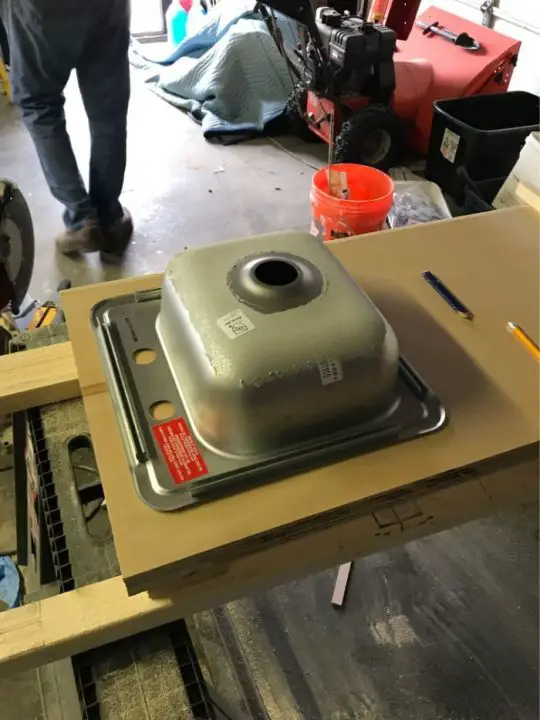
Tracing
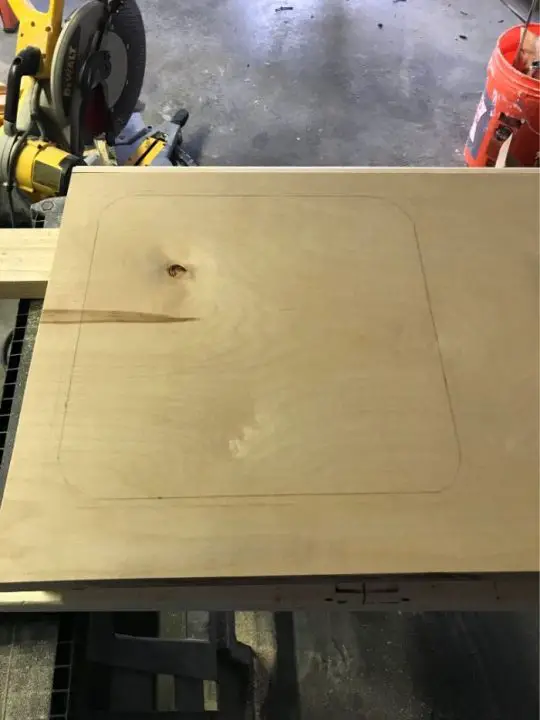
The outline
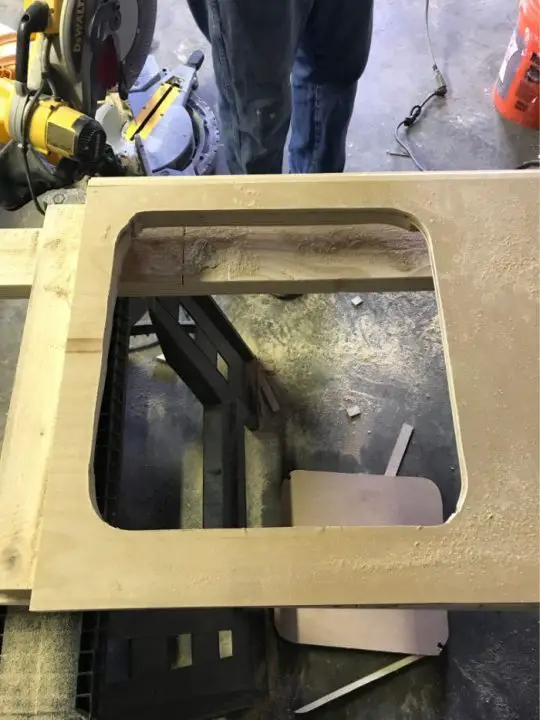
What a hole!
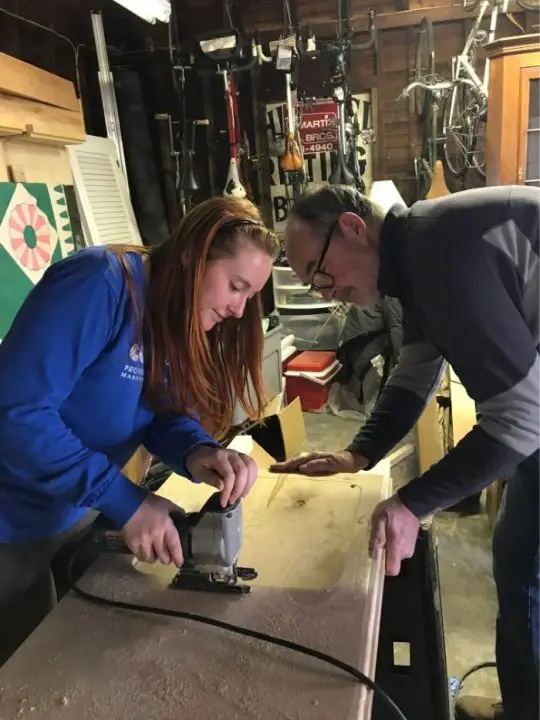
The paparazzi are always snagging me at work
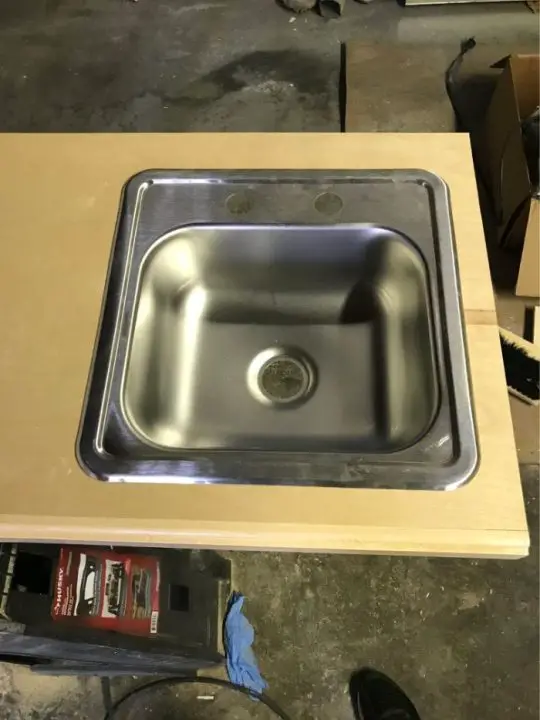
It fits perfectly!
Step 5: Make the backsplash and attach the counter
With the counter basically finished and my sink attached, the next project was to add a backsplash. This is another optional part of your kitchen setup but there’s about a 3-inch gap between the counter and the wall because your window frame is in the way. Without the backsplash, you have a greater chance of things falling back into the abyss behind your cabinets. I also just think it gives the kitchen a greater feel of being a real kitchen and not a heap of plywood with a sink.
I measured the length of the cabinets and using ¾” plywood, cut a strip about 5″ wide. Using the nail gun, I attached it to the back of the counter top.
The counter top and the back panel together!
Again, here is a spot for you to make a few personal decisions about what you’d like your van to look like. The wood by itself looked really good but I wanted to take it a step further and add some tile for a really finished look. Plus, there were so many fun and shiny backsplash tile options I couldn’t resist.
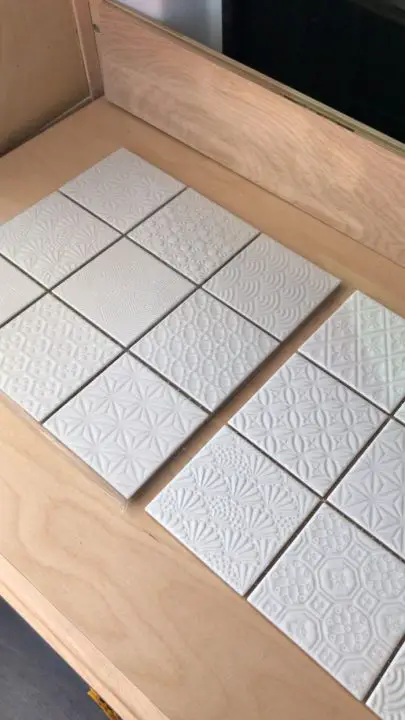
Every tile has a different pattern!
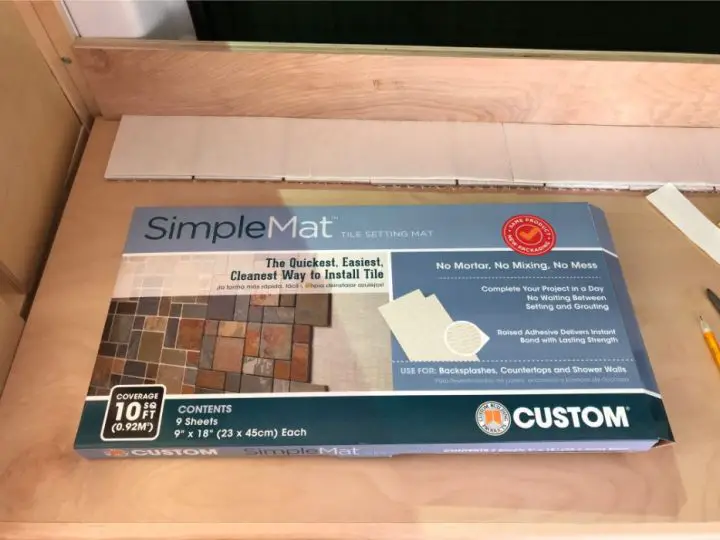
Before I screwed in my panel for the backsplash, I had already picked out my tiles and made sure the panel was the same height as the tiles. From then on it was a pretty standard tiling project. I found self-adhesive strips for tiling and covered the panel with the strips before adding on the tiles.
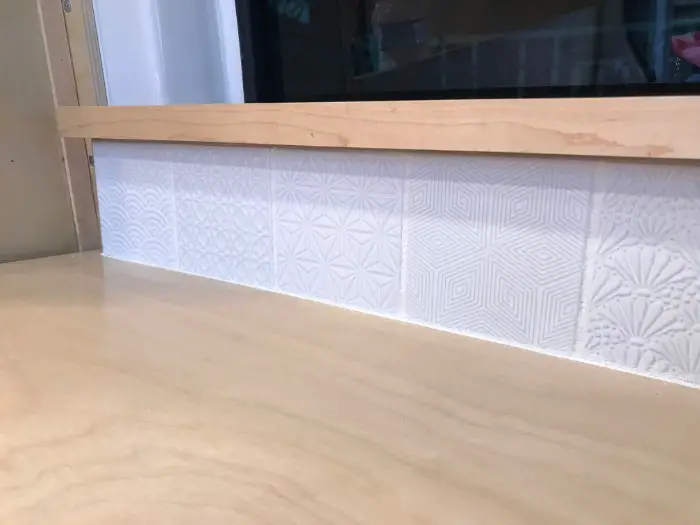
With the tiles firmly attached, I added white grout to seal them in and fill in the gaps. This part gets super messy, but it’s also super fun. Since it was such a small space, I just used my fingers (while wearing gloves) to spread the grout around and then used a scraper to finish it off. After that I waited a full day for the grout to dry and set before washing it off and adding a little shelf on top. The shelf acted to hide the top of the backsplash plywood and the top of the tiles and it also added some additional storage space in my kitchen. When my backsplash was all done it looked like this:

Once your backsplash is done (and you’ve installed your sink), all that’s left is to attach the counter top! This is pretty awkward because it requires someone to basically crawl inside the cabinets and screw the counter from the bottom but you’ll only need a couple L-brackets and it will be sturdy.
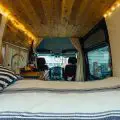
Step 6: Side wall
Just like with so many other elements of my kitchen (and the van itself), there is a lot of flexibility with certain elements. At this point with my cabinets and counter basically done, I decided to add a little wall to separate the kitchen area from the driver’s seat. This allowed me to section off the van in a nice way and also provided two wall areas to hang kitchen towels, plastic bags, umbrellas, jackets, etc. I simply measured a piece of ¾” plywood that would reach from the floor to as high up as I could get it and as wide as the counter. After a few coats of polyurethane (and a decorative trim on the edges of course) all I had to do was screw it into the lower cabinets! I added some hooks for holding things and I had a whole extra area for storage and decoration.
Related reading: How to set up your van kitchen seating area
Tips and Tricks
Upper Cabinets
As you can tell from the photos, I have cabinets above the kitchen that I didn’t mention in this post. This is because they are part of my post concerning building the storage and cabinets for the bedroom area. You can find that link here! Just follow the instructions for those cabinets and modify them to fit your kitchen area needs.
Cooking
You may be asking, “where is the stove?” I have a 2-burner Coleman grill that I store behind my driver’s seat. When I need to cook, I simply bust it out and light it up using a propane tank and a grill lighter! It’s not always convenient to bring it in and out but it does provide me with more counter space when I’m not cooking.
Storage
While you’ll have some good storage space for all your kitchenware, this is a good opportunity to minimize! I have a large pot for cooking soups and stews, a smaller pot for pasta, and a sauté/stir-fry pan. That’s it!
Is there anything I’m missing? What elements are a “must-have” in your tiny kitchen? Let me know in the comments below!