Hey! This site is reader-supported and we earn commissions if you purchase products from retailers after clicking on a link from our site.
Enjoying a good pizza while you’re traveling, doesn’t mean that you must partake in the only pizza shops that deliver to your campground or are available for pick-up service in your area. Frankly, in most remote camping areas, you’ll spend more time driving to the restaurant to try a new pizza from some national vendor such as Dominoes, Pizza Hut or Hungry Howie’s than is worth your dinner’s overall taste and effort to acquire it. Simply put, making your own pizza is fun, easy and delicious once you’ve explored the craft. In today’s article, I’ll some of my secrets for making a good pizza while RVing and how you can too.
High heat and the best cooking surface are a key to success
There’s a reason some of the best pizza makers use brick ovens to cook their tasty delicacies and it’s because the stone holds the heat and distributes that evenly to the pizza during the cooking process. Yes, you can go to a restaurant supply store and purchase a pizza stone specifically marketed toward those that want to bake a pizza on a stone, but a good alternative to this option is to visit a garden center and purchase a finely finished concrete stepping stone.

You’ll save money and it will work just as well as a stone from a restaurant supply outlet does. I use a stone that is 18” x 18” and it fits nicely in my outdoor charcoal Weber grill as well as my indoor oven.
Since concrete or stone are normally porous, I recommend using olive oil, as well as salt and pepper to season your stone like you would for a cast iron skillet. To do this, pour small amounts of the oil and seasonings onto the stone and use a cloth to vigorously rub them into the surface of your stone. Once you have done that, be sure to cure the stone by placing it into your oven or grill for 20-30 minutes at a high temperature. As well as adding flavor, this helps to ensure that your pizza (or other things you want to cook) will not stick to the stone when you use it in the future.
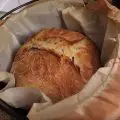
Preparing your pizza dough
For me, a good crust and sauce is the key to making a good pie and as an RVer I have found that this yeast is the best when traveling. It holds its integrity longer than other brands and it works best in various elevations, temperatures and environments.
To start your dough for the crust, you’ll first need to activate your yeast. To do this, take one packet of yeast (2¼ teaspoons) and mix it with one (1) cup of warm water. Let this mixture stand for 10 minutes. At this point your mixture should be frothy. If its not, then your yeast is bad, or the water was too hot, and you’ll need to start over.

- Antimo Caputo created this product in response to the problems fresh yeast causes when making pizza,...
- Caputo then created the perfect solution after studying pizza makers and pastry chef needs - No...
- Caputo Yeast has a certain fermentative power, has a sure and measurable force, pushes over time and...
Last update on 2024-04-17 / Affiliate links / Images from Amazon Product Advertising API
Once your yeast has been activated, add two (2) tablespoon of olive oil to the mixture and two (2) tablespoons of honey.
In a separate and larger mixing bowl, mix one (1) teaspoon of salt (preferably Kosher) with 2½ cups of flour. Bread flour works best, but all-purpose flour works nicely as well.
Next, gradually add in your wet mixture with your dry ingredients. Using a fork, mix them together thoroughly. The mixture should not be sticky and should ball up easily when you have successfully combined them together. However, if the dough is sticky, just keep adding a small amount of flour until it becomes the correct consistency to work out properly.
Once you have thoroughly mixed your dough to its proper consistency, the next step is to knead the dough on a lightly floured surface for five to six minutes. When you have completed this task, place the dough back into the mixing bowl, cover it a with a damp cloth and let the dough rise for 3-4 hours in a warm dry place or overnight in your refrigerator.
Preparing your pizza sauce
As a trained chef, I would prefer to make my own sauce using fresh tomatoes, herbs and spices. However, as a full-time RVer, I realize that option is not open to me most of the time.
Instead, I like to buy canned or bottled pizza sauces that are easy to store and tasty as well. While not exactly the taste I am looking for, adding additional ingredients to these sauces make them uniquely yours and that is what I recommend that you do.
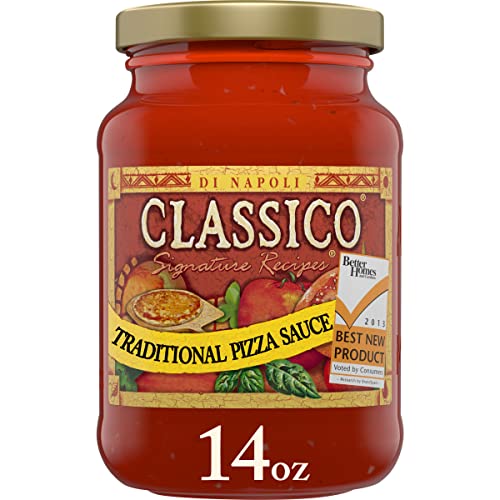
- One 14 oz jar of Classico Signature Recipes Traditional Pizza Sauce
- Classico Signature Recipes Traditional Pizza Sauce delivers authentic Italian flavor to your...
- Made with diced tomatoes and olive oil, our pizza sauce also makes a great spaghetti sauce
Last update on 2024-04-17 / Affiliate links / Images from Amazon Product Advertising API
For example, I always add a teaspoon or two of some dried Italian seasoning to any canned or bottled pizza sauce that I use. Also, I like to add a ¼ to ½ of a cup of dry red wine and pinch or two of good Kosher Salt, some freshly ground pepper, and at least one ½ teaspoon of dried red pepper flakes.
Once you have assembled your sauce, bring it to gentle boil on low heat and let it simmer for 5-10 minutes. Next, add ¼ cup of grated parmesan cheese and stir it into the sauce gently. This will help thicken your sauce as well as give it a richer taste.
Building and baking your pizza
This is the best part about homemade pizza. Personally, I love a good pizza with fresh vegetables such as sweet onions, sauteed mushrooms, basil leaves, thinly sliced Roma tomatoes and fresh authentic Mozzarella cheese. However, the choices are endless, and you can add anything that pleases you including various meats, cheeses or vegetables.
Once assembled, bake your pizza on a pre-heated stone for 12-15 minutes or until the crust has reached a crisp and firm texture and the cheese has become bubbly with a golden-brown glaze to it. Times will vary, but it’s best to close the lid on the grill to contain the heat and control the cook time as well as to perfectly cook your pizza. In fact, I often add some apple wood chips to my charcoal just prior to cooking my pizza to give it an earthy smoked flavor. However, the real key to cooking a good pizza is to make that sure your stone is good and hot before you place your pie on it and that you use fresh and flavorful ingredients.
With that said, good pizza comes from the heart my friends. Happy grilling and safe travel to you all.